Customer Picking Orders Key Information
The Picking module orchestrates the outbound fulfillment workflow—driving everything from order release to delivery, with integrated handling for pick-based charges and product control.
Overview of Outbound Picking
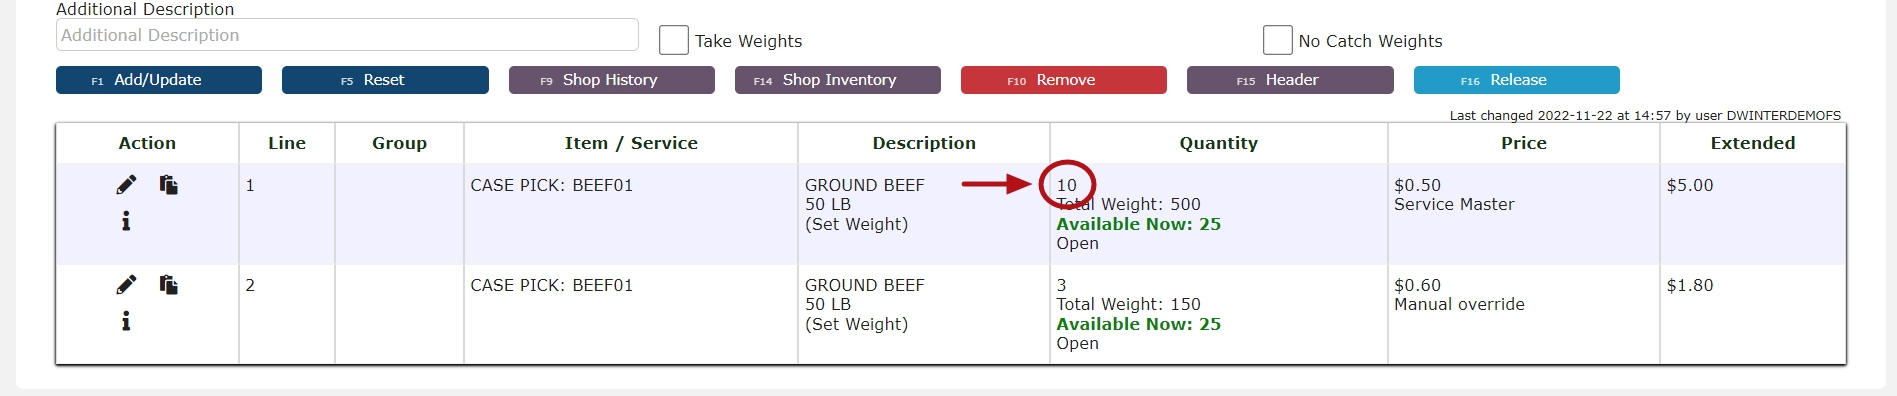
• Charge Types - By default, the system supports billing based on case picks and full-pallet case picks, offering precise charge accuracy tied to physical movement.
• Charge Types - By default, the system supports billing based on case picks and full-pallet case picks, offering precise charge accuracy tied to physical movement.
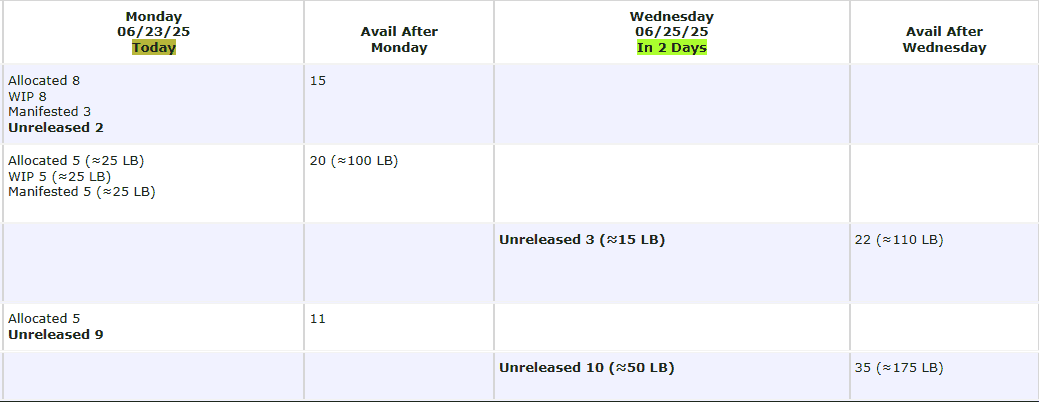
Outbound Pick Process Phases
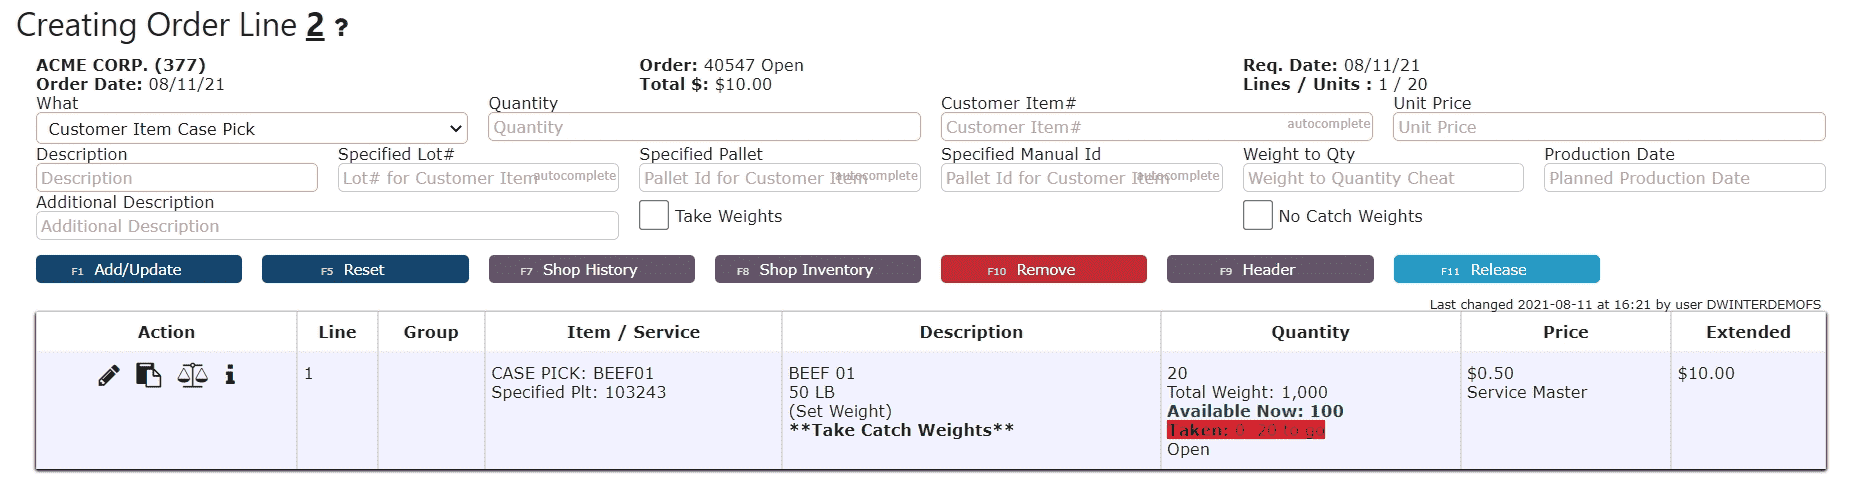
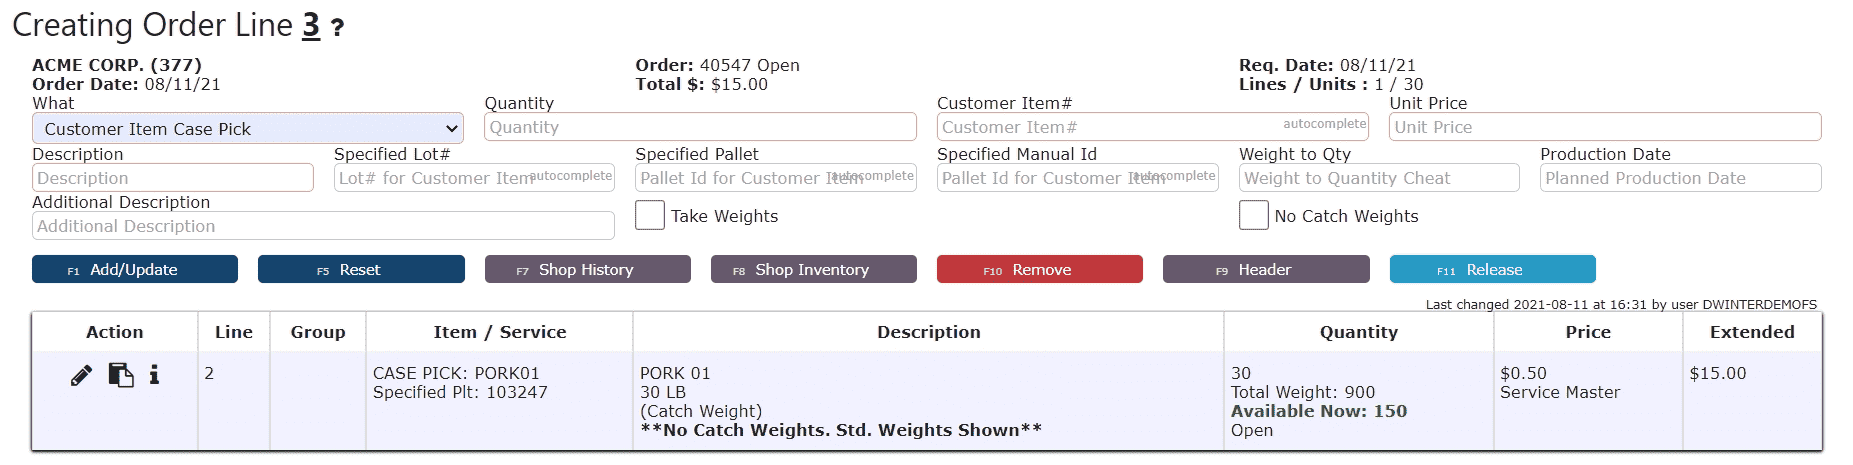
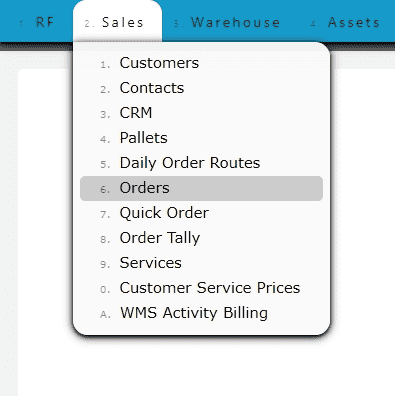
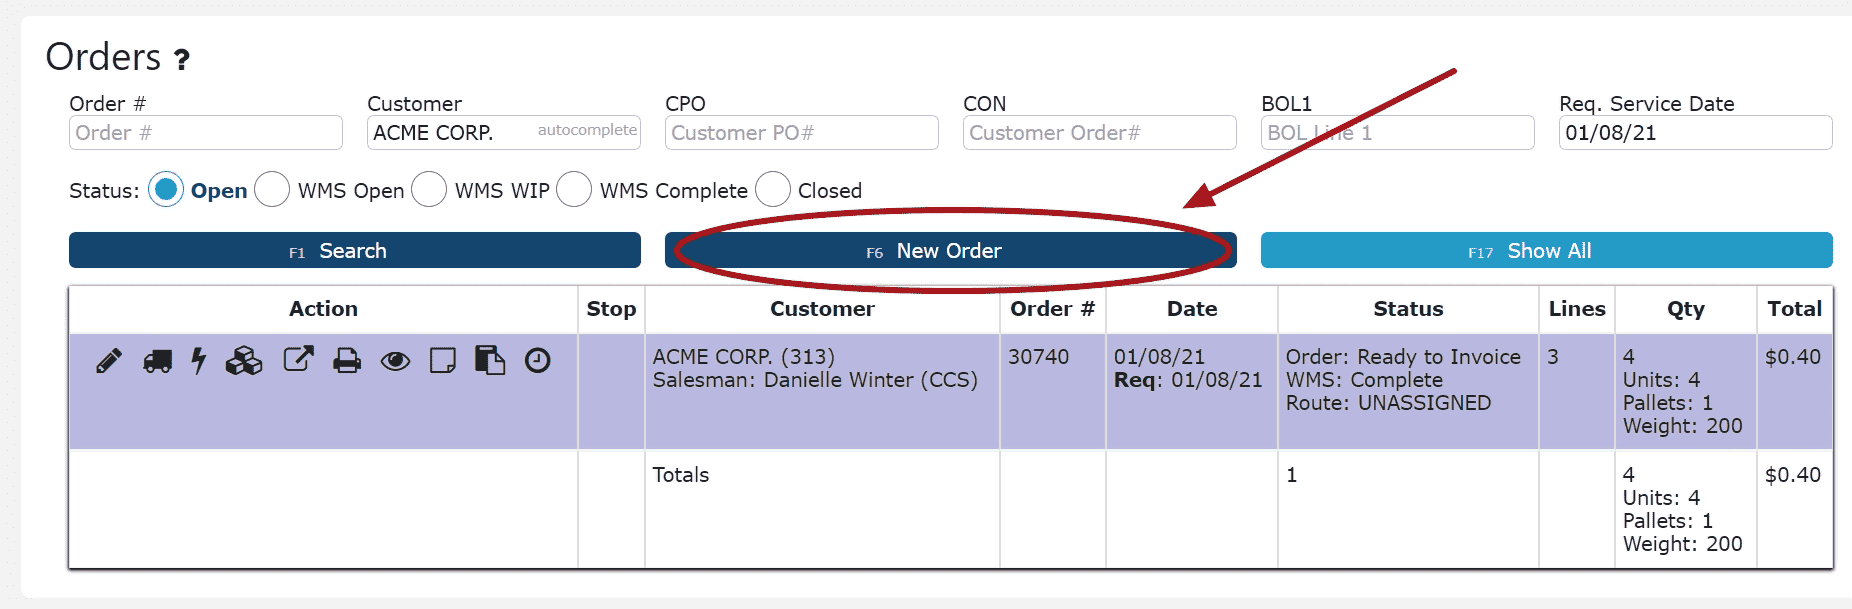
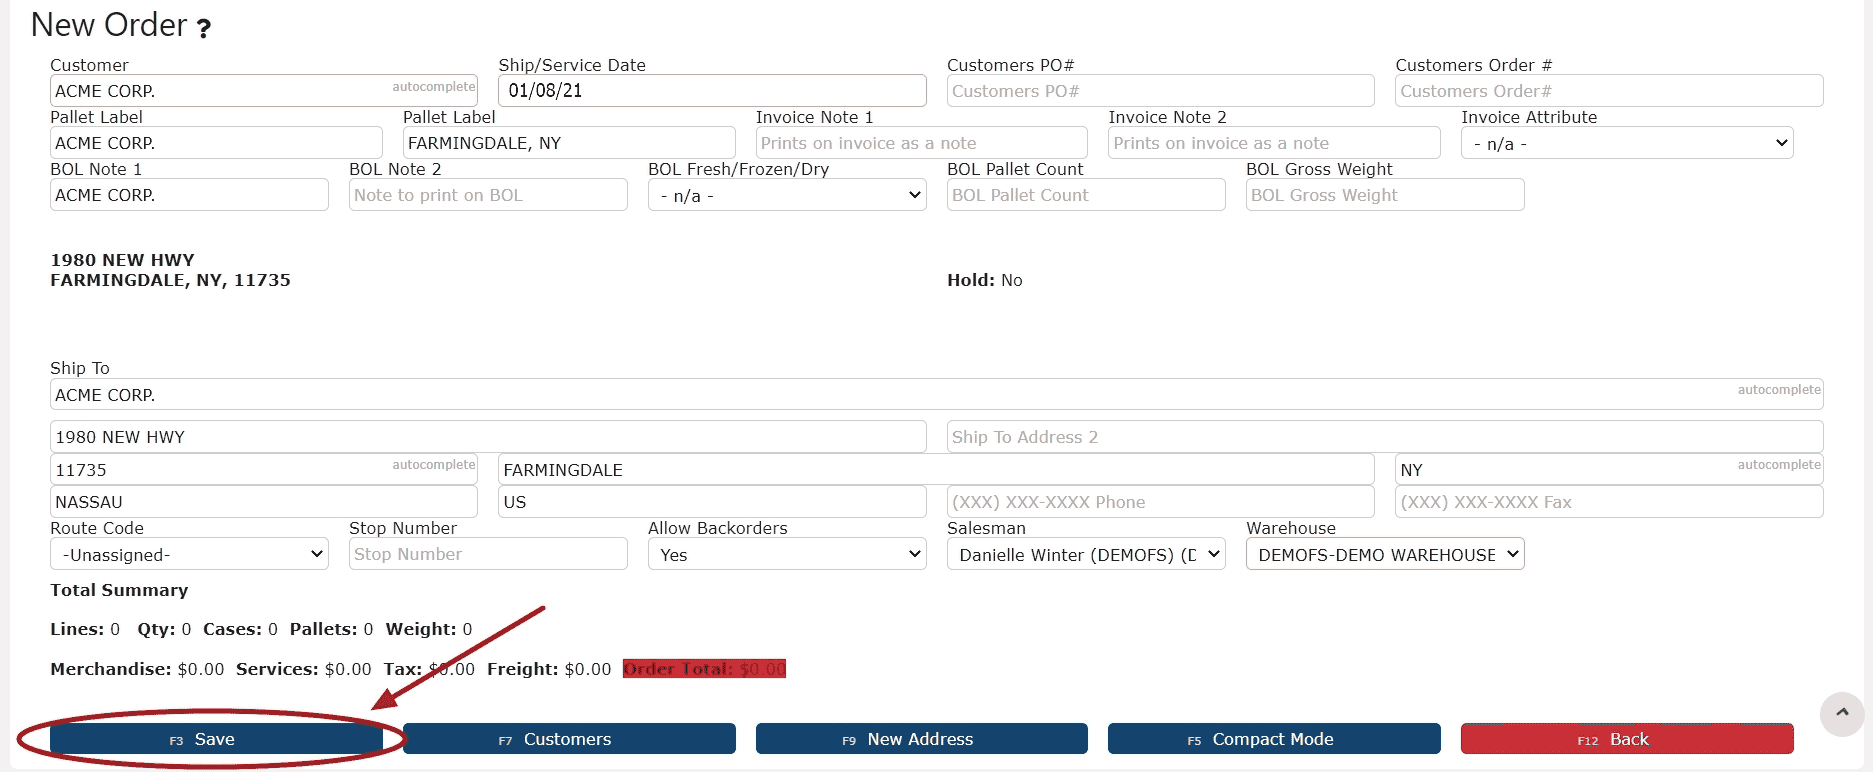
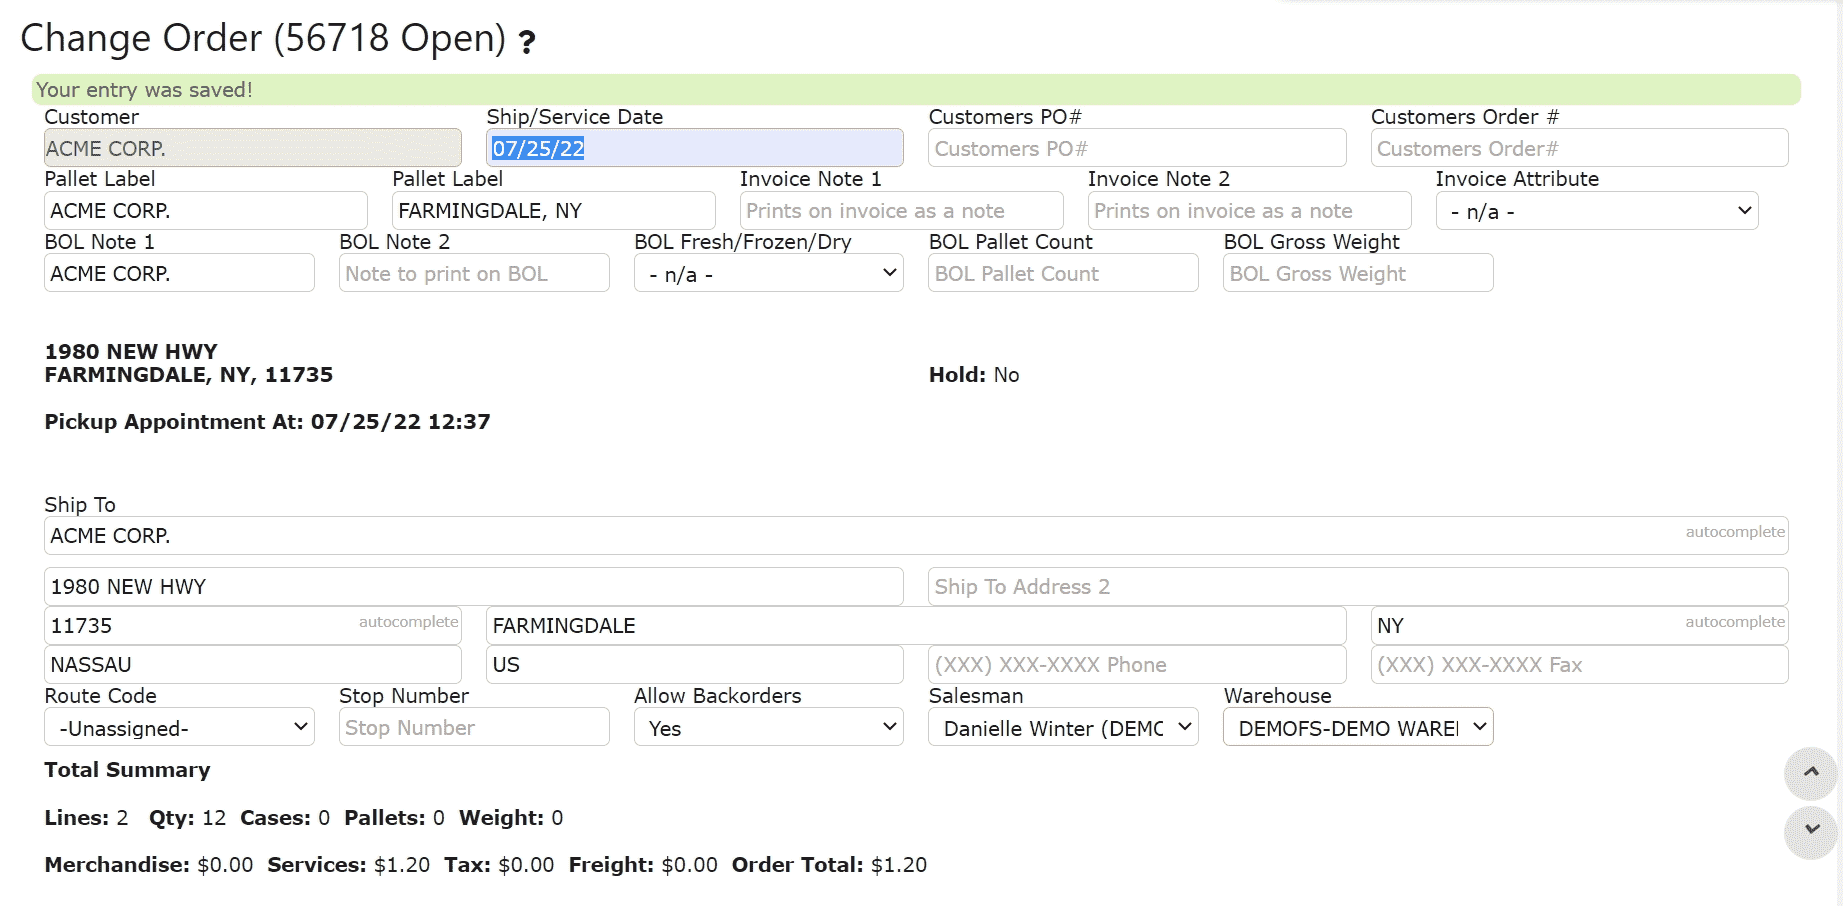
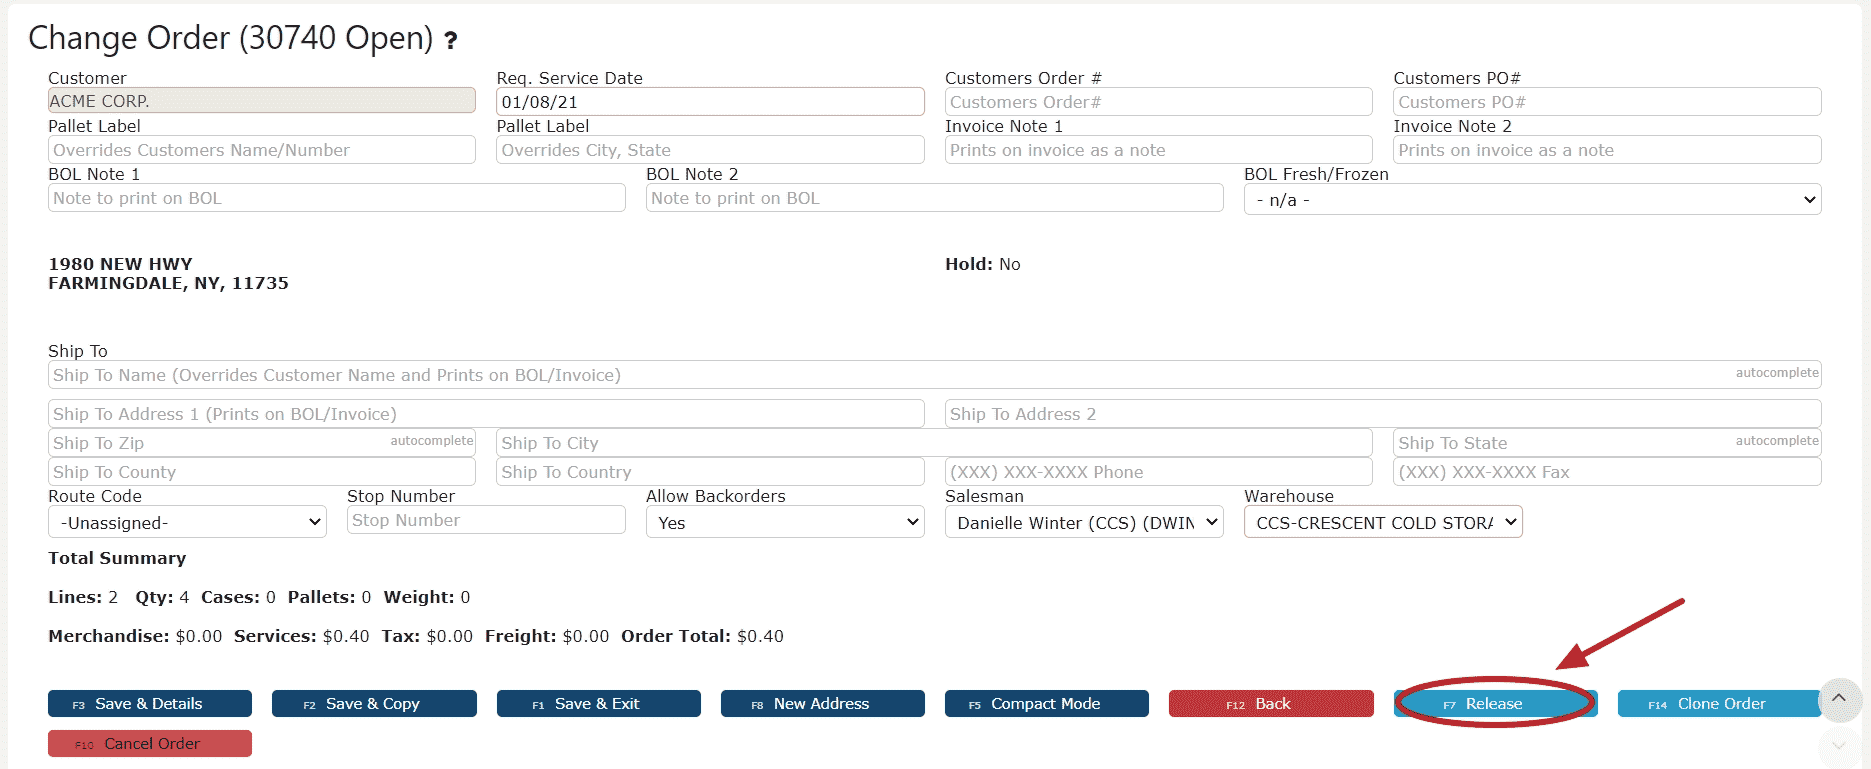
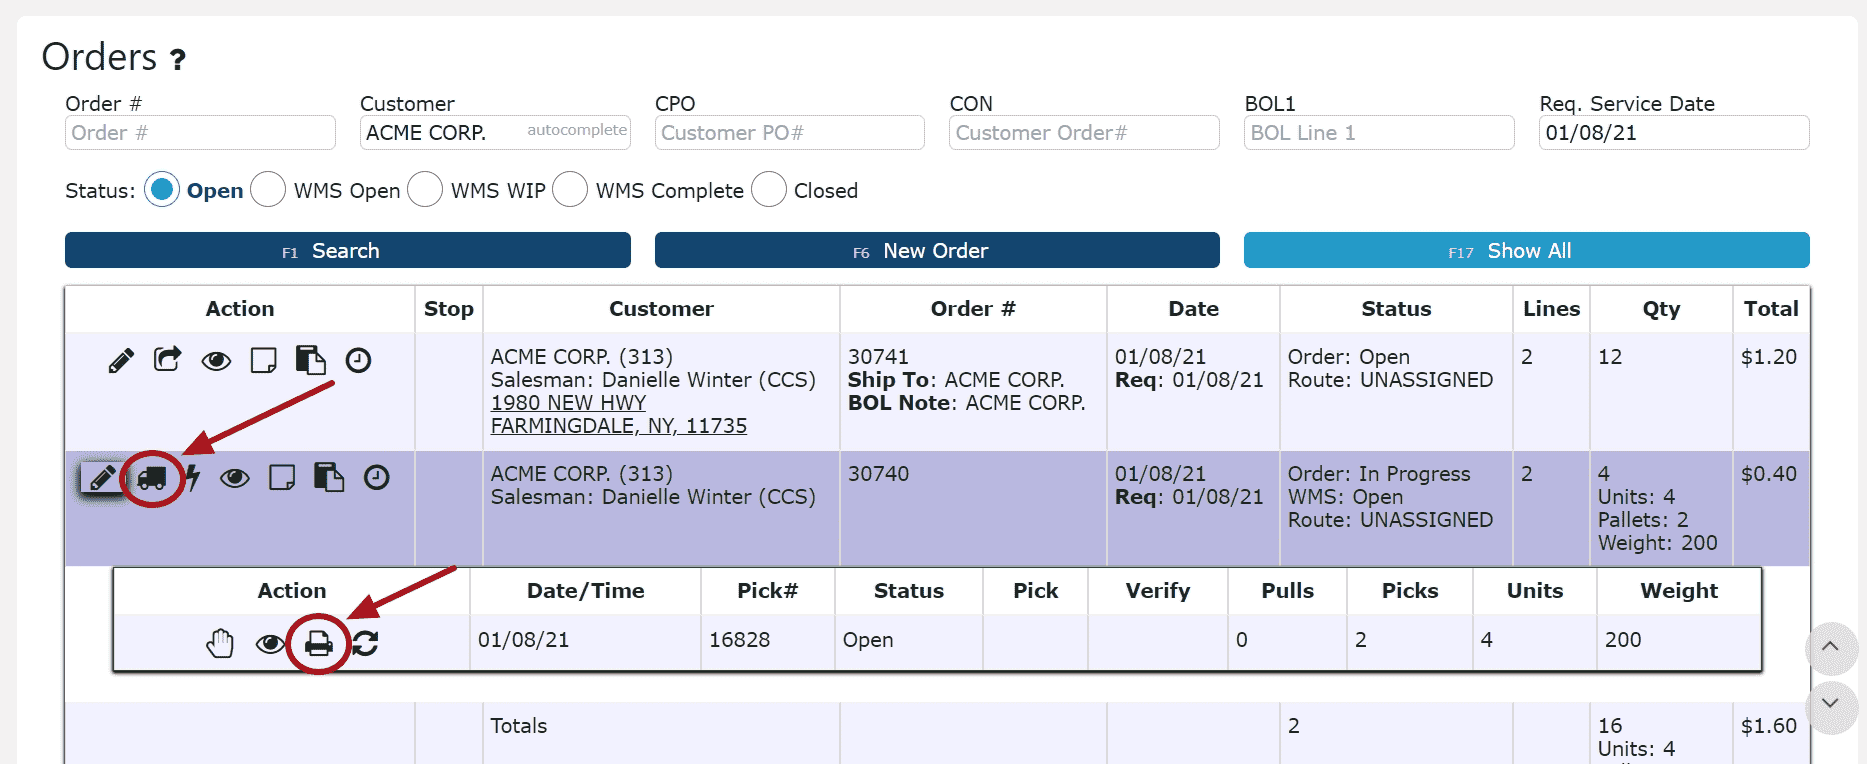
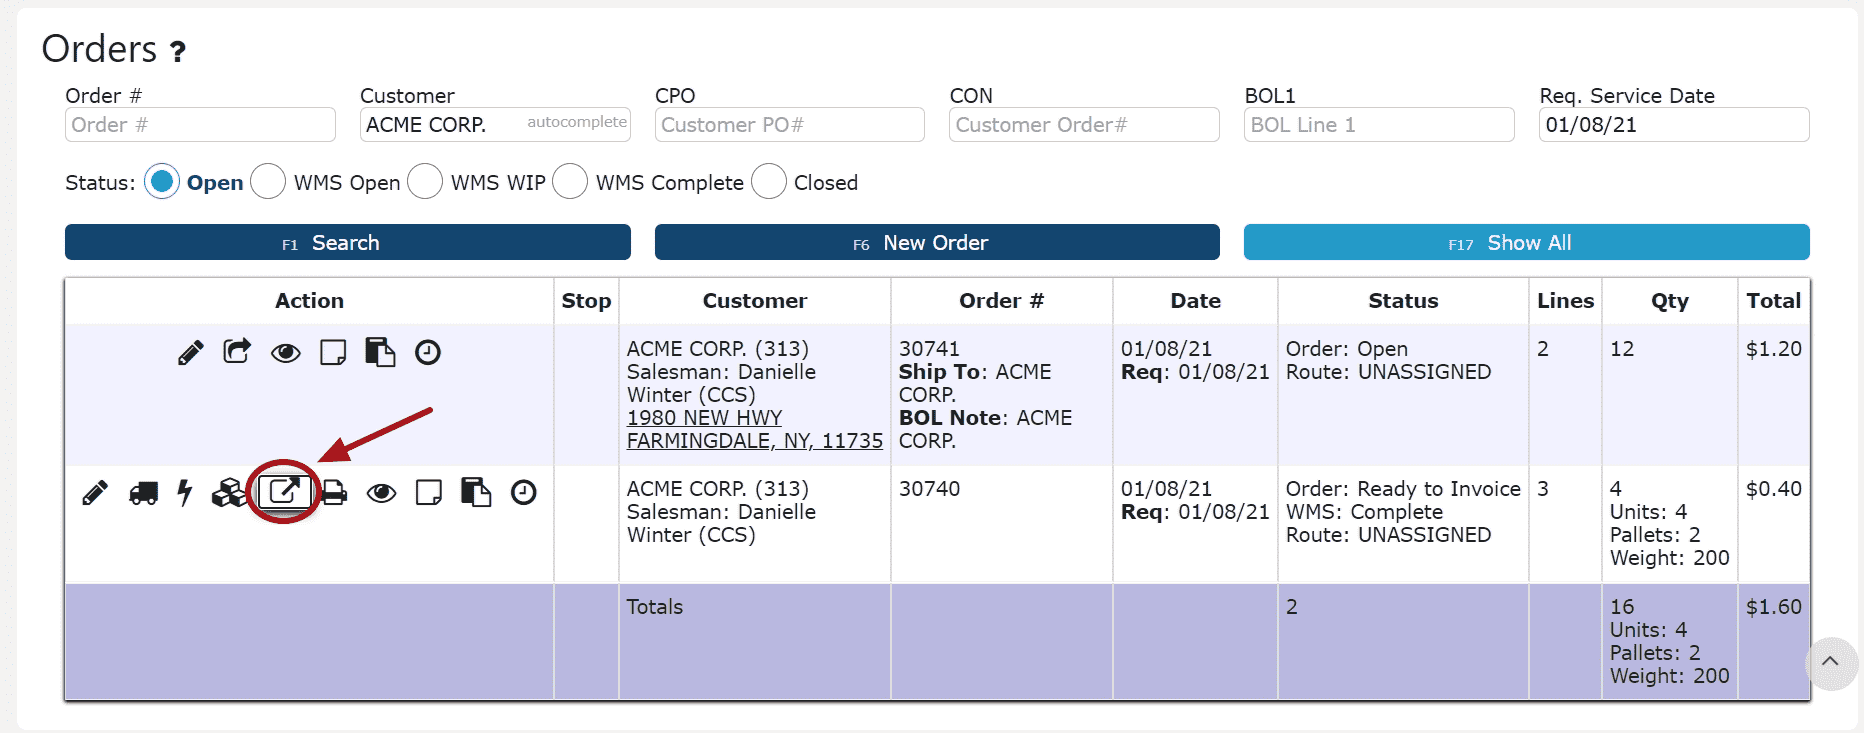
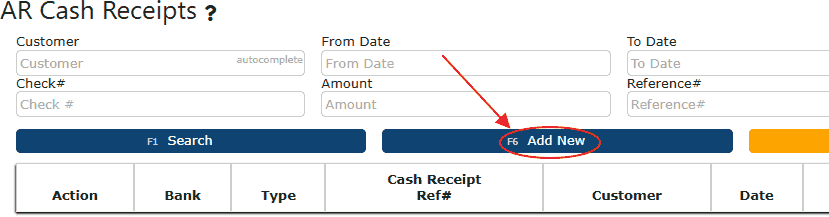
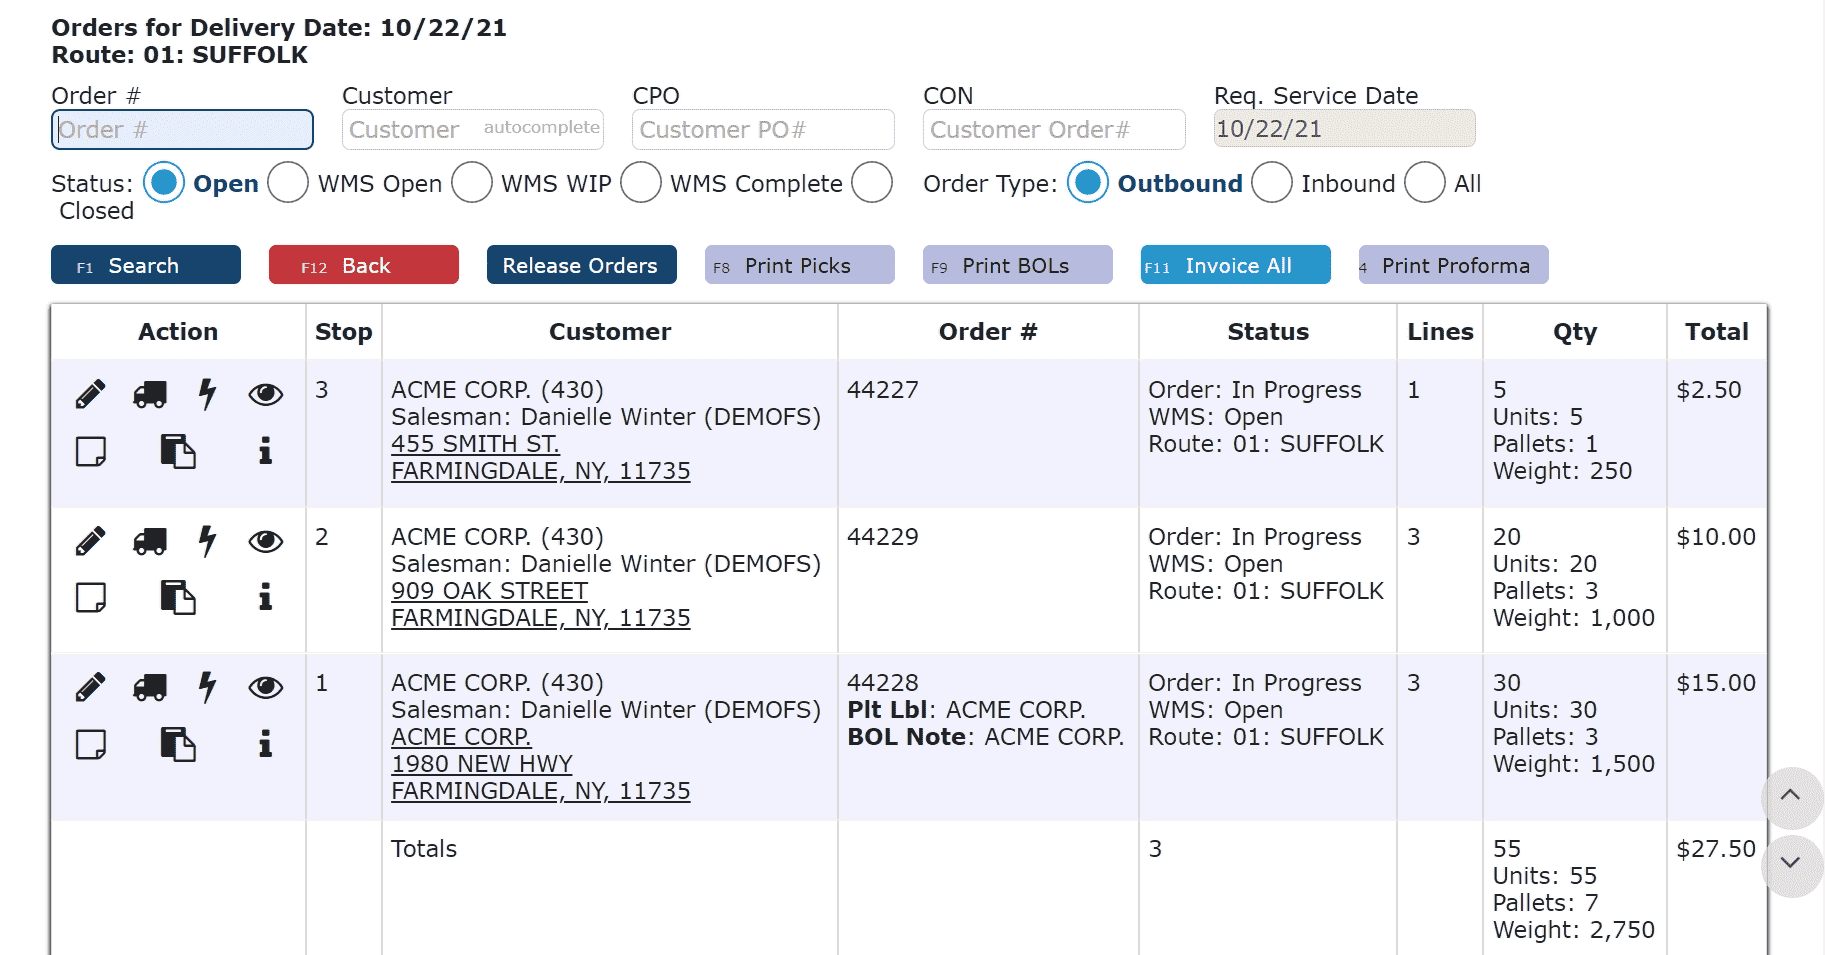
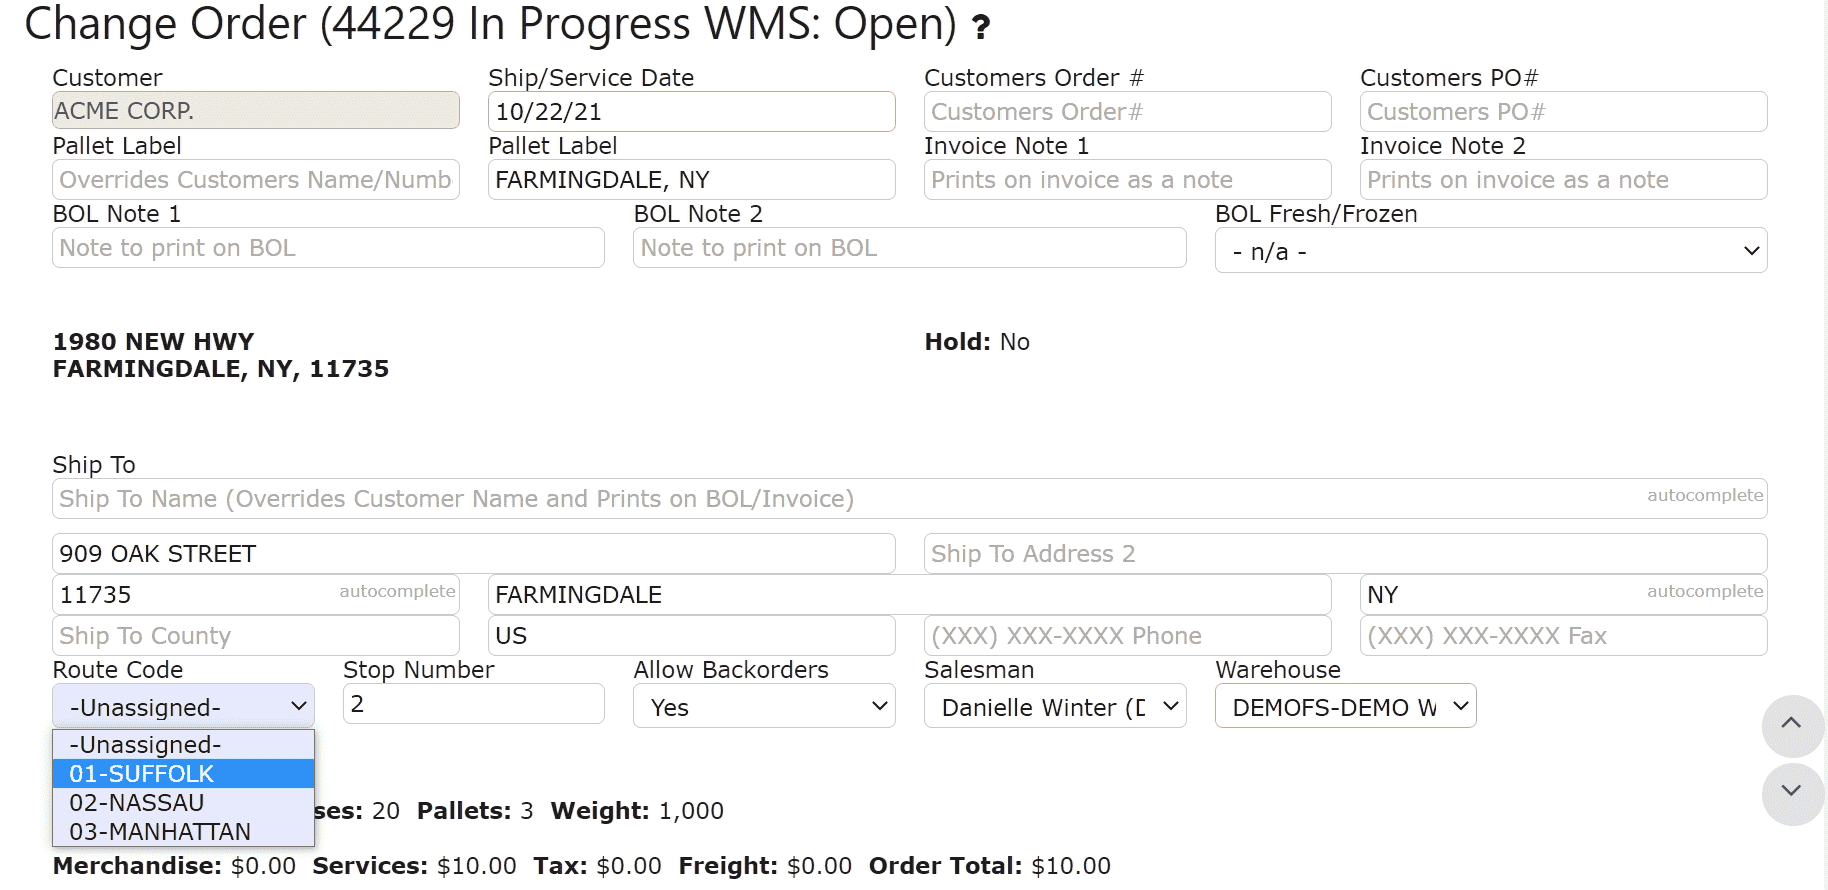
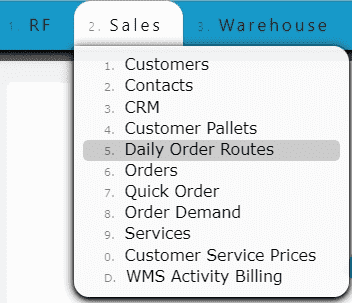
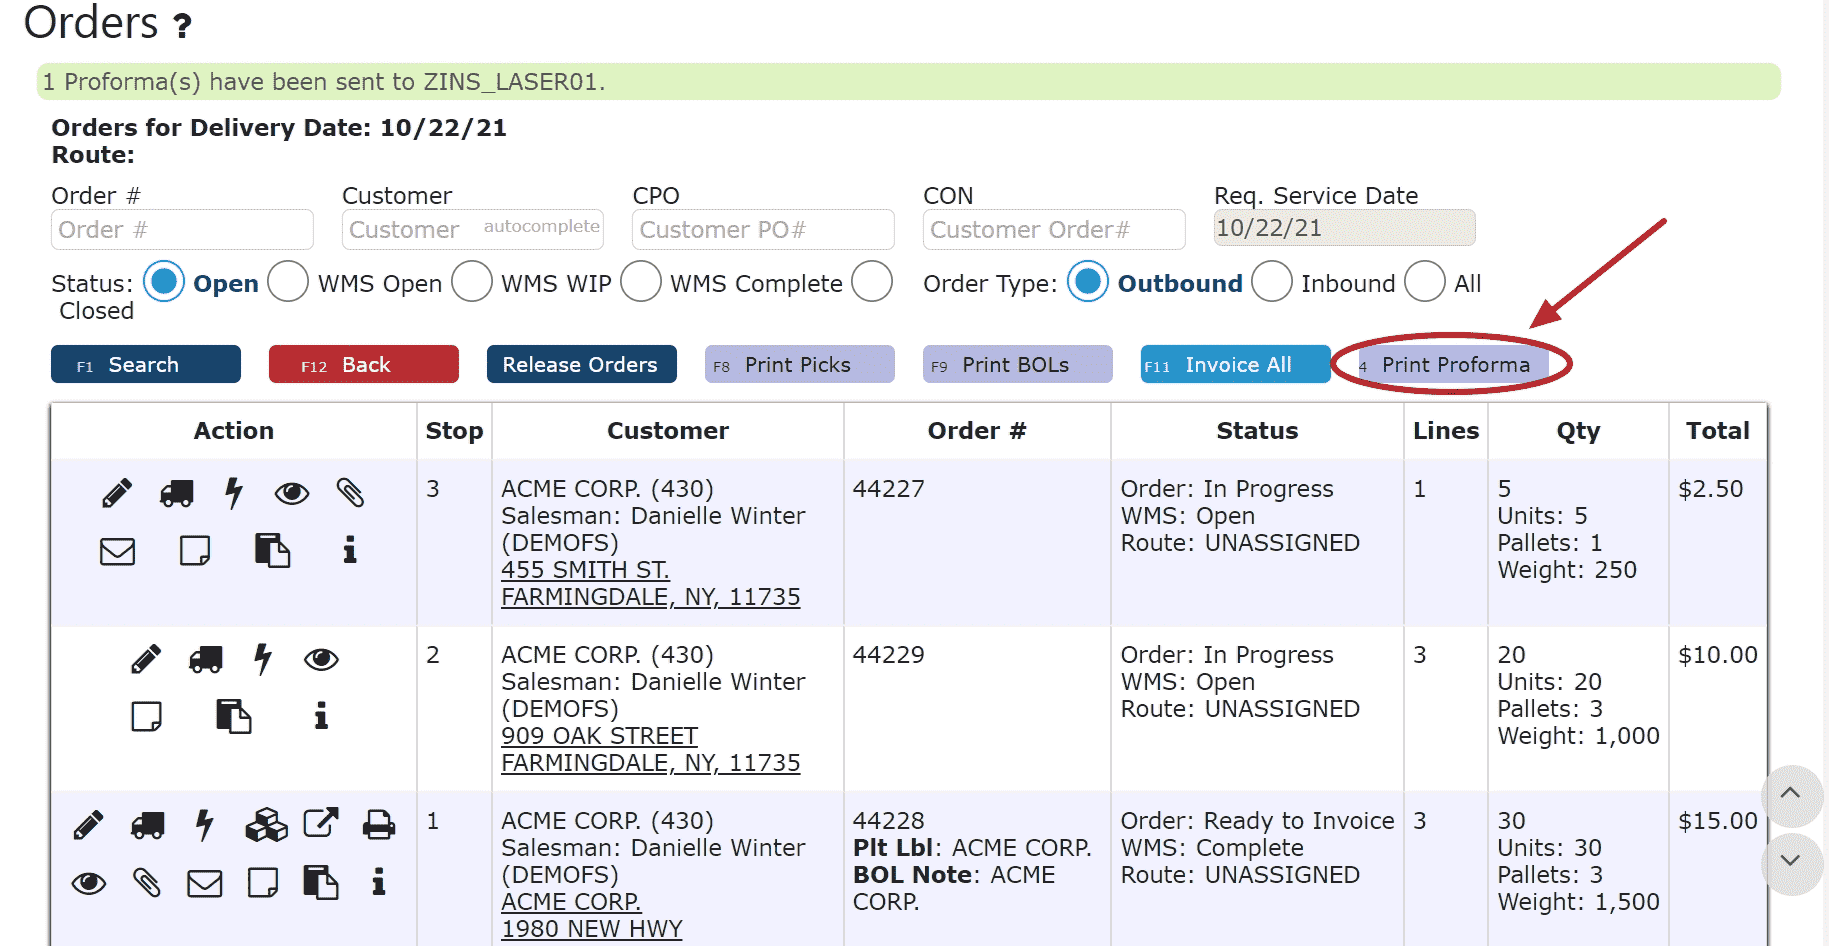
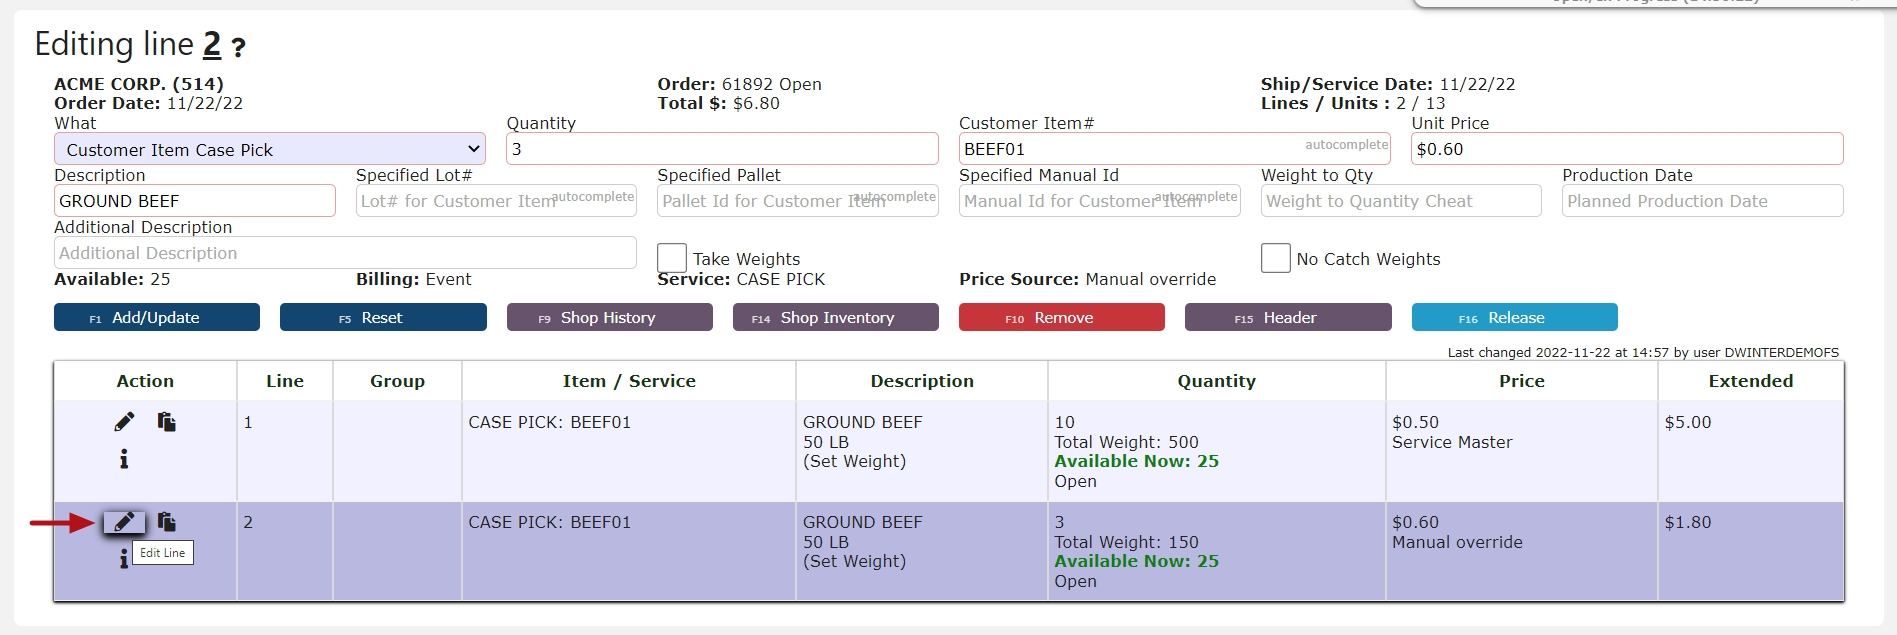
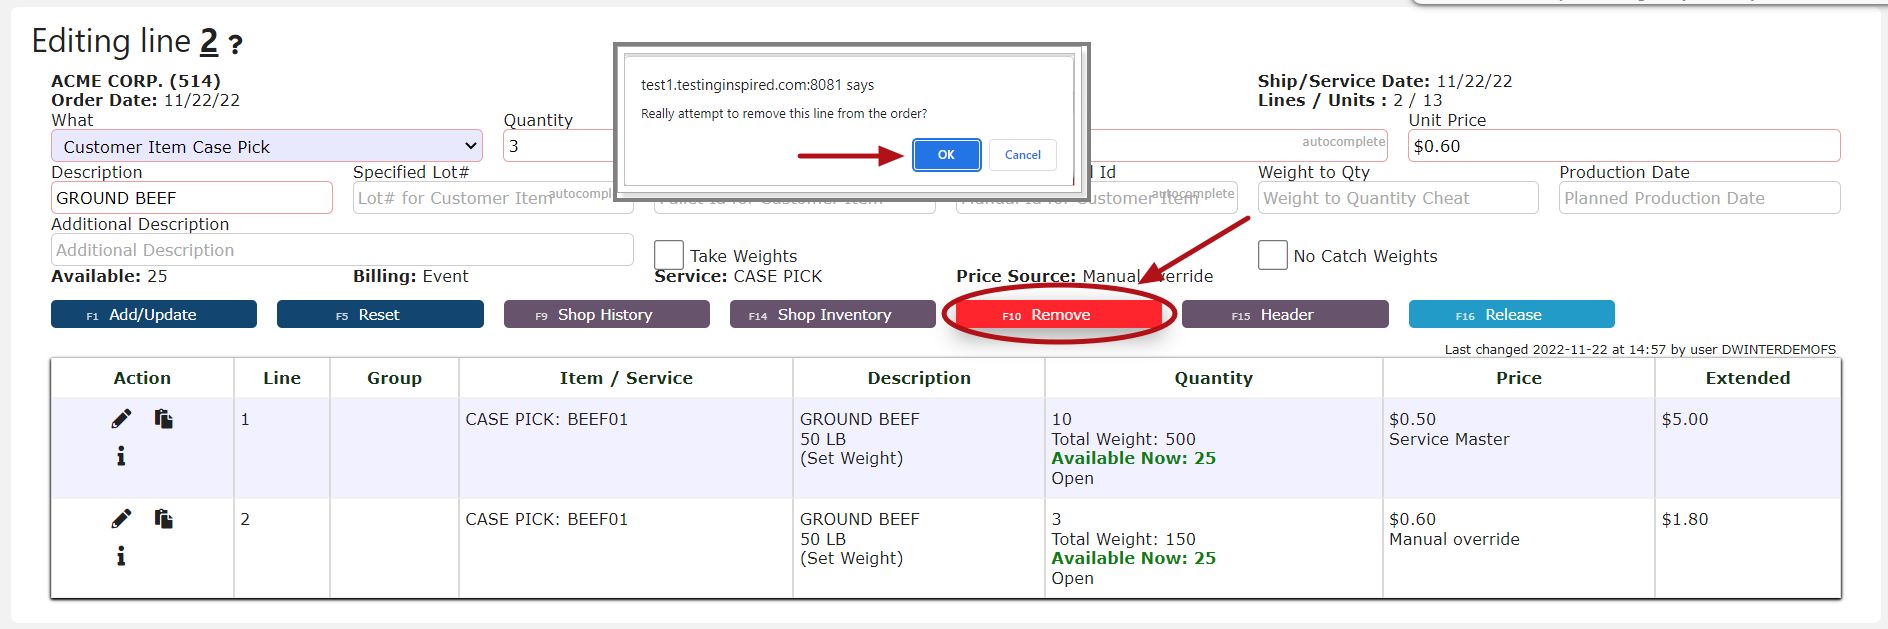
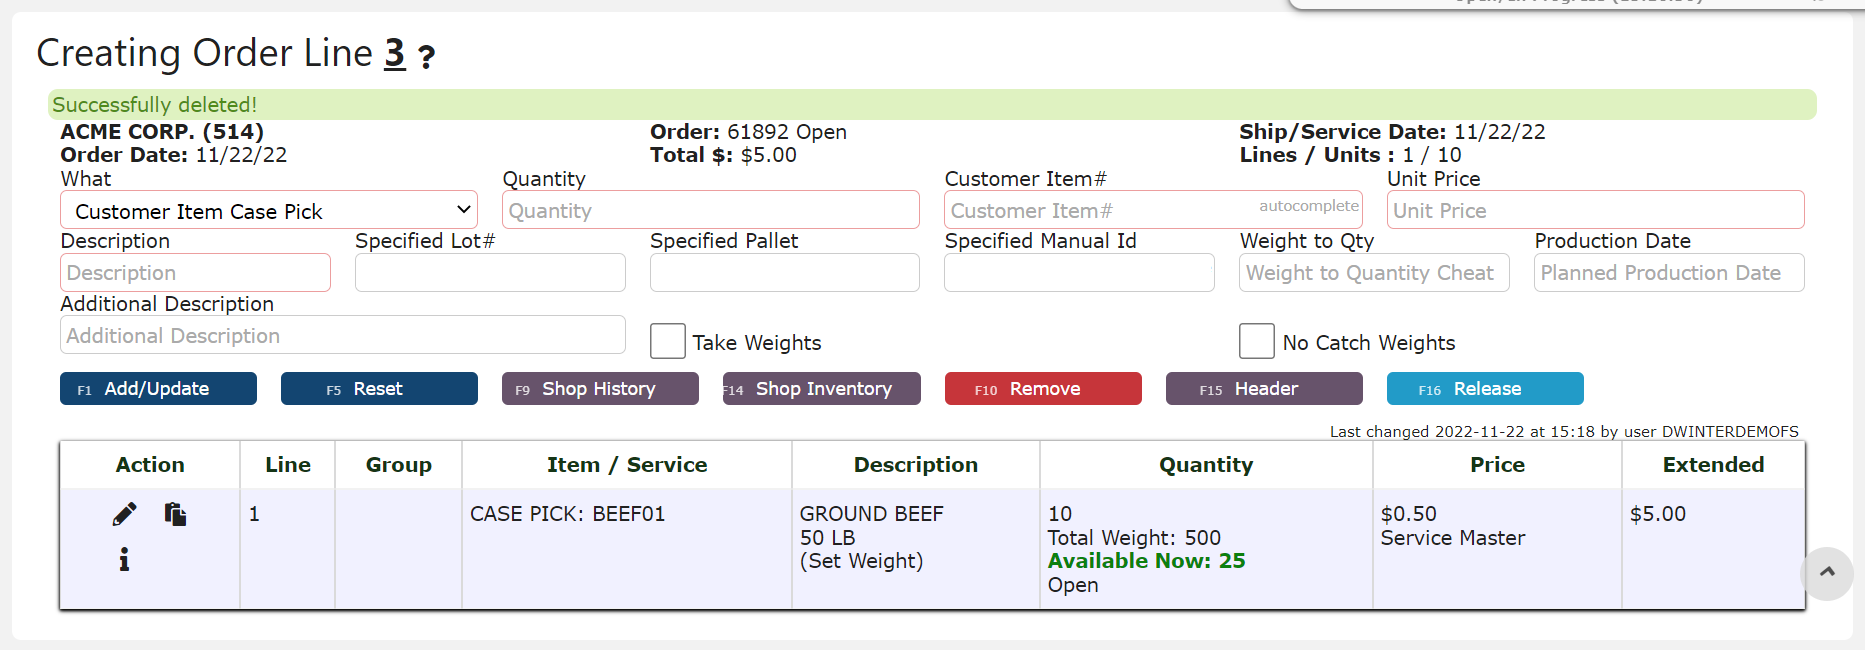
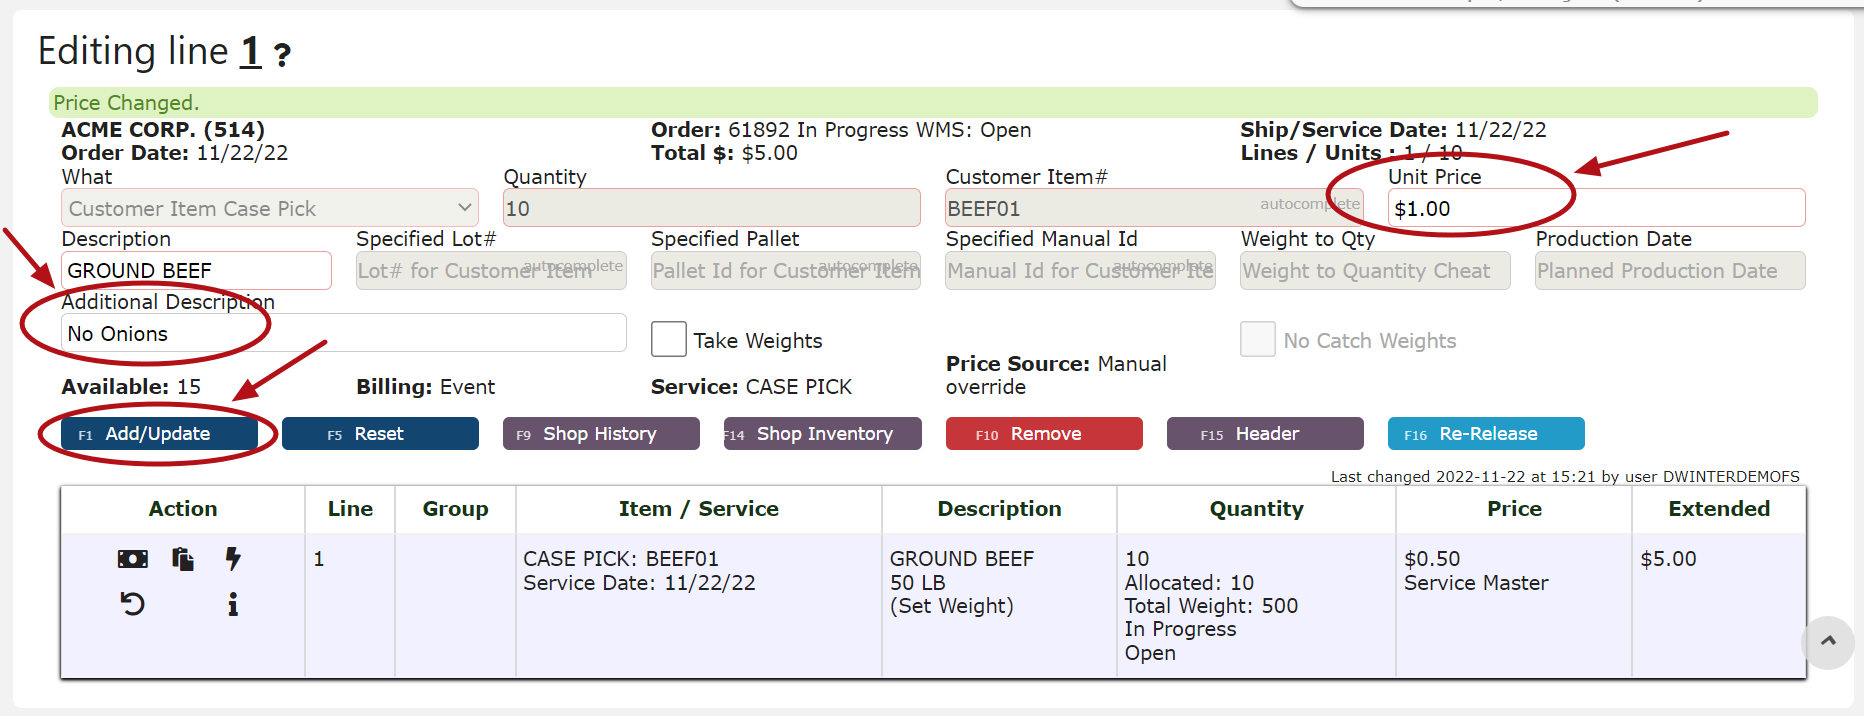
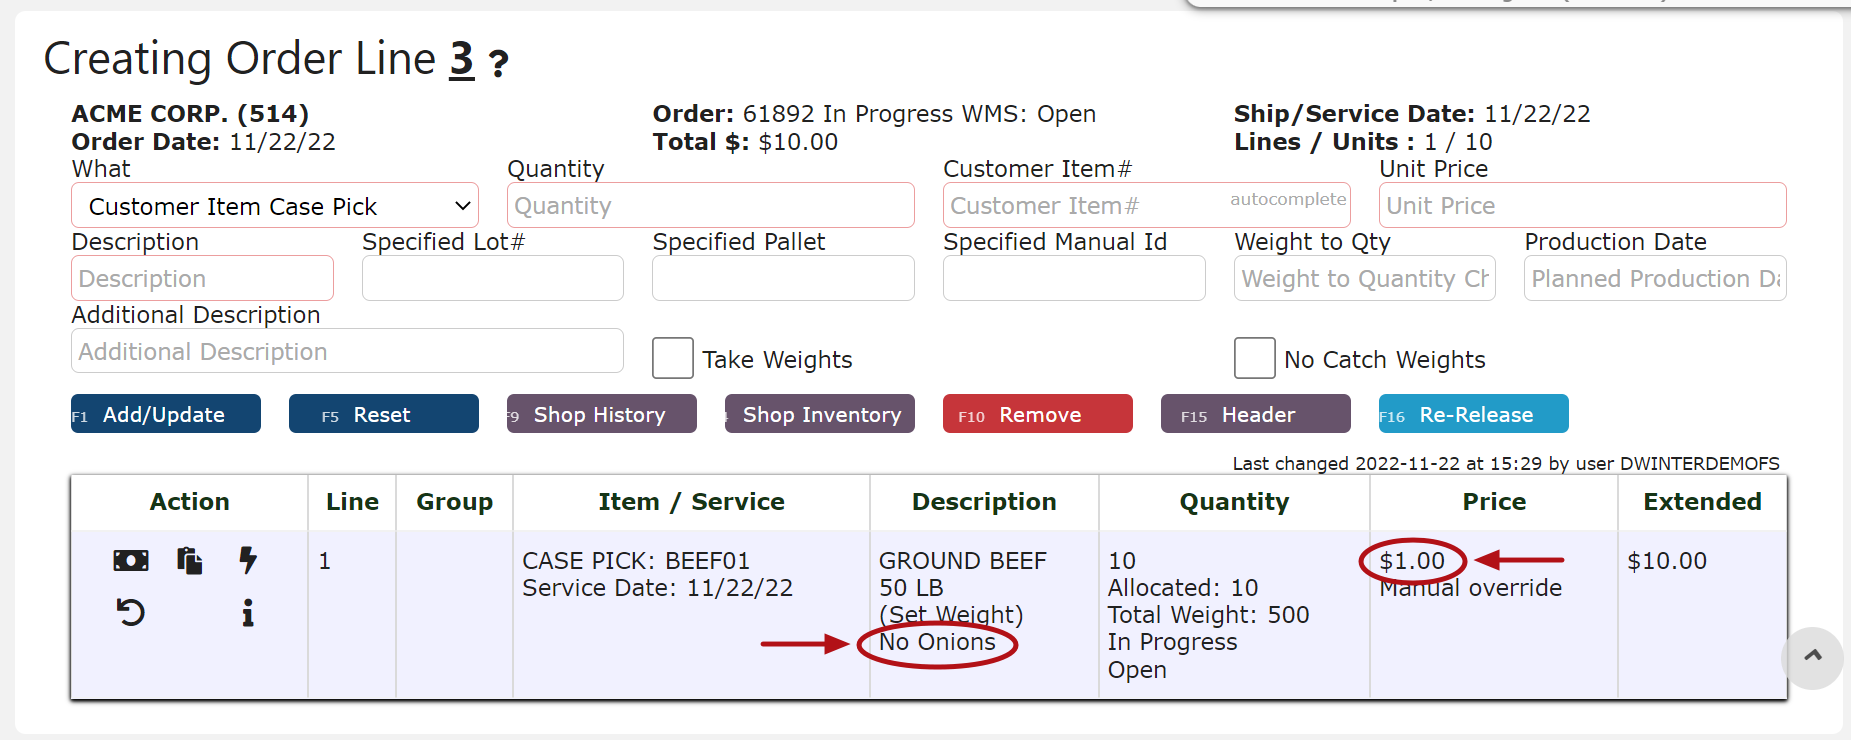
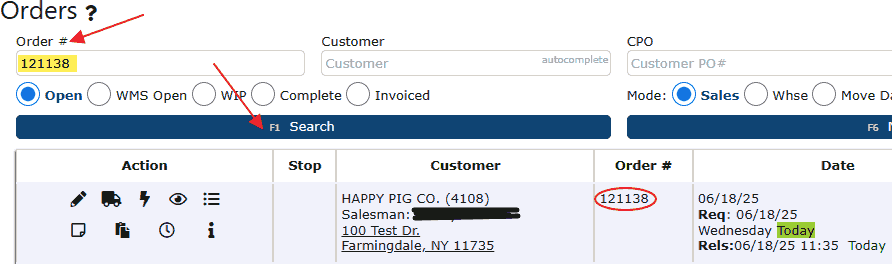
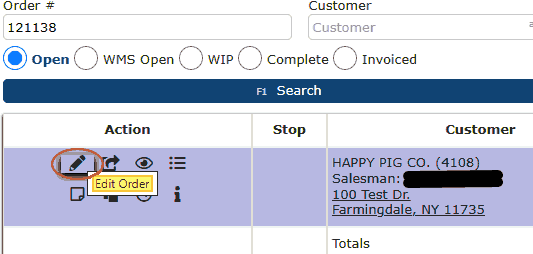
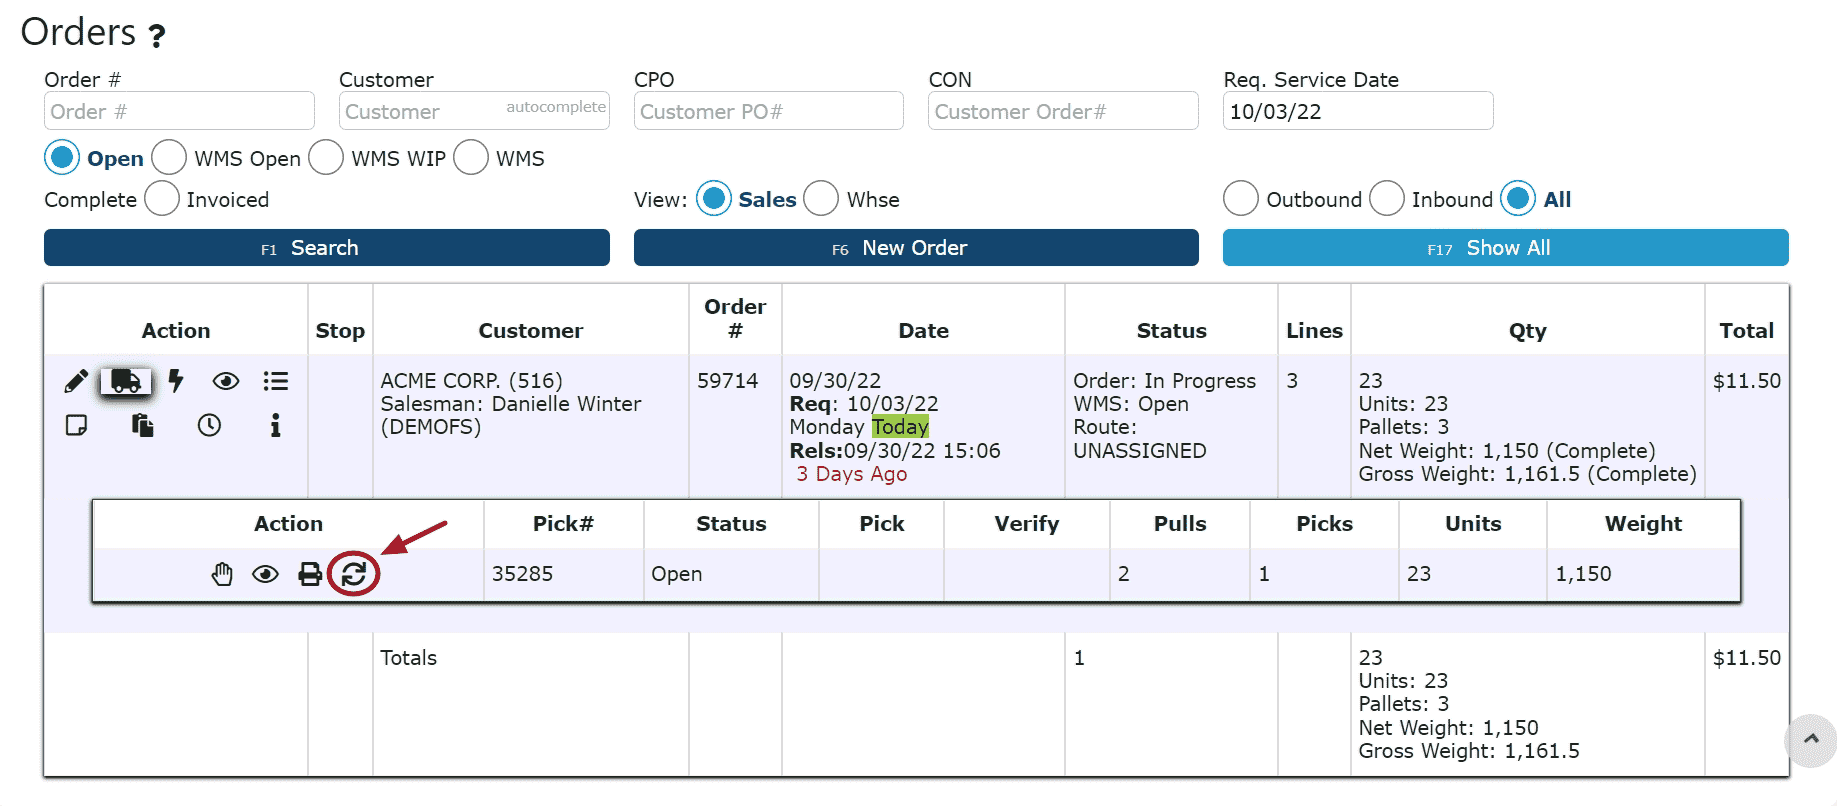
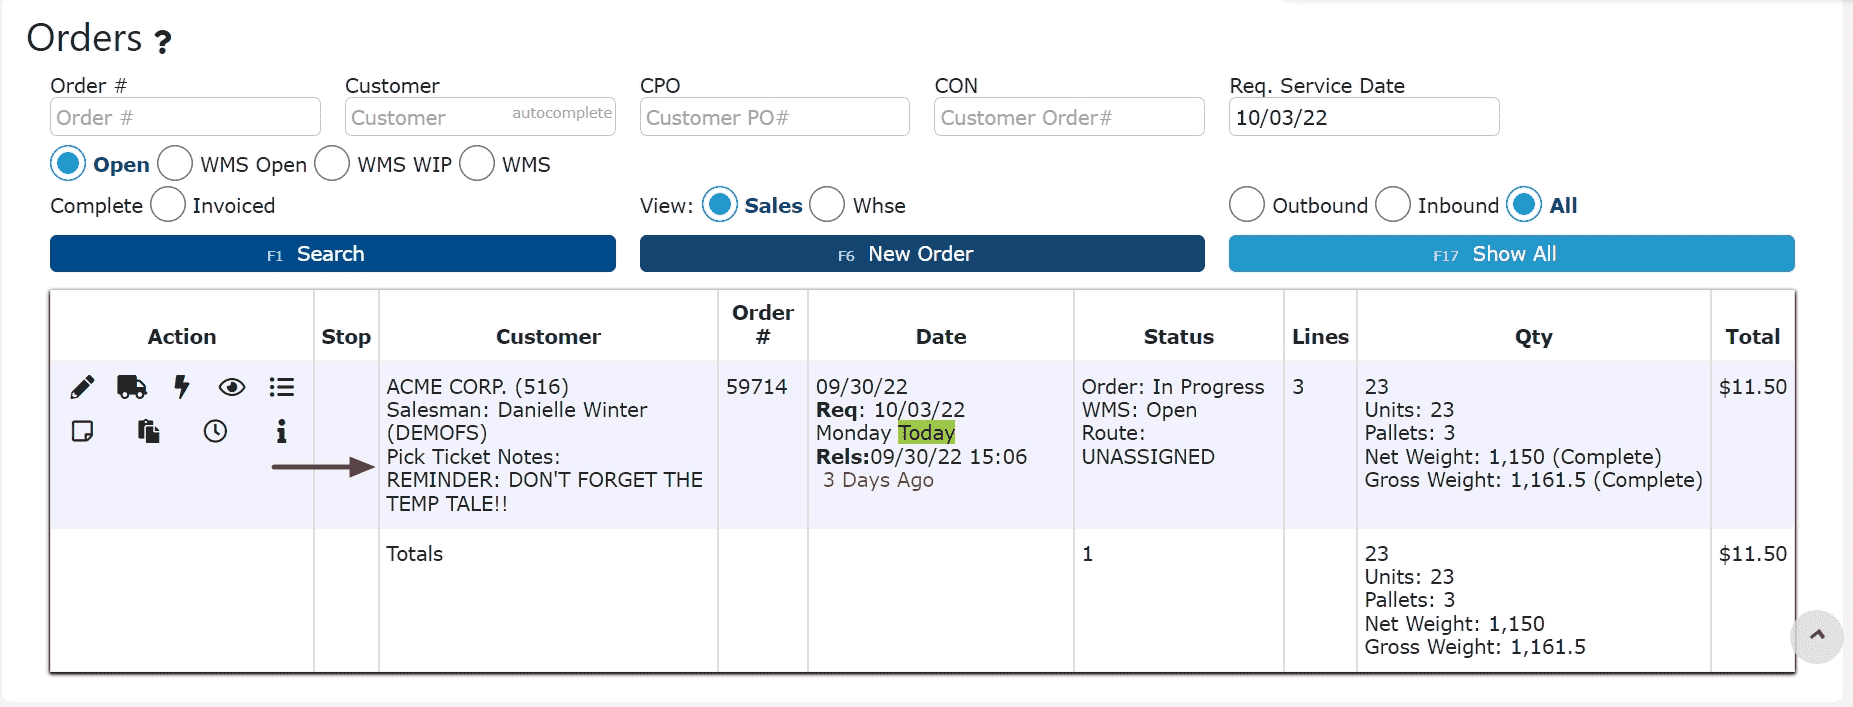
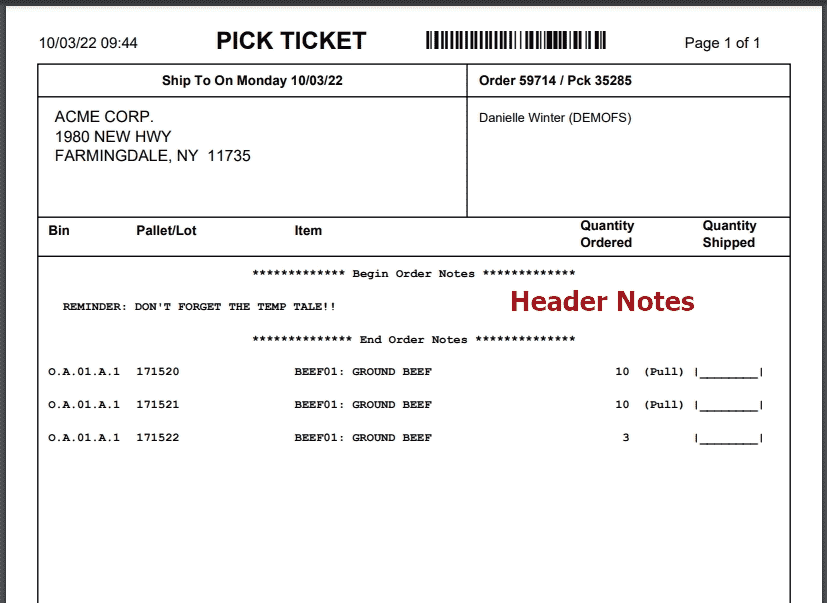
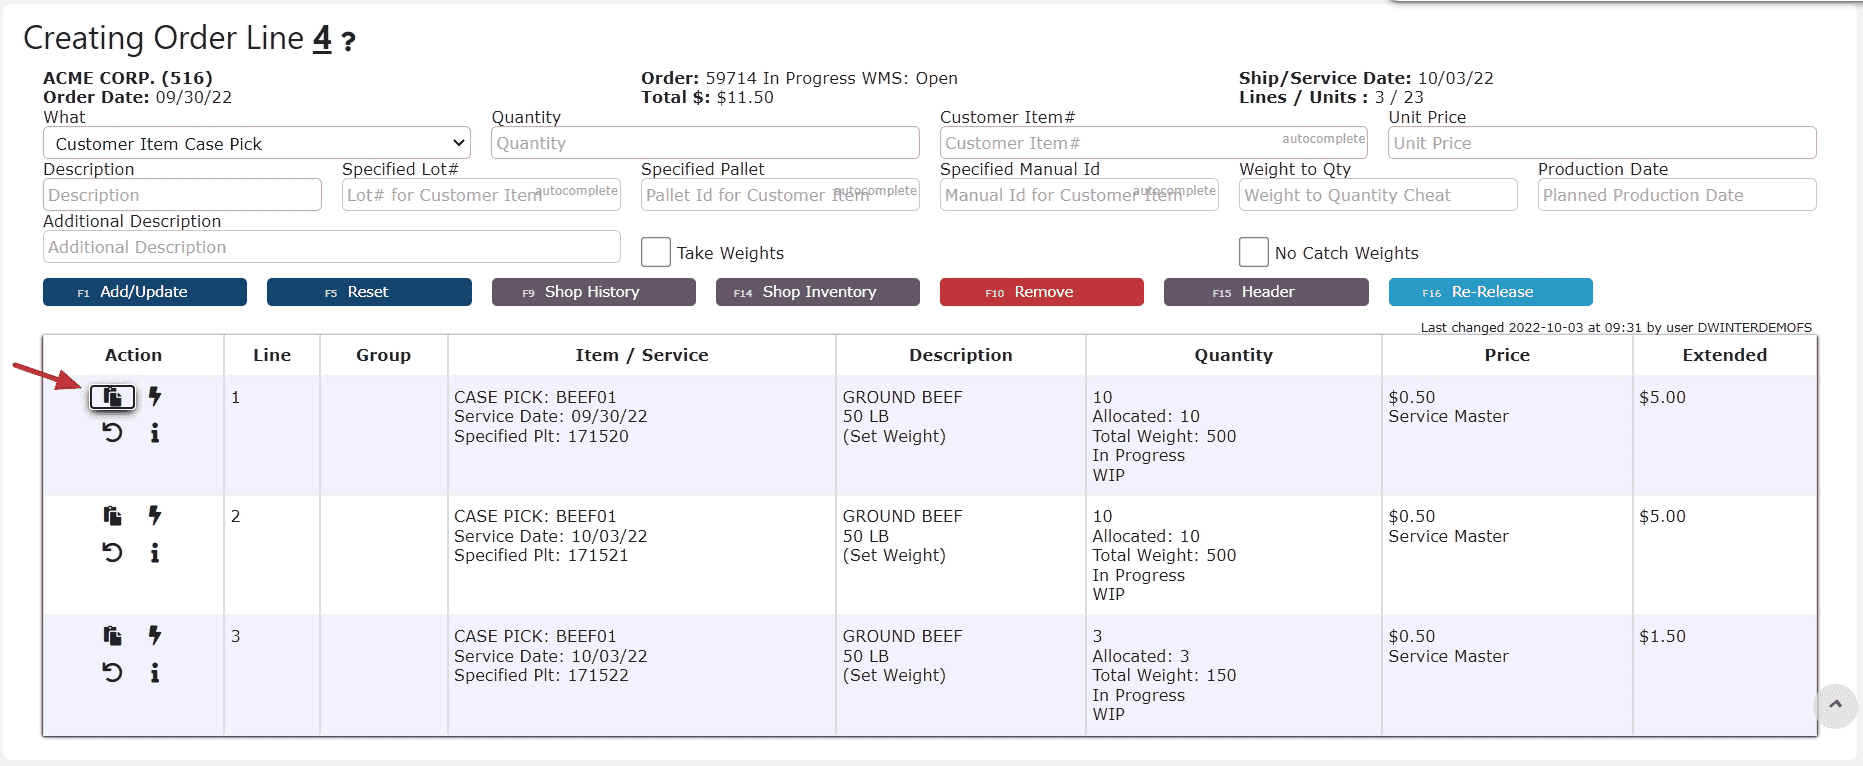
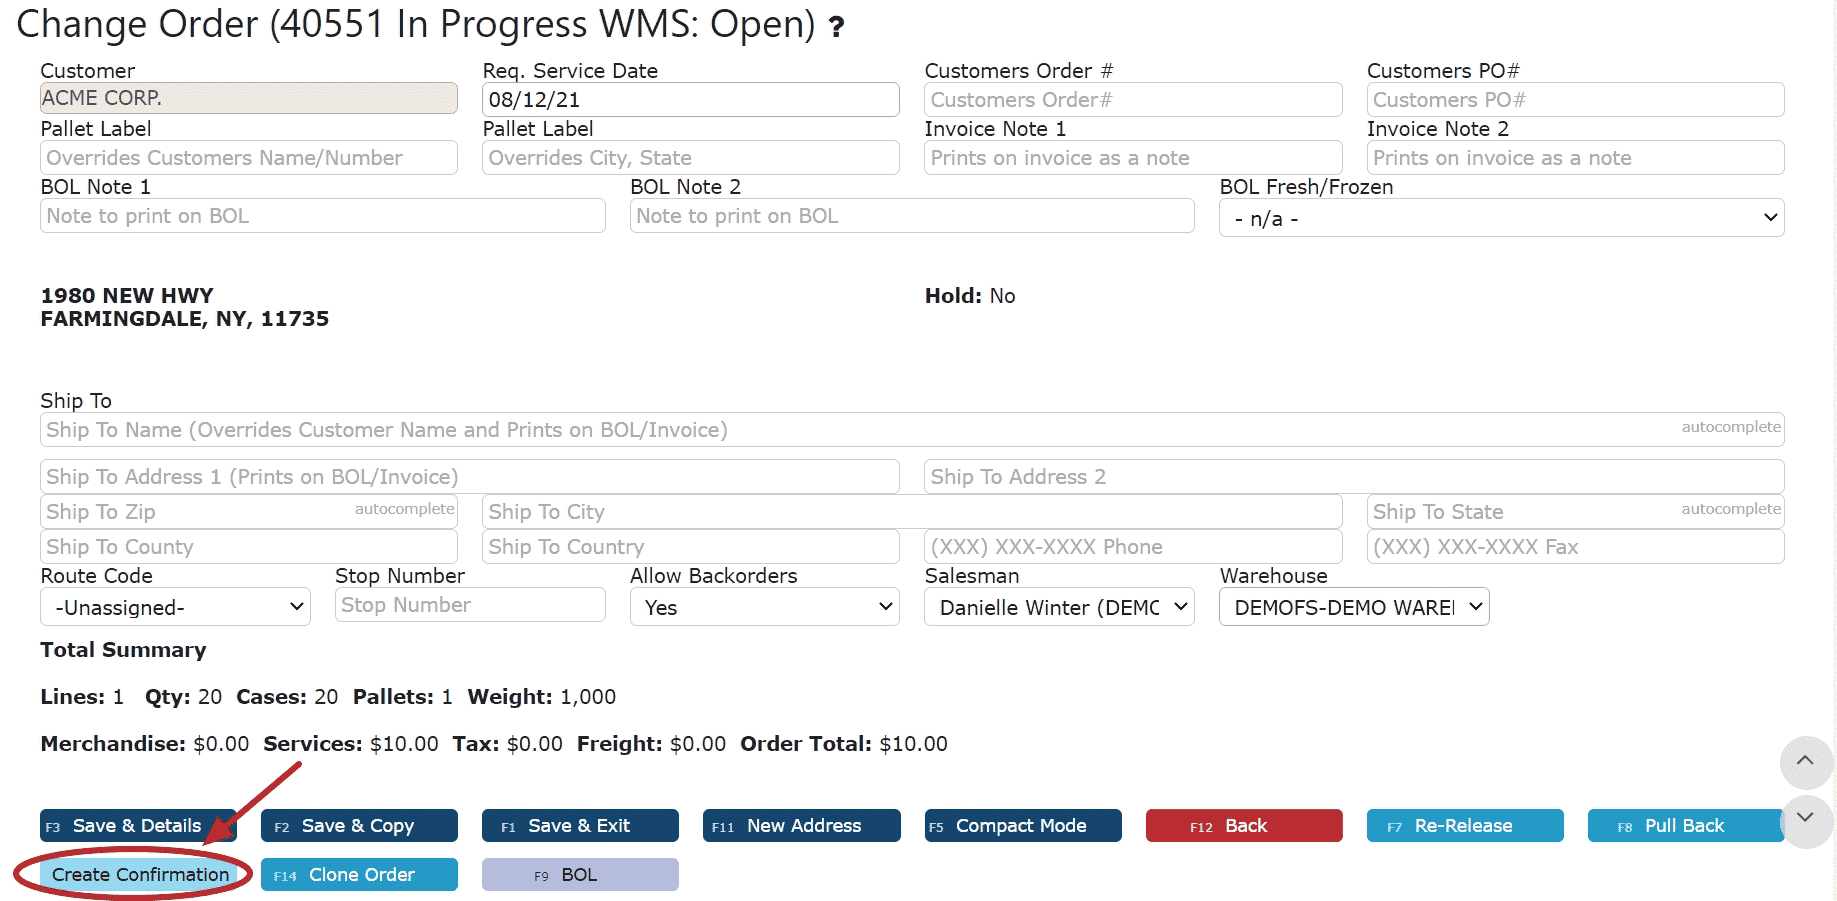
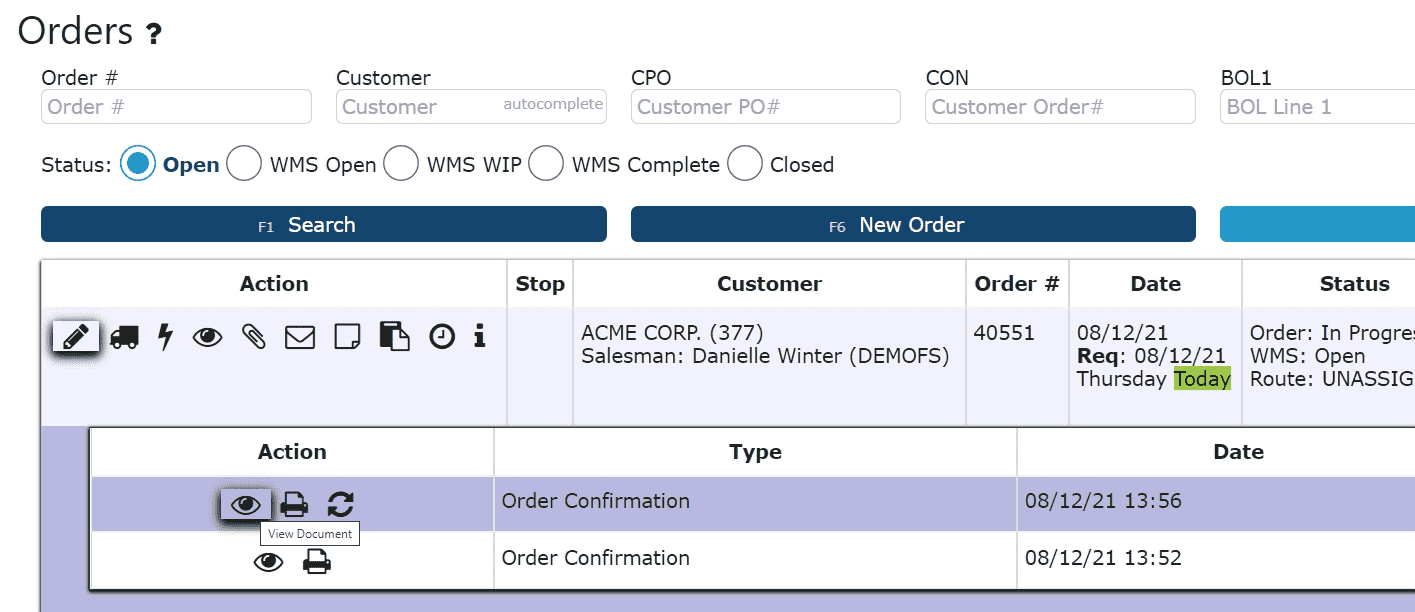
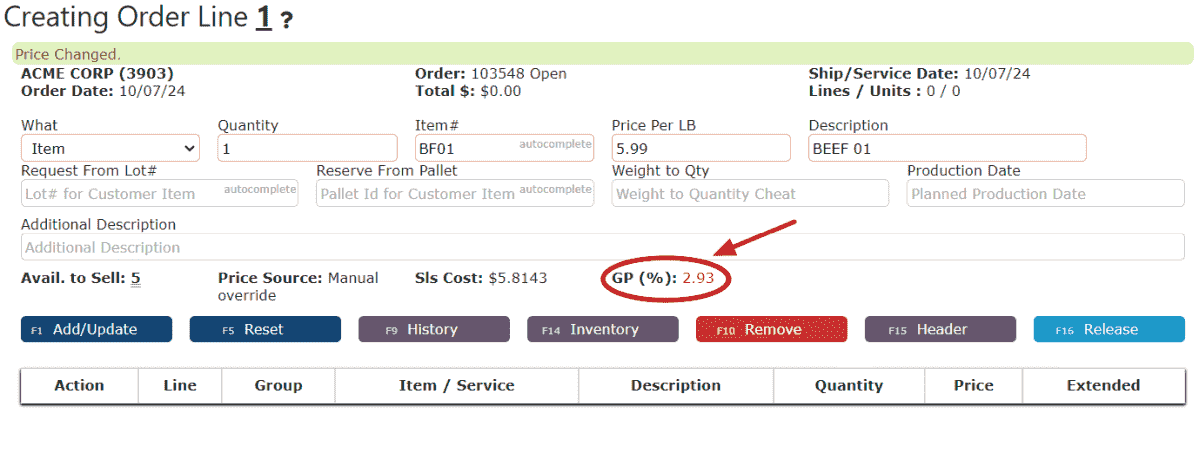
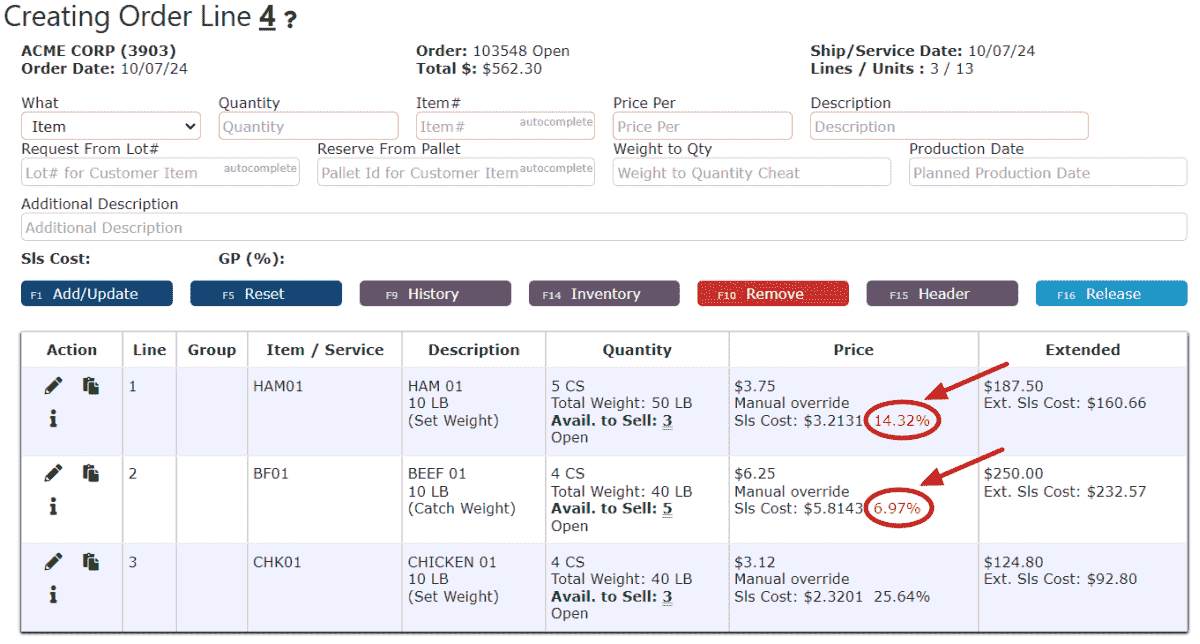
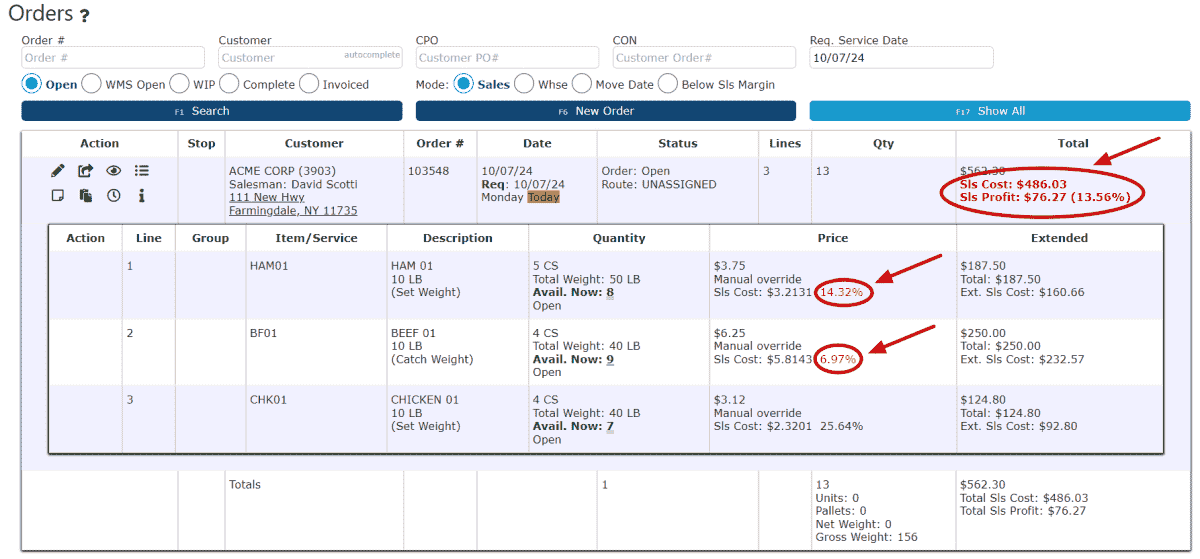
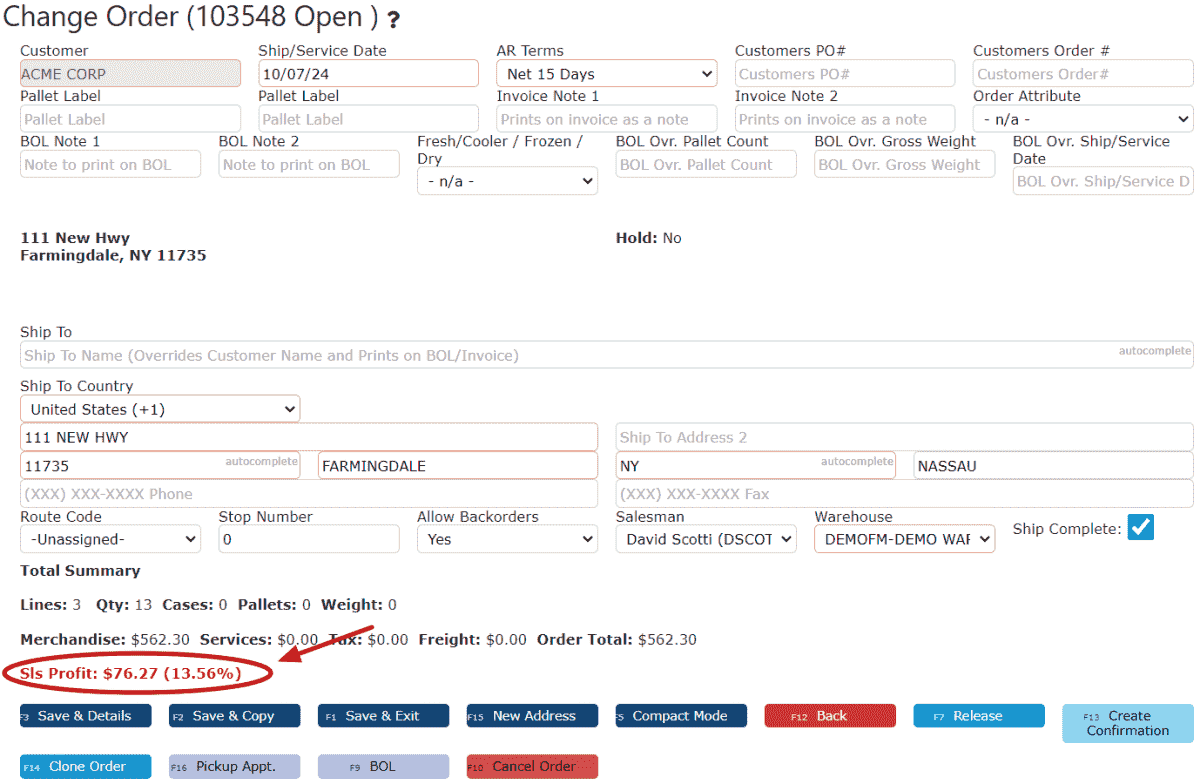
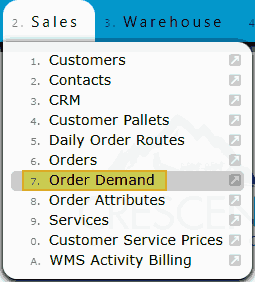
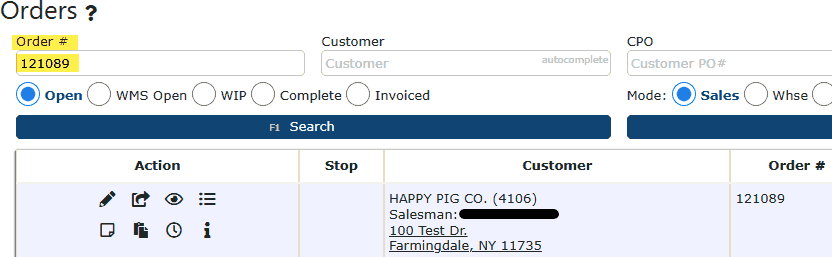
1. Order Creation & Release - Orders are entered via Sales → Orders → Add New.
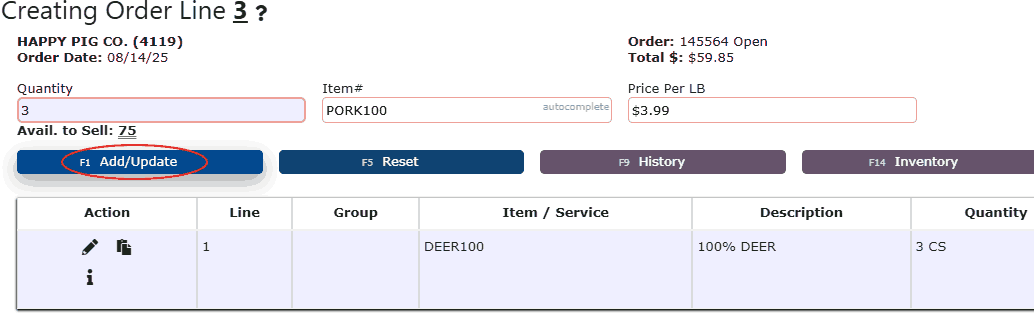
• After completing the header details, click Save & Details, add lines, and release the order once ready.
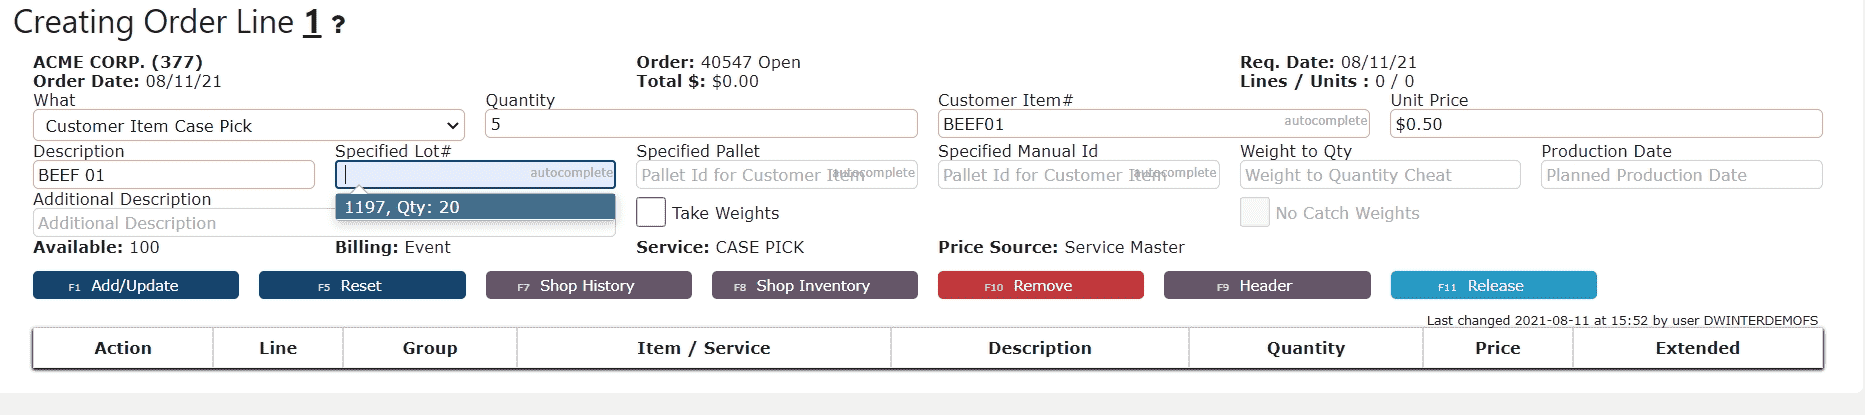
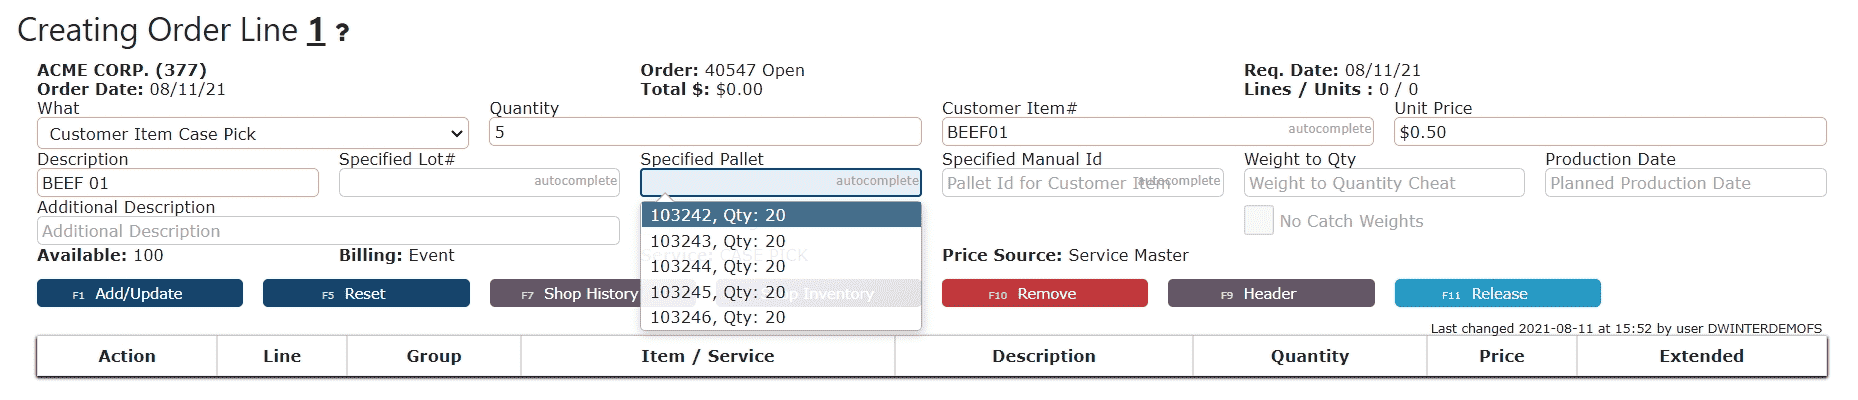
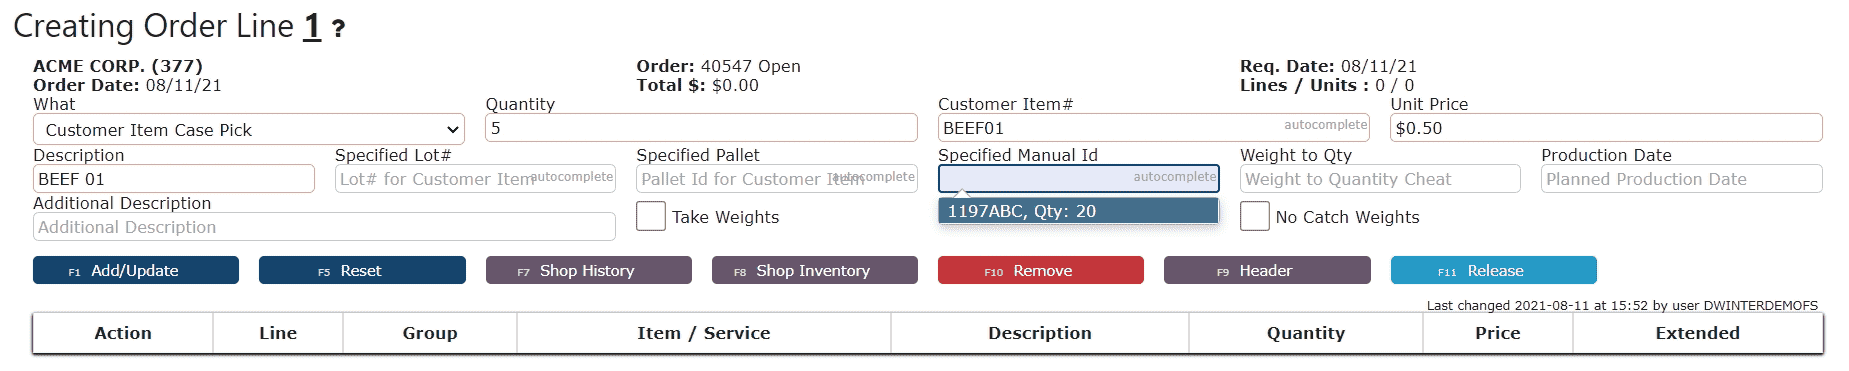
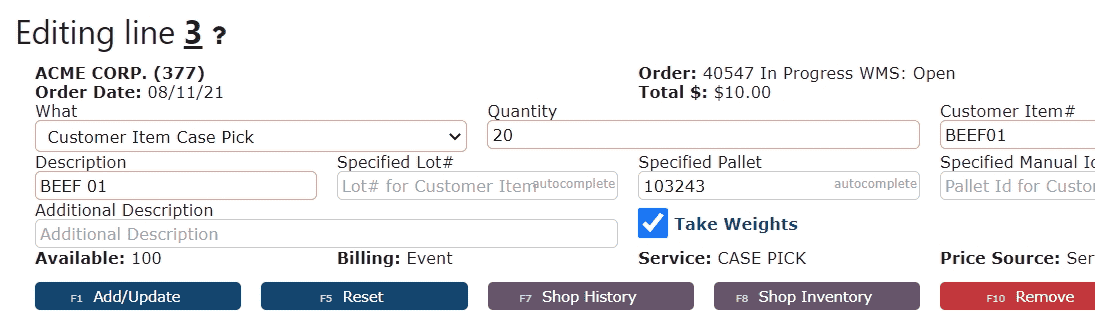
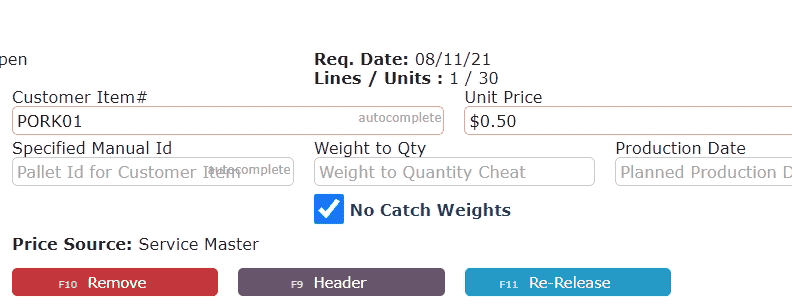
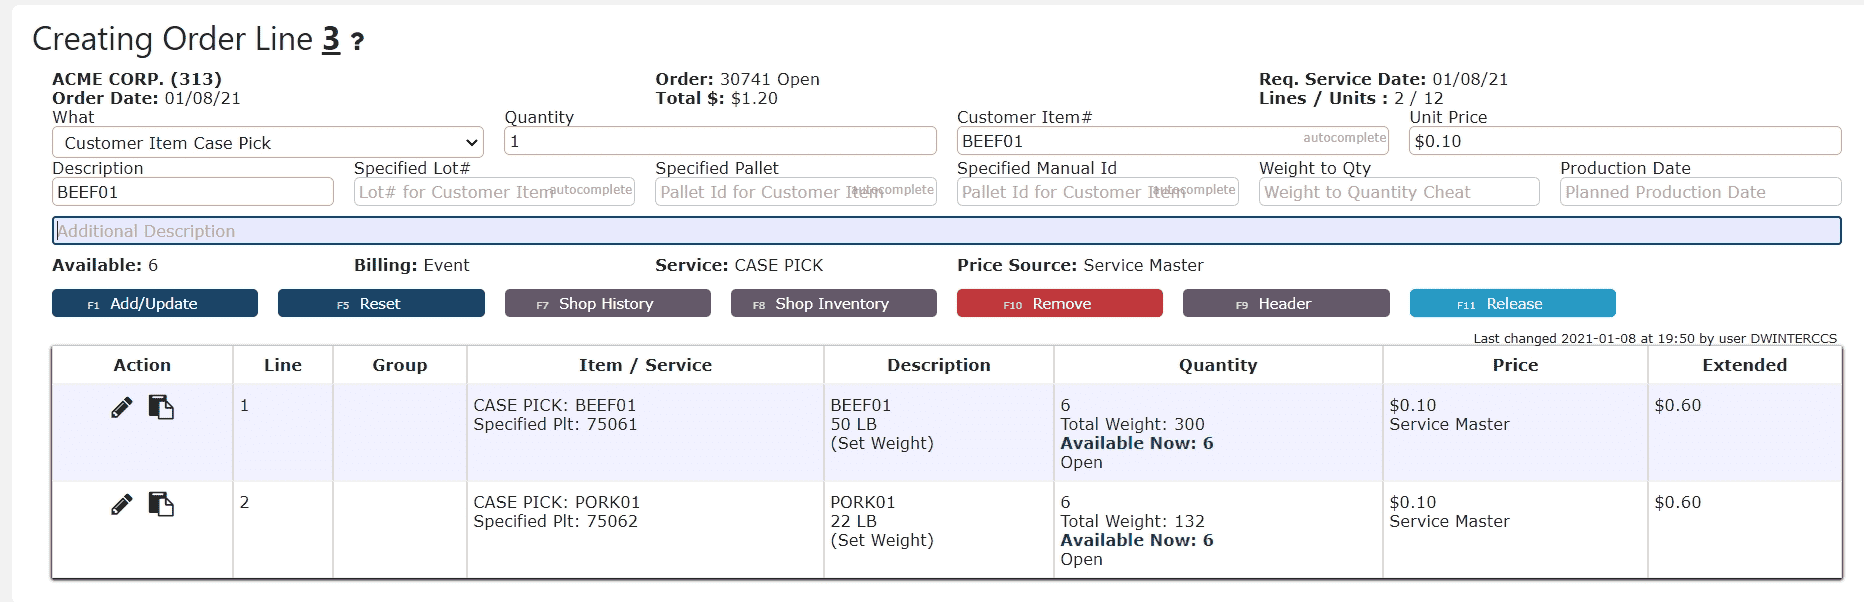
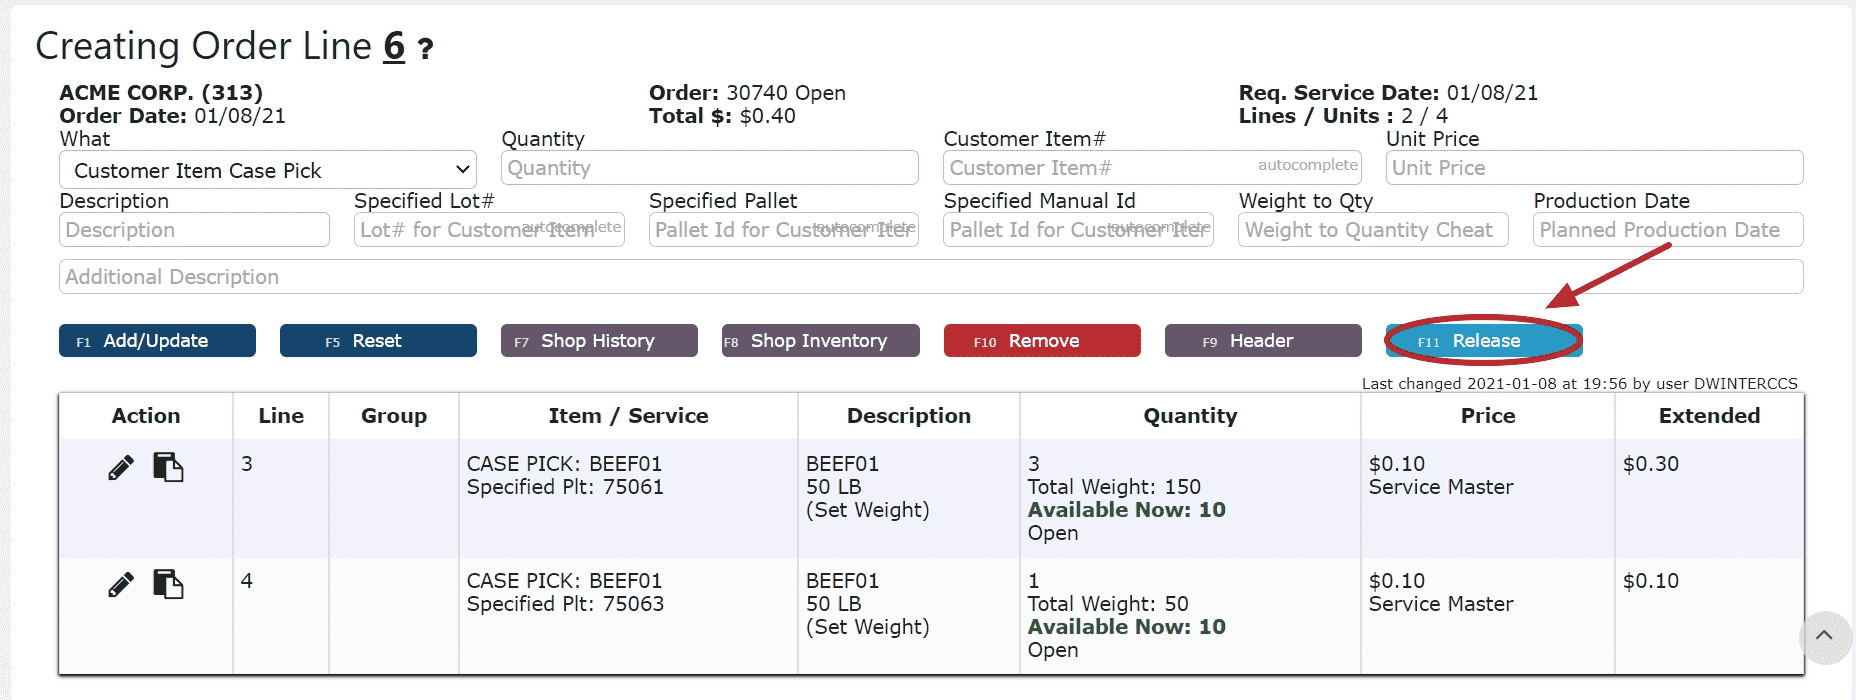
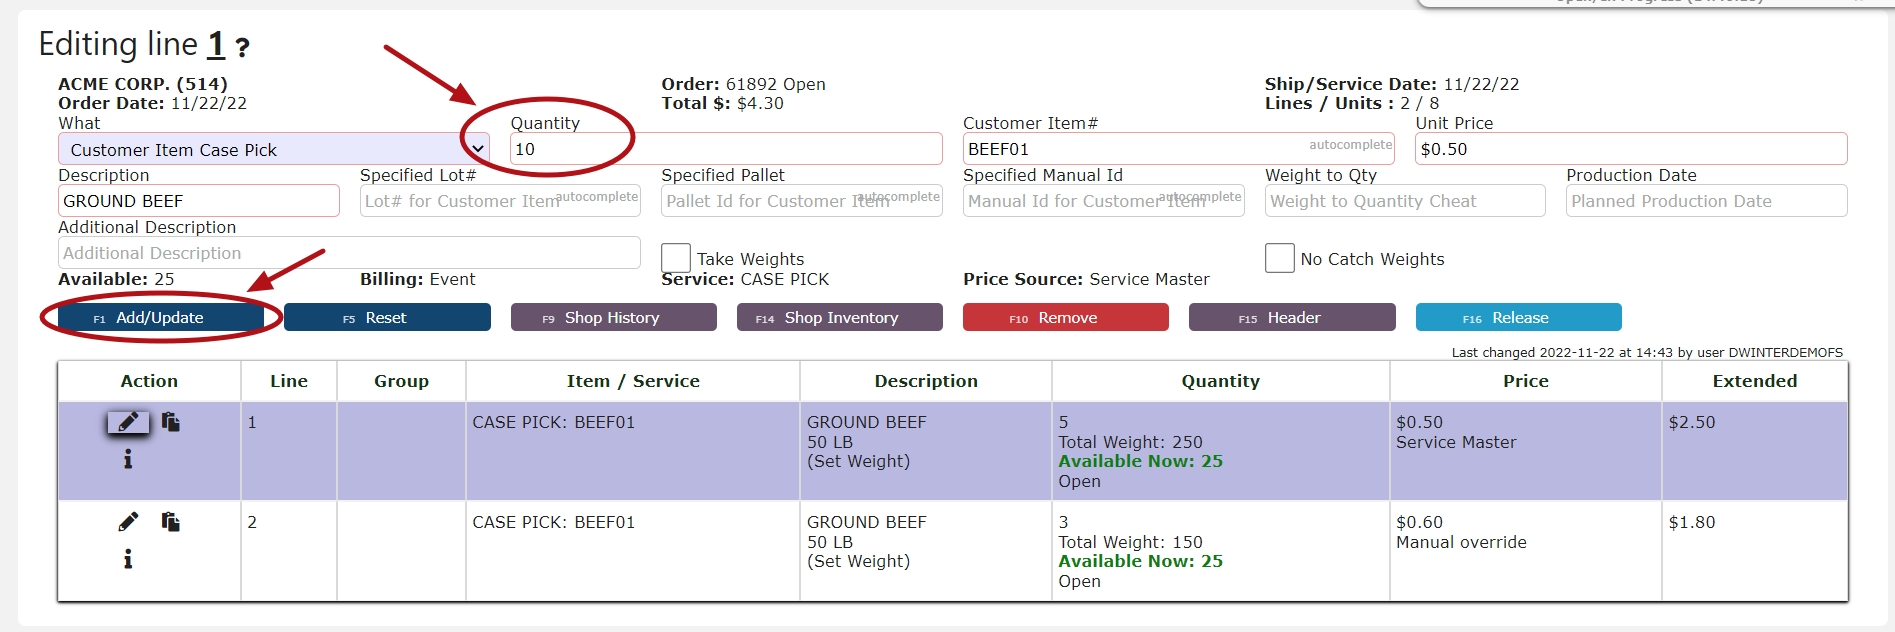
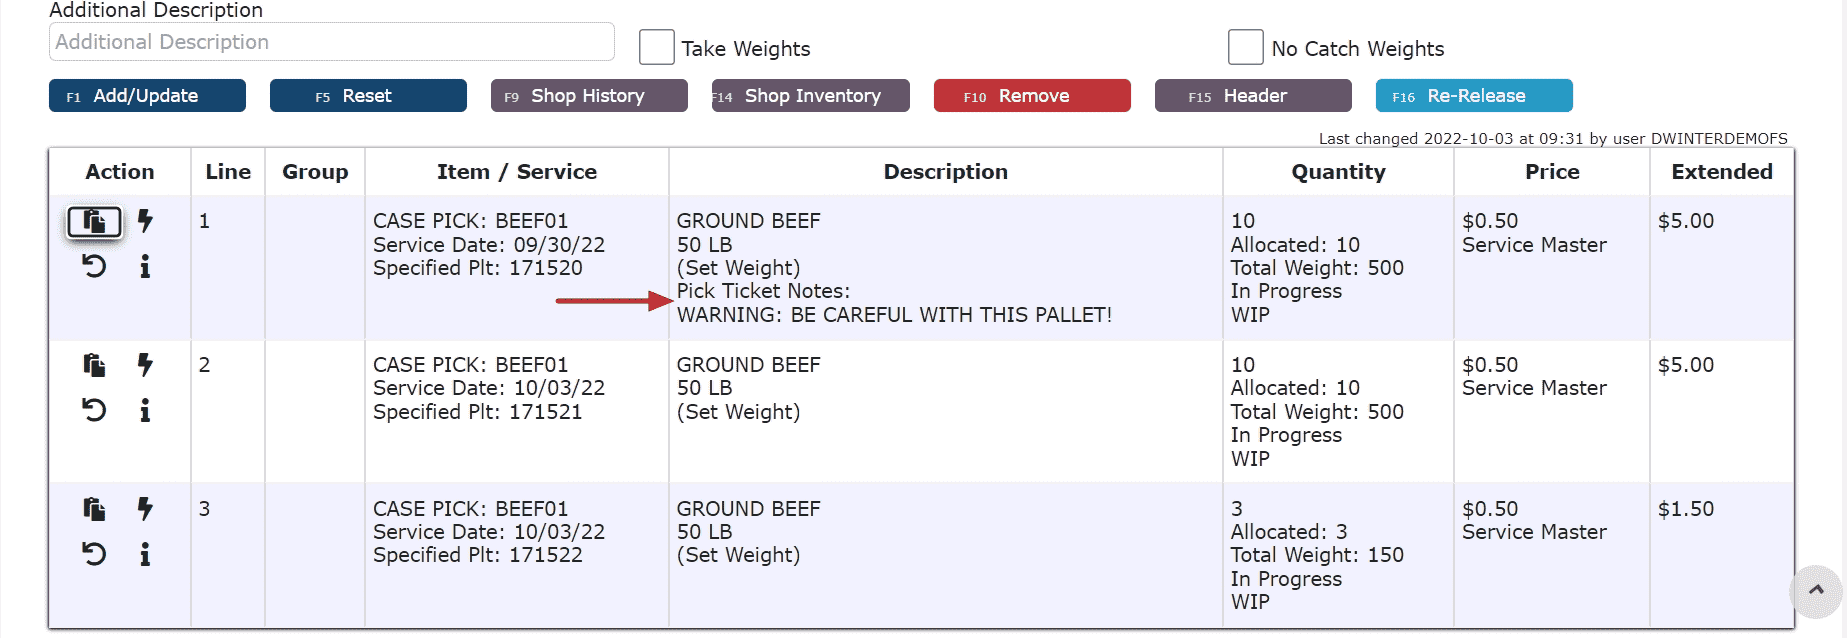
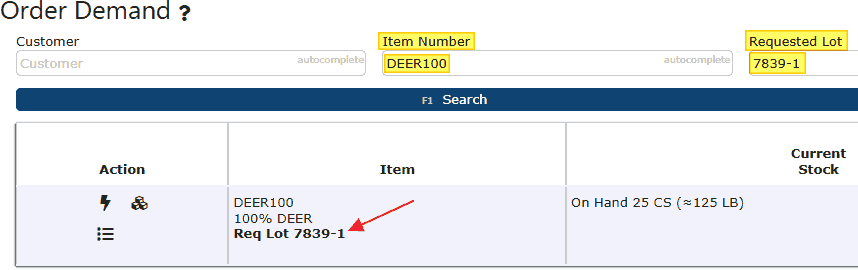
• Inventory Preferences: Specify preferred lots, pallets, or manual IDs for allocation. Note: Manual IDs and lots cannot be combined.
• After completing the header details, click Save & Details, add lines, and release the order once ready.
• Inventory Preferences: Specify preferred lots, pallets, or manual IDs for allocation. Note: Manual IDs and lots cannot be combined.
Weight Options:
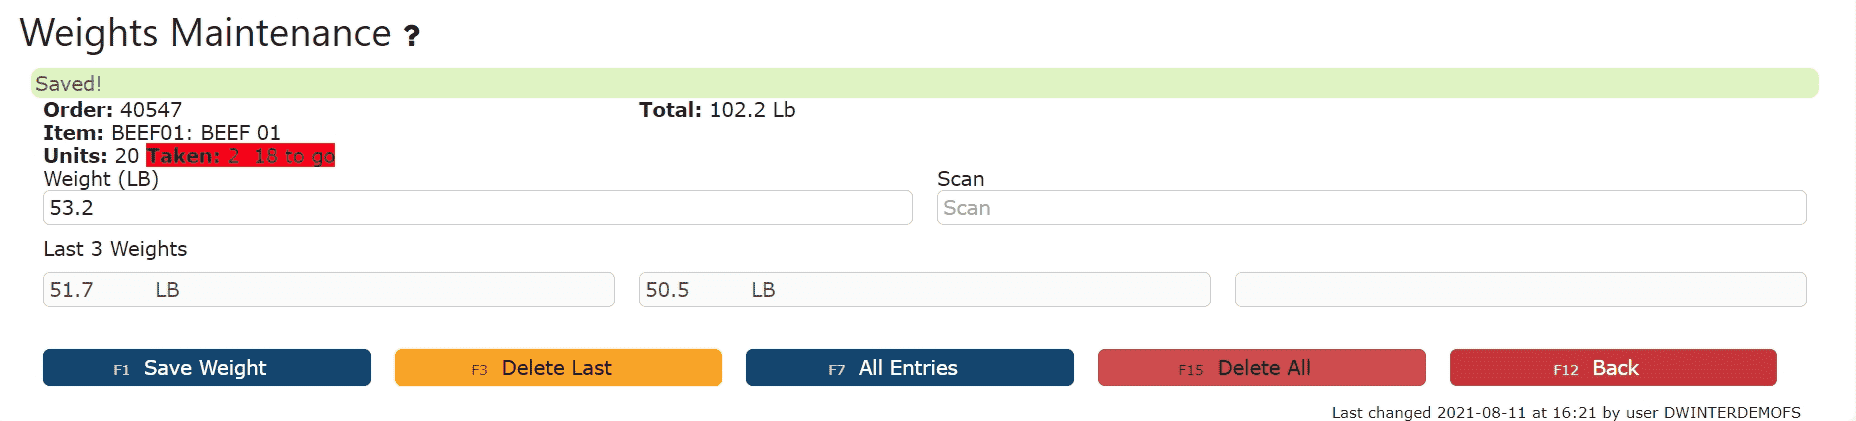
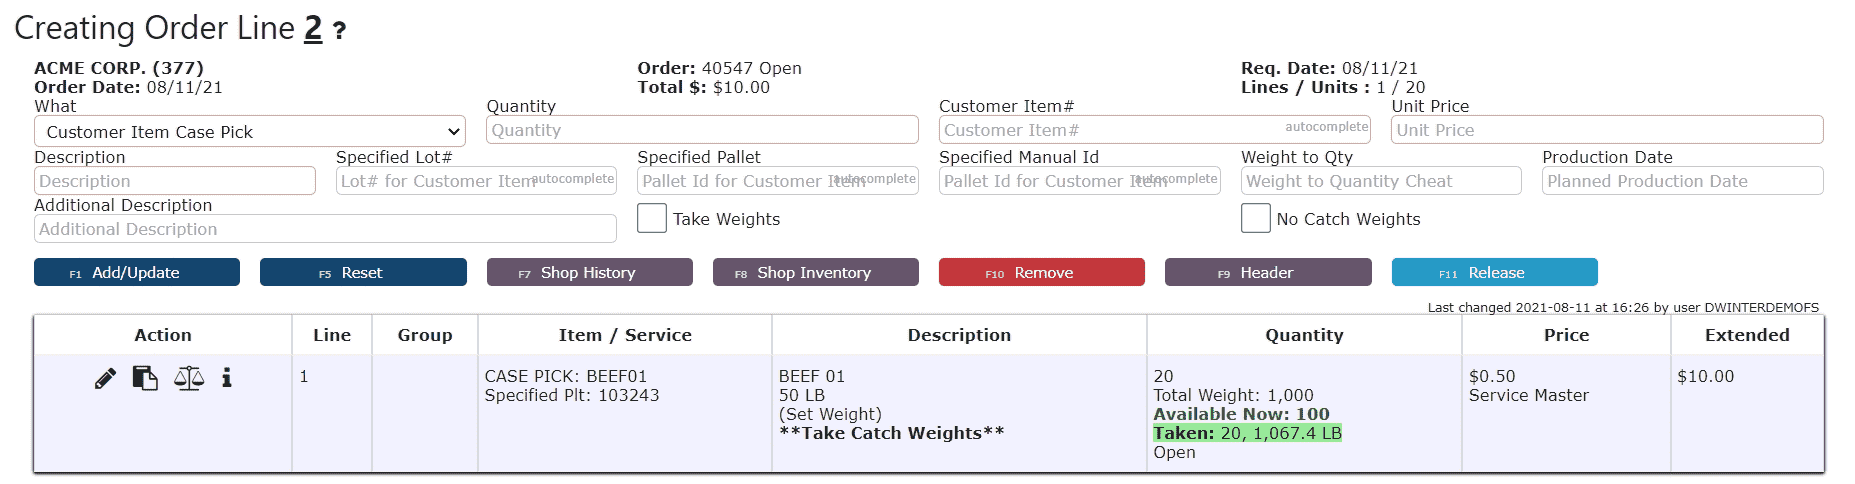
• Take Weights: When enabled, weights are recorded (even for non–catch-weight items) and displayed on documents like Proformas and Invoices—strictly informational.
- No Catch Weights: Allows catch-weight items to be processed without capturing their weight.
- Weight-to-Quantity: Entering a total weight auto-populates the corresponding quantity based on unit weight.
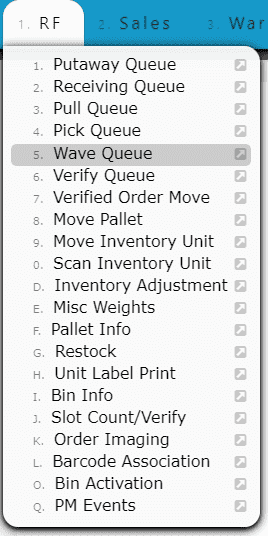
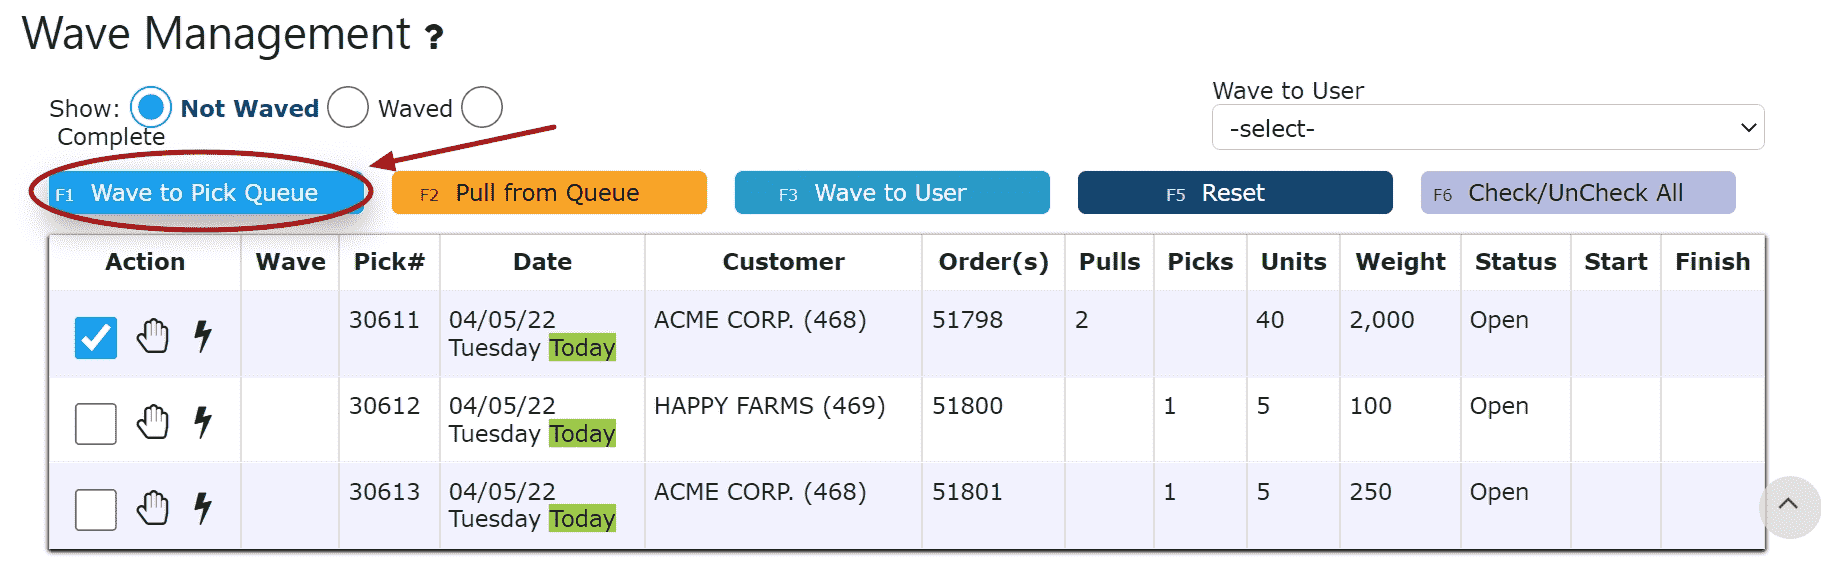
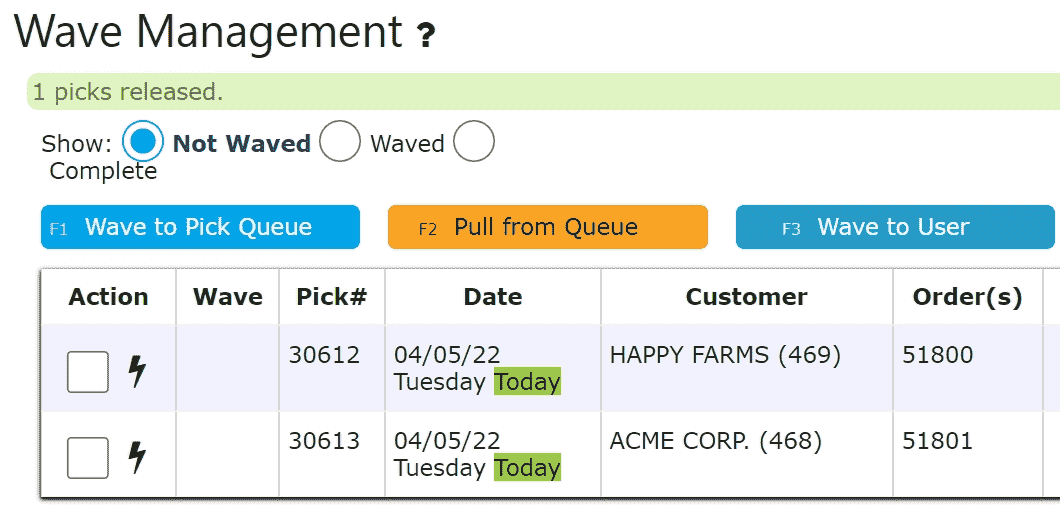
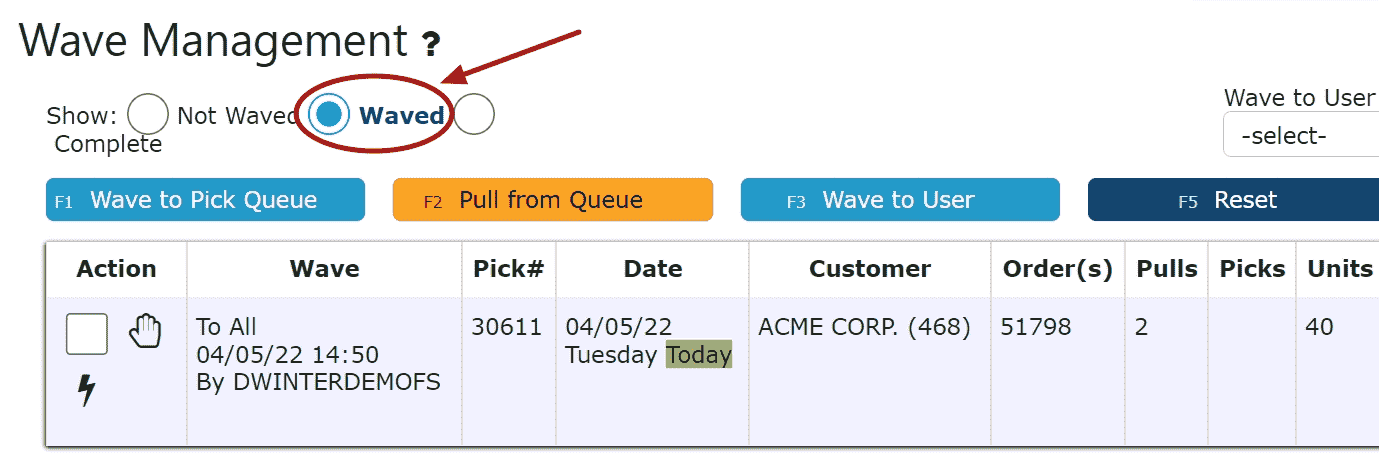
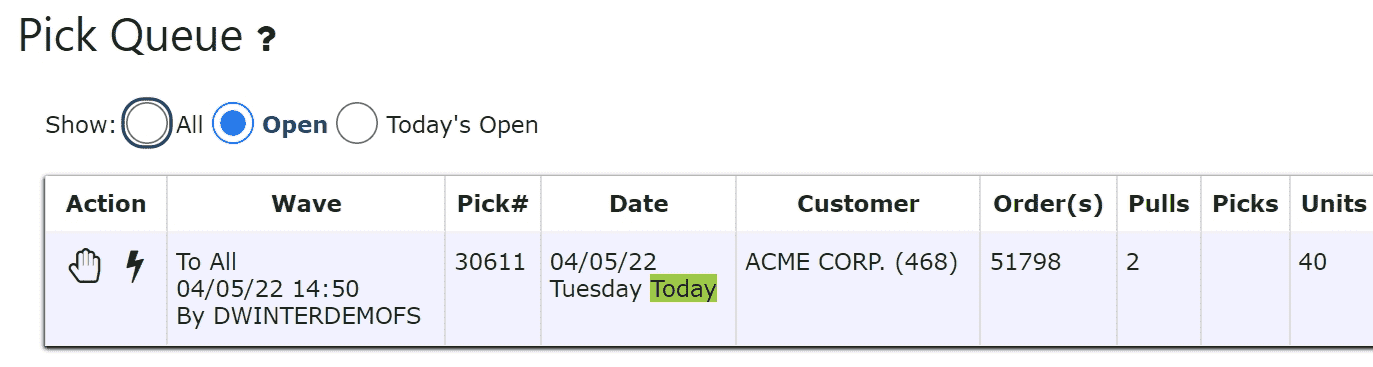
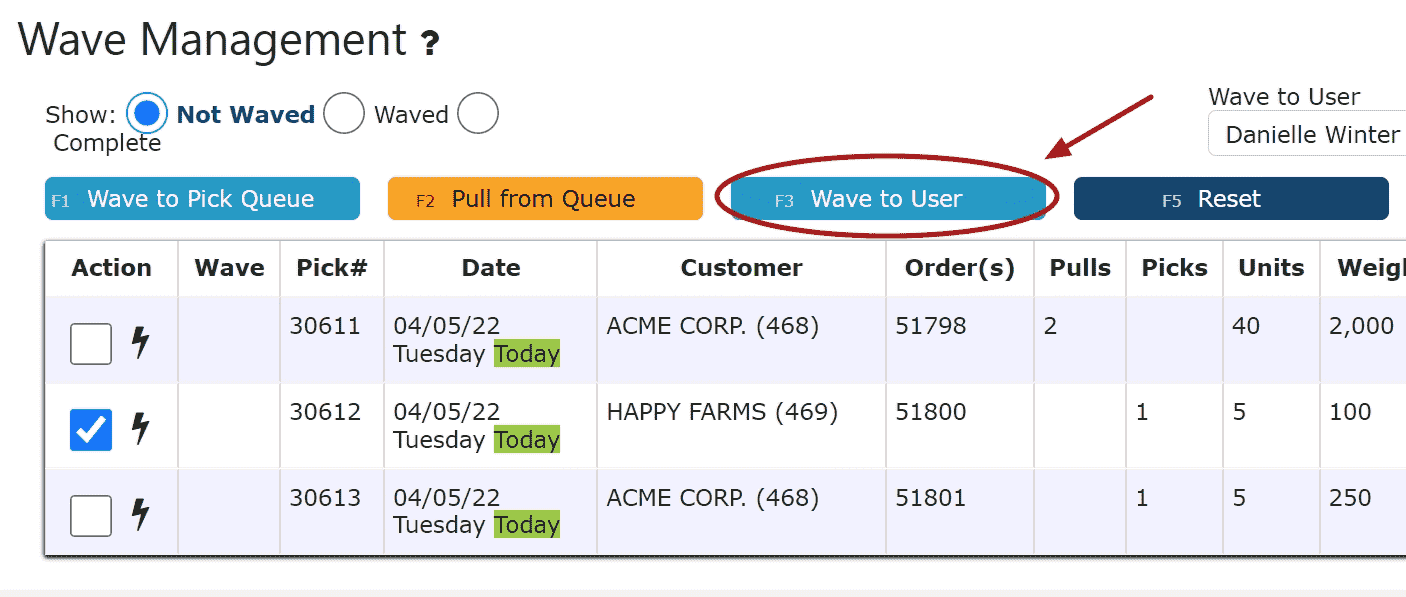
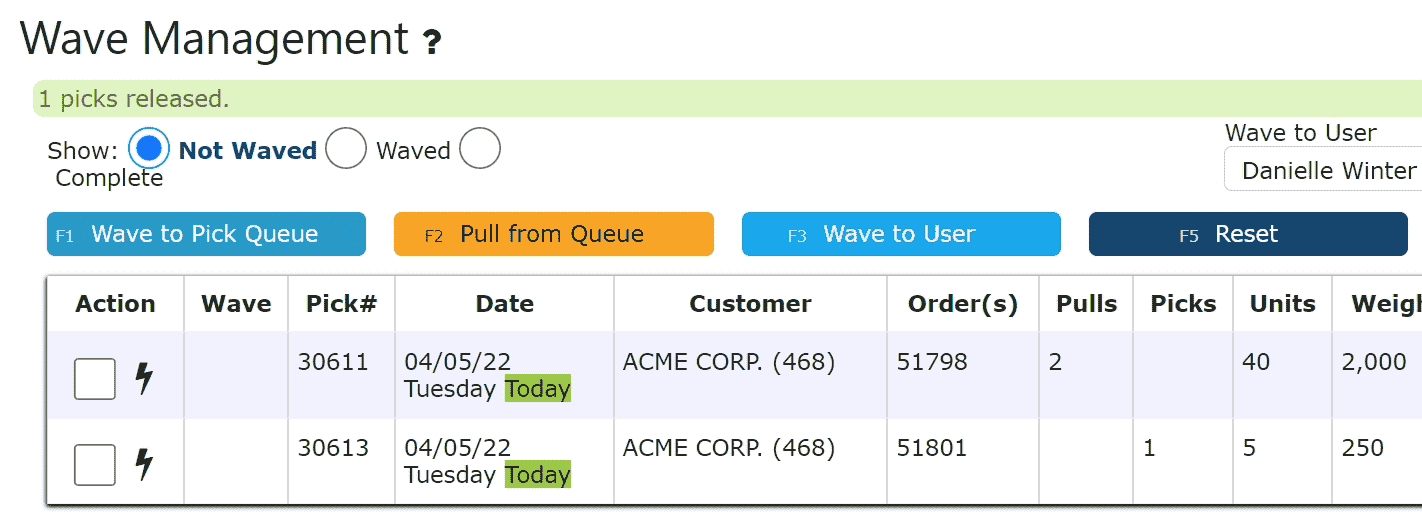
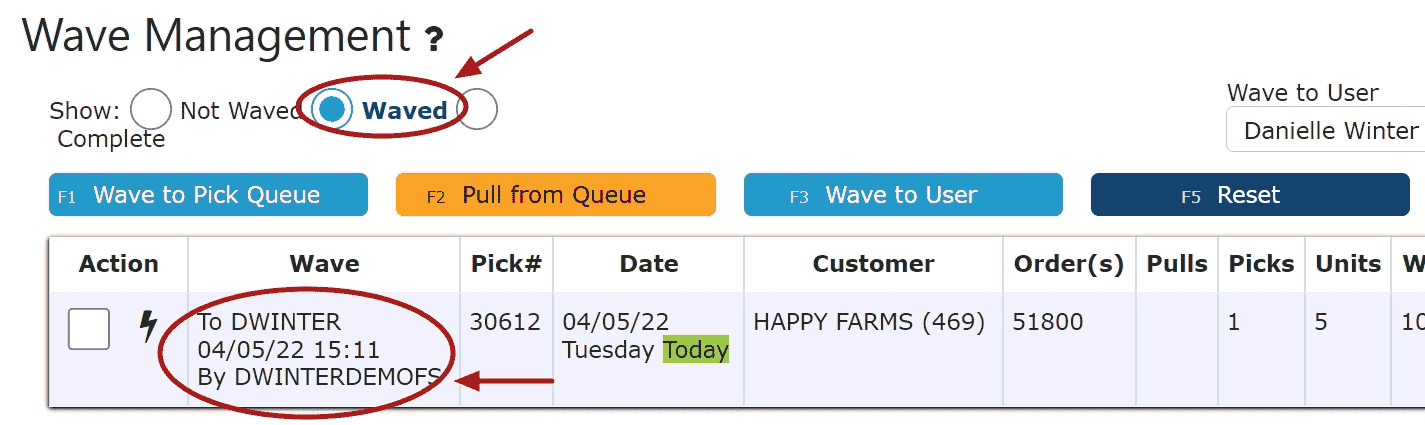
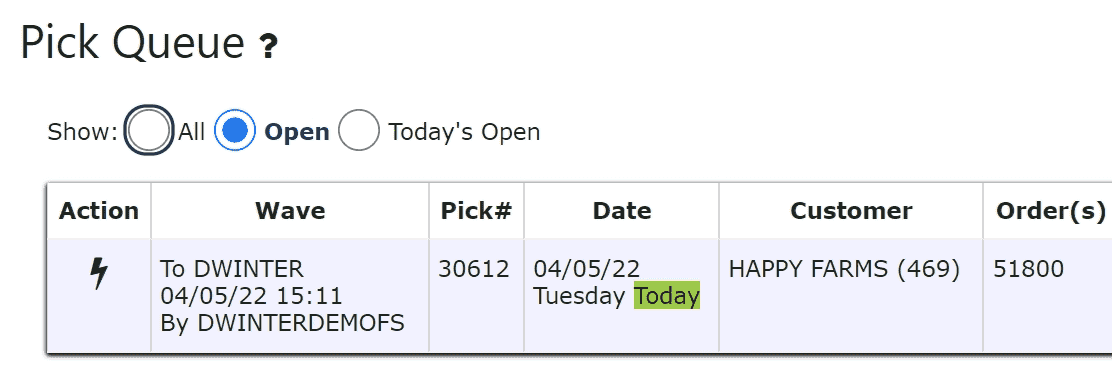
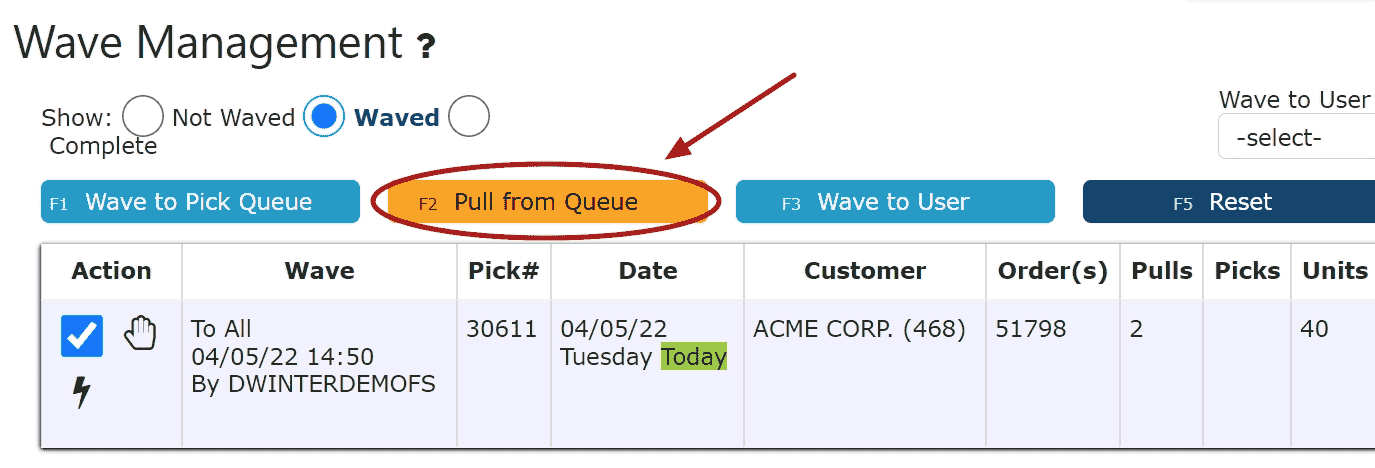
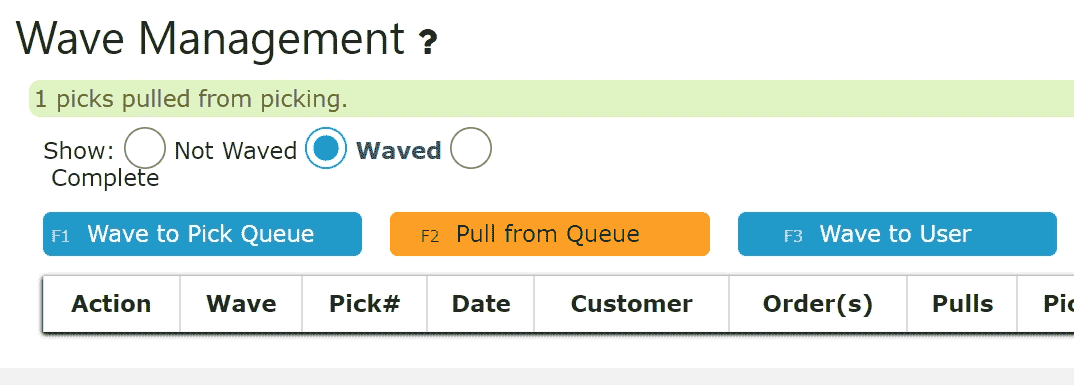
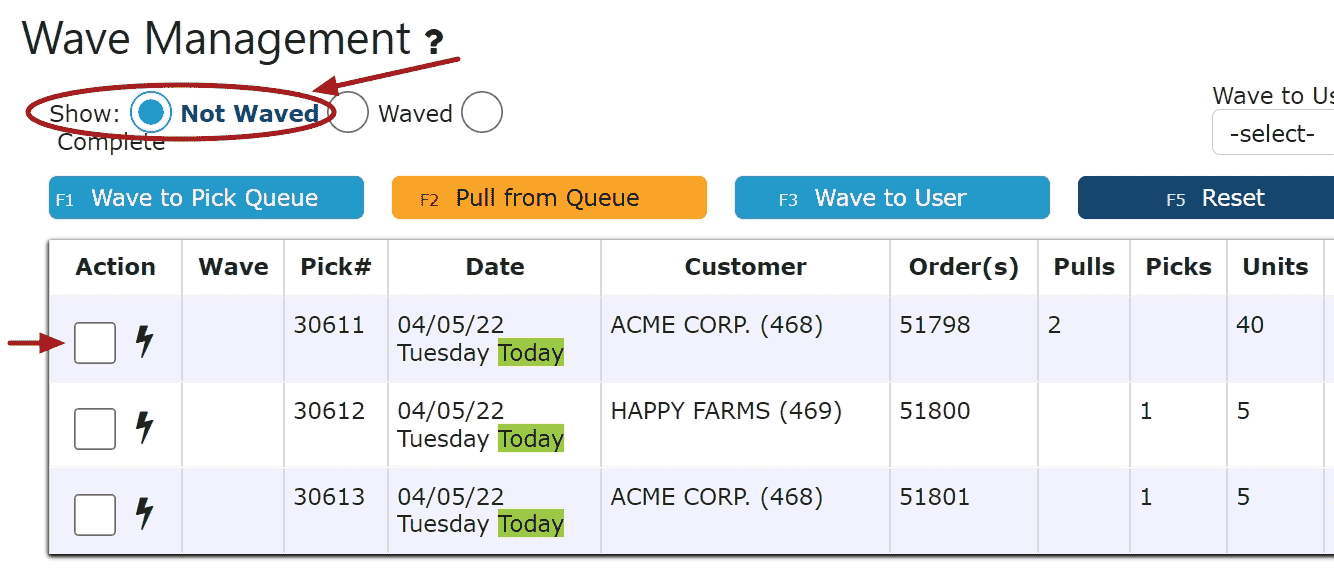
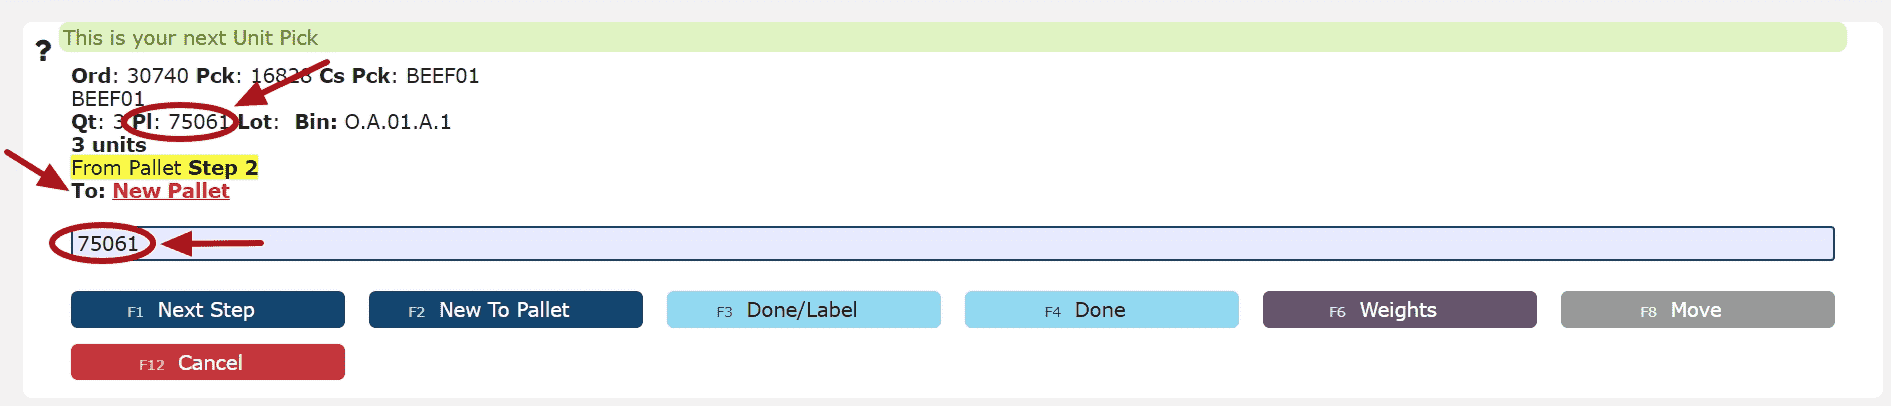
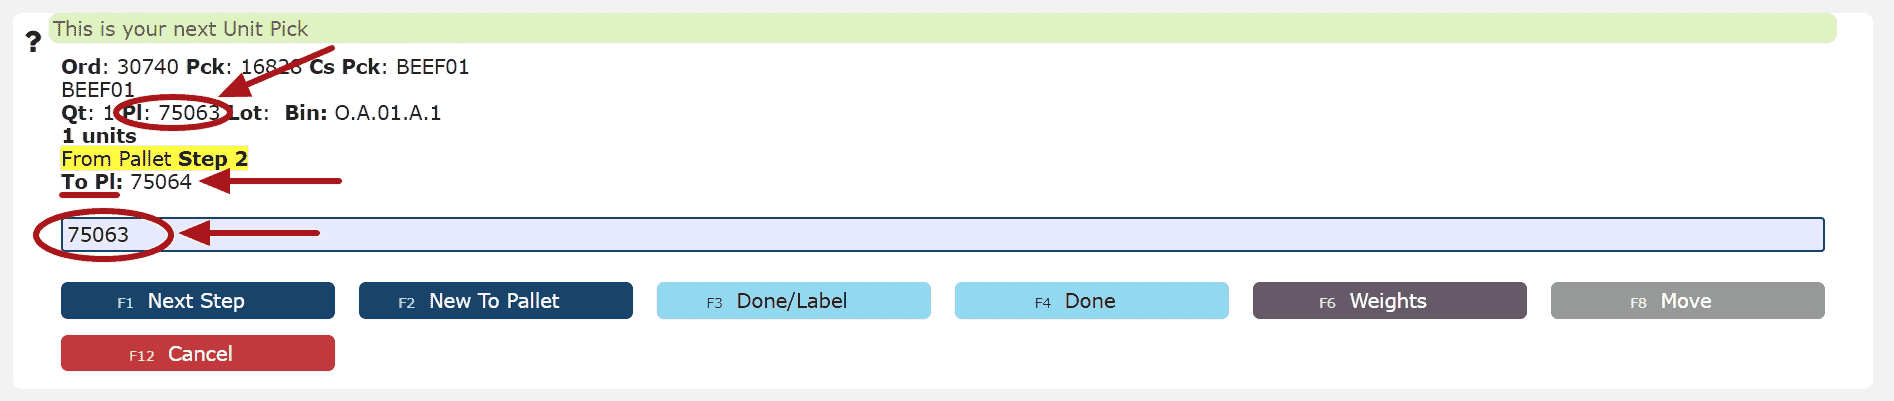
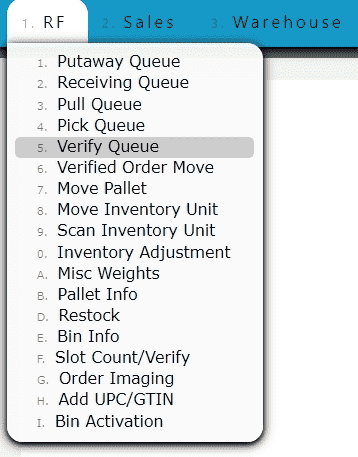
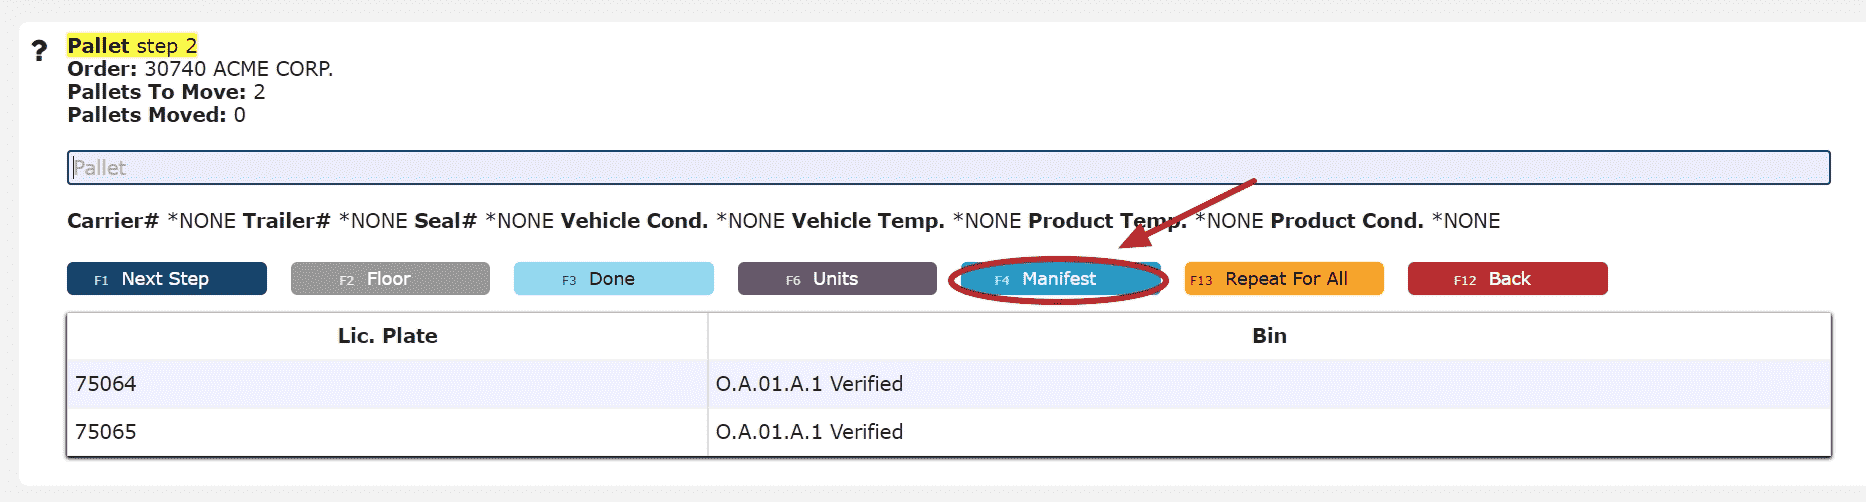
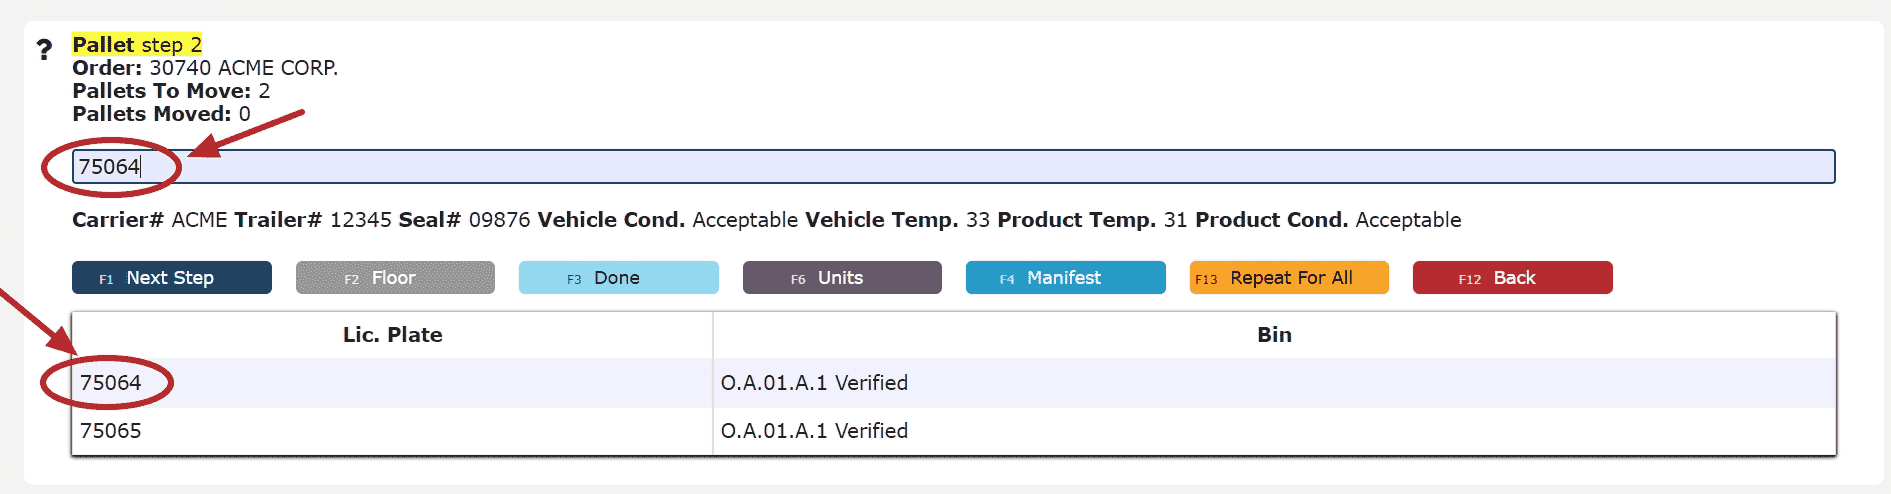
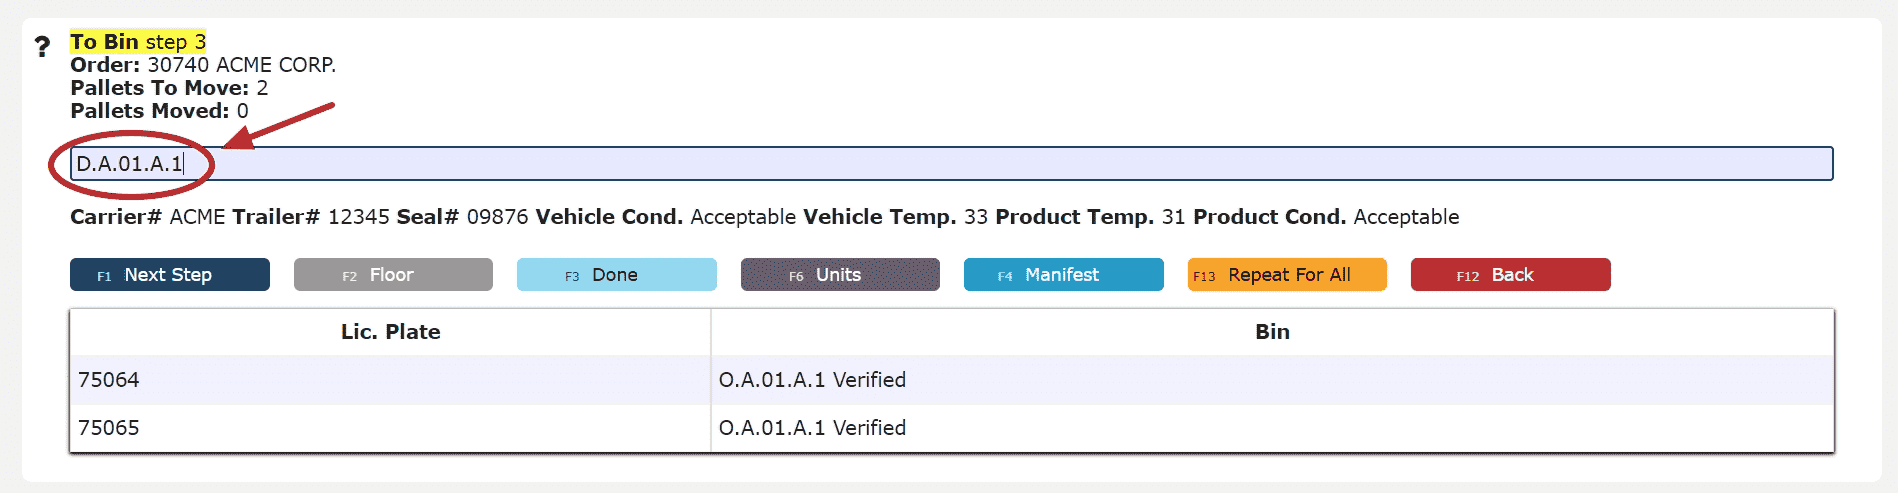
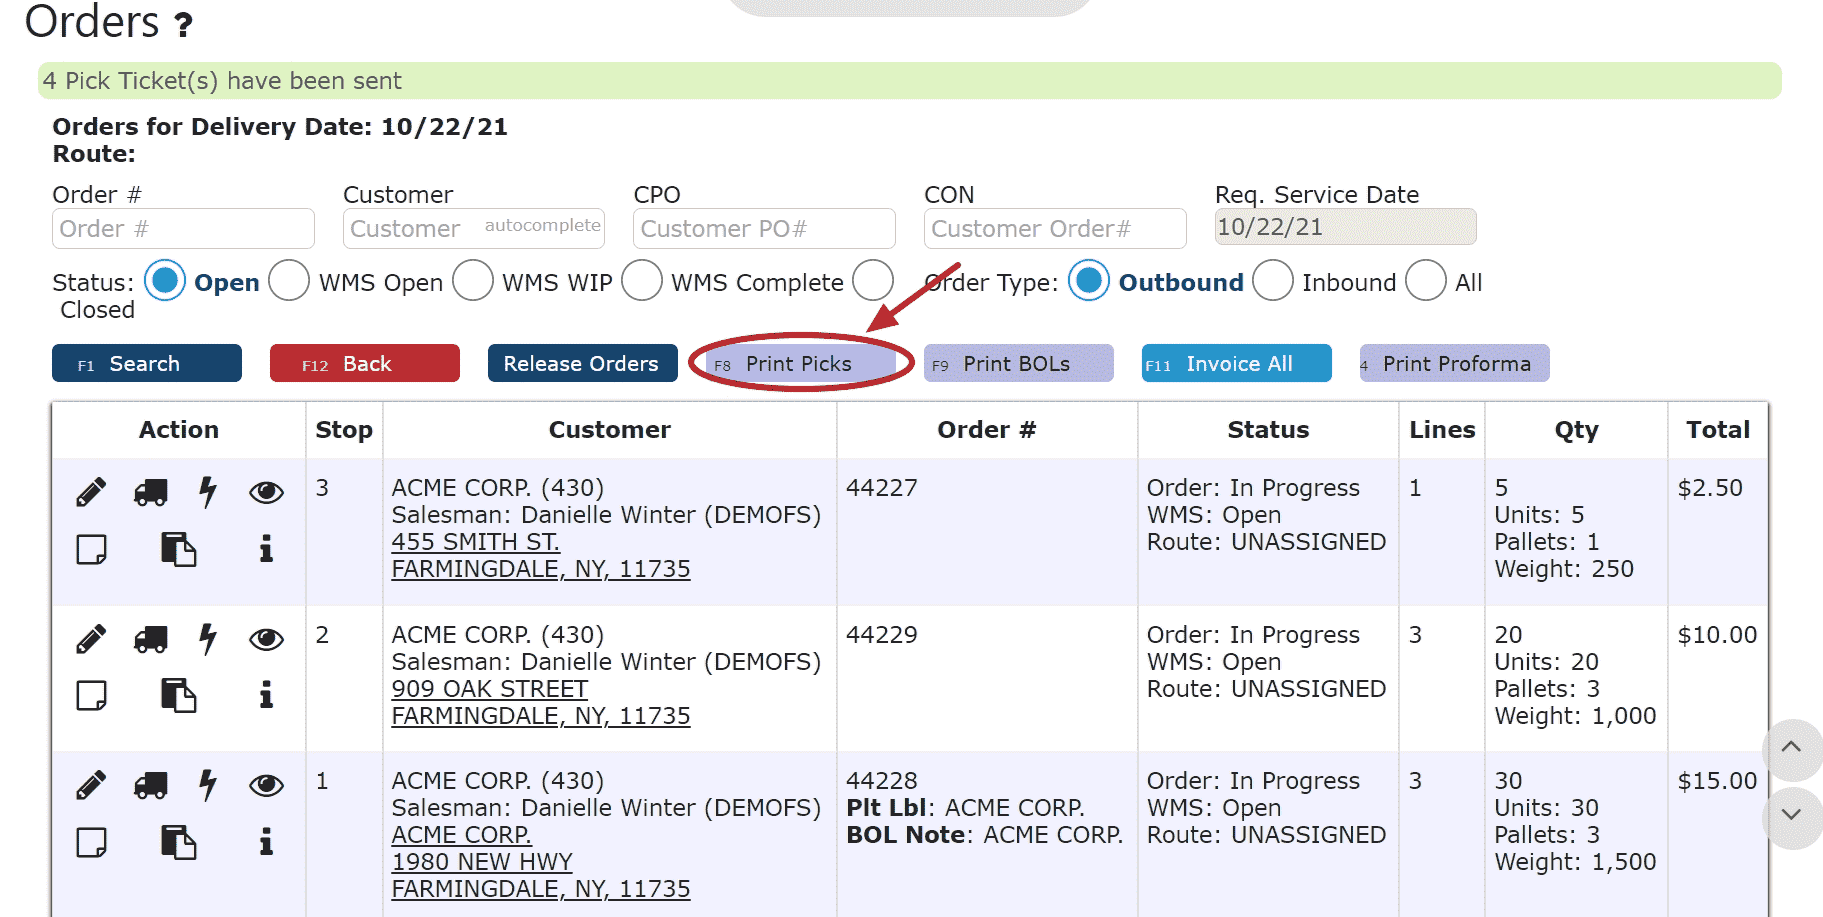
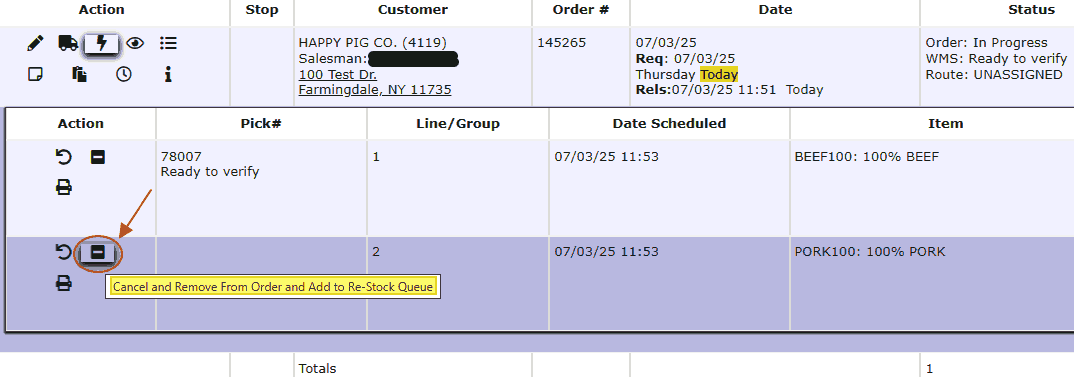
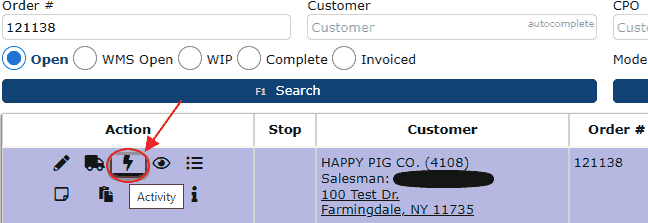
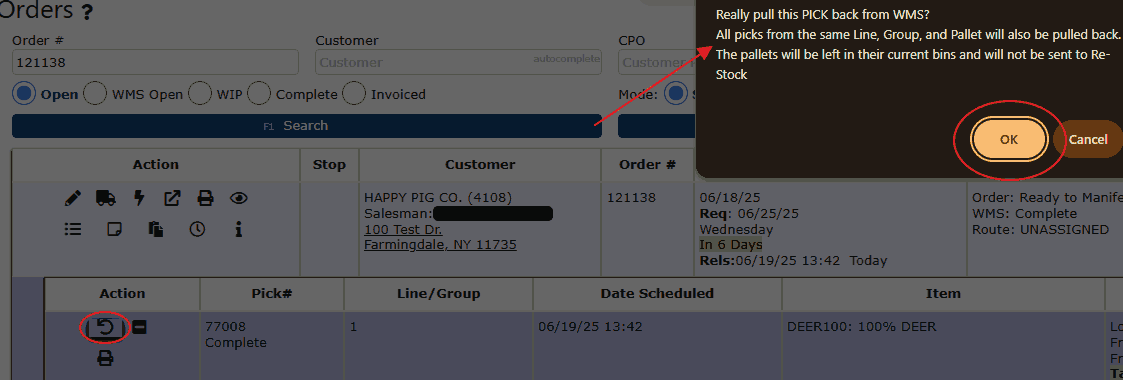
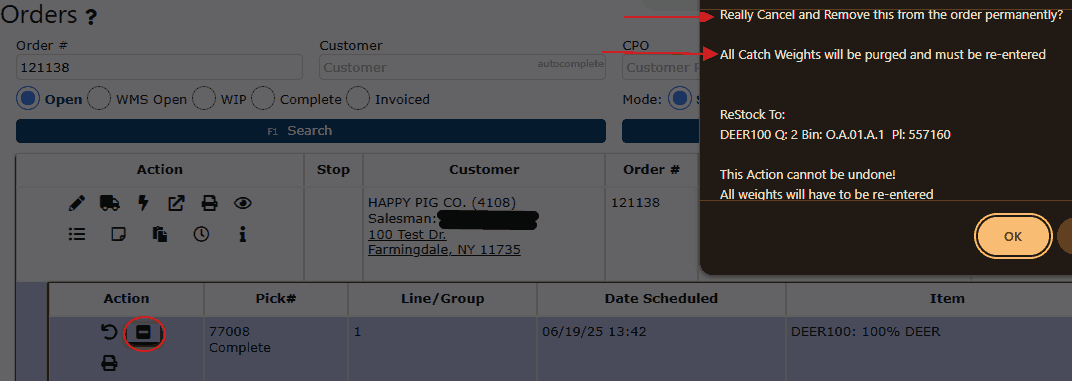
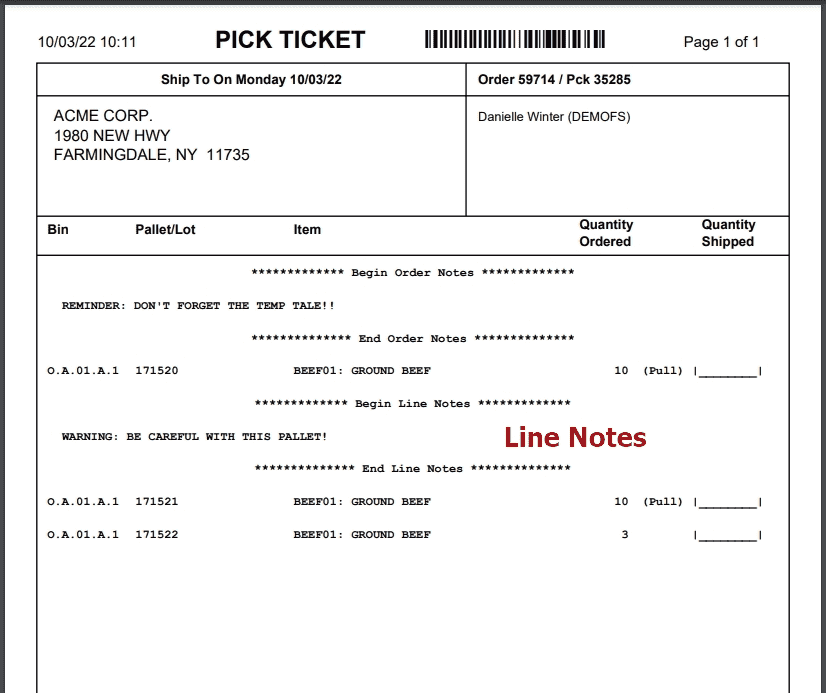
2. Picking - Pickers are guided by system logic to retrieve items efficiently using specified sequences (e.g., bin proximity or SKU grouping).
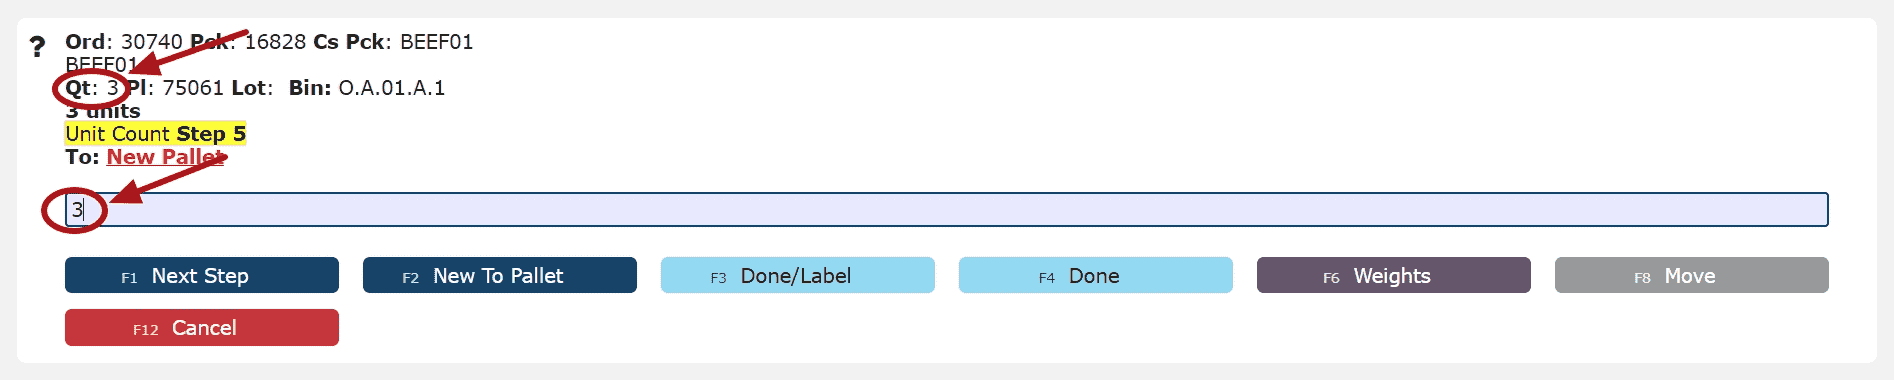
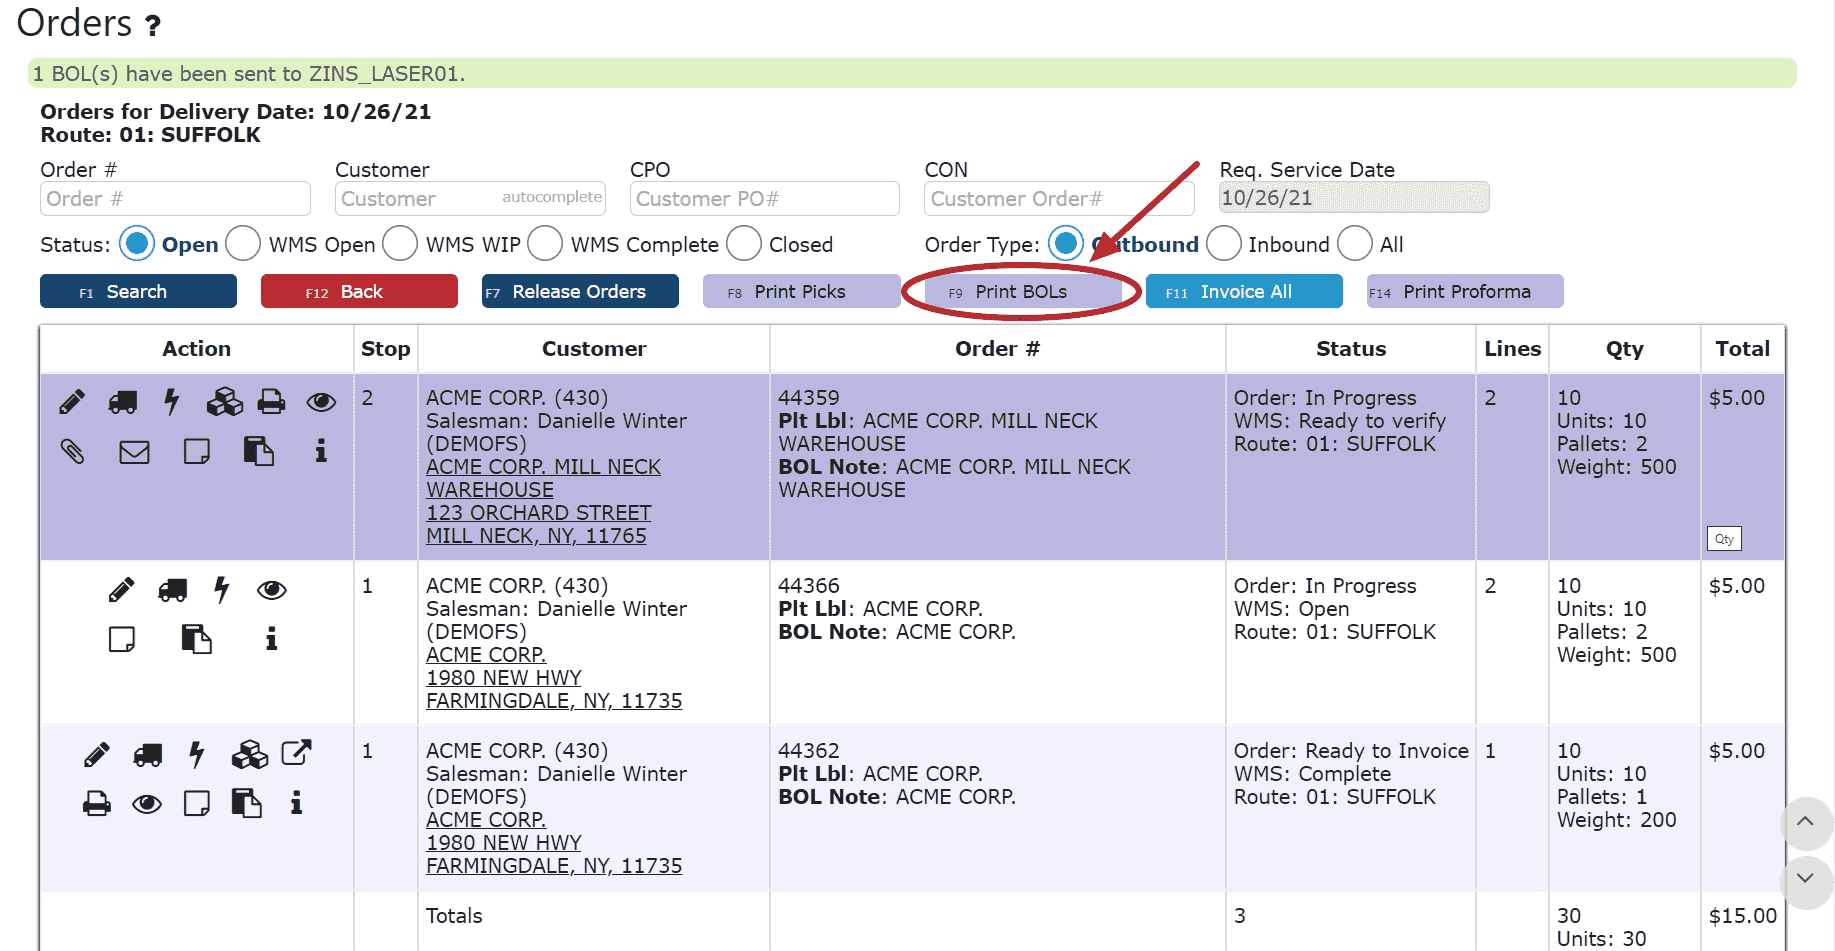
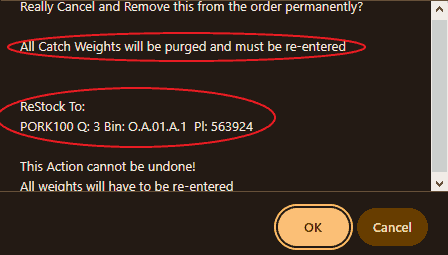
3. Verifying - After picking, items are confirmed against the order—ensuring accuracy before shipping.
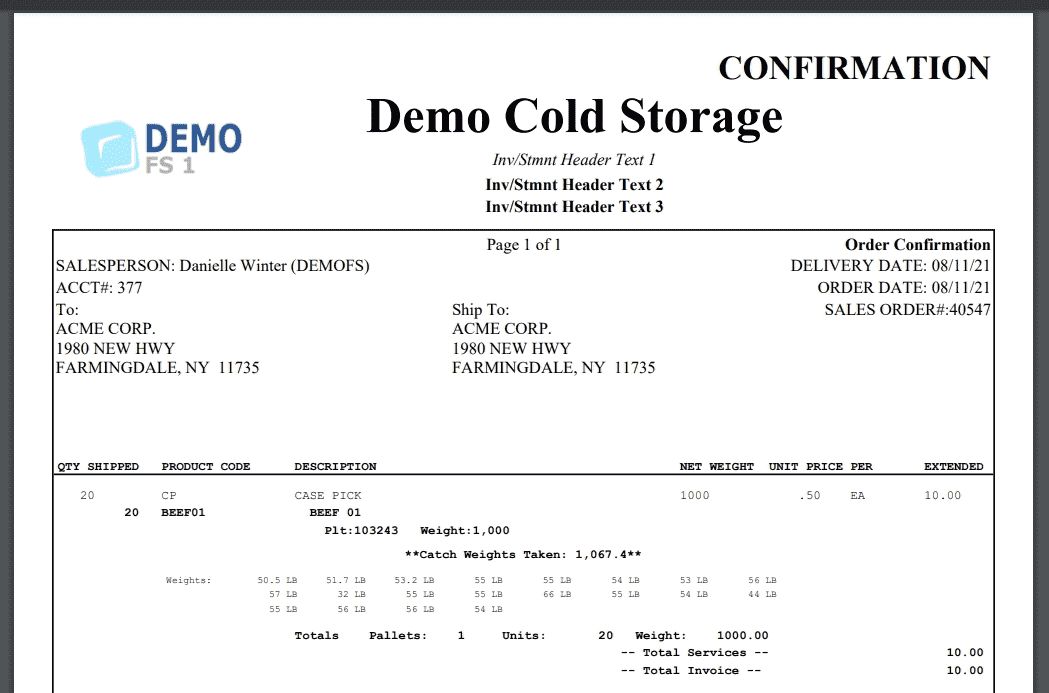
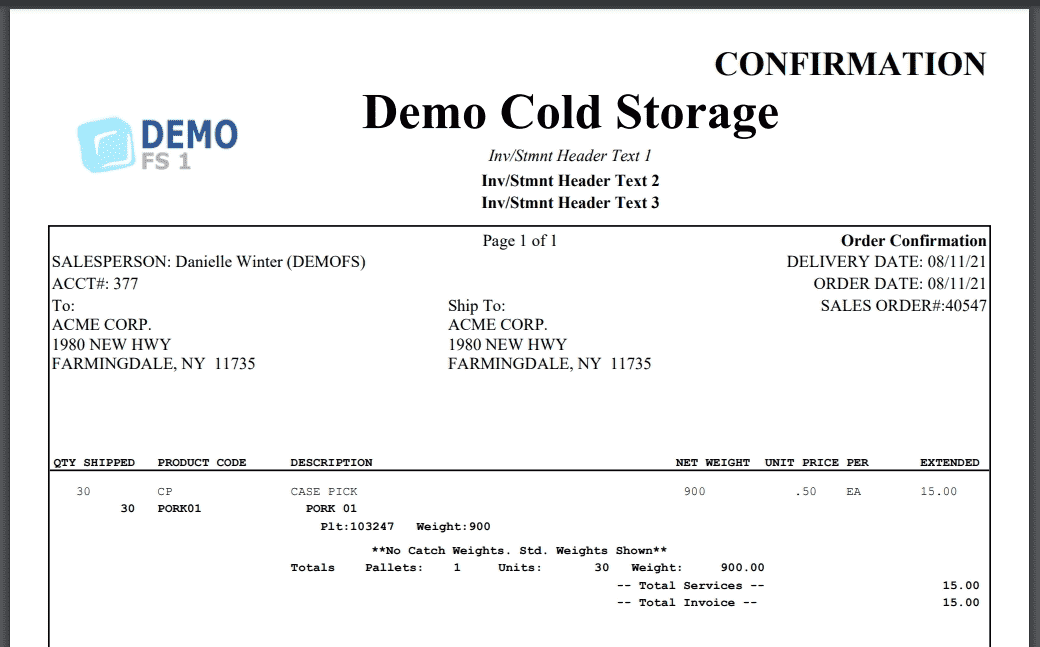
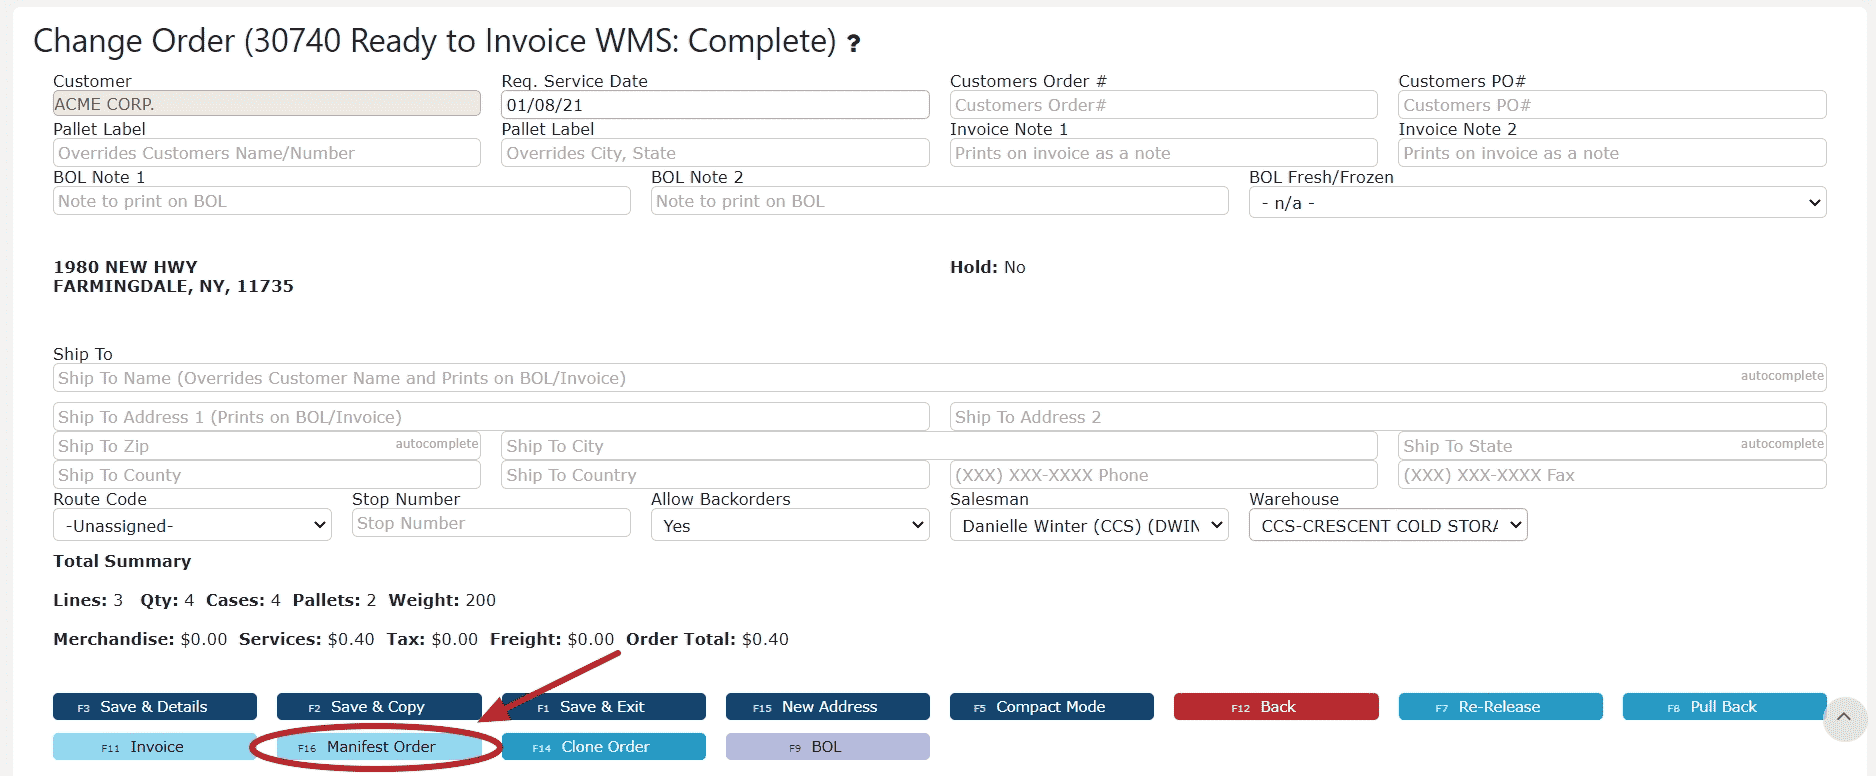
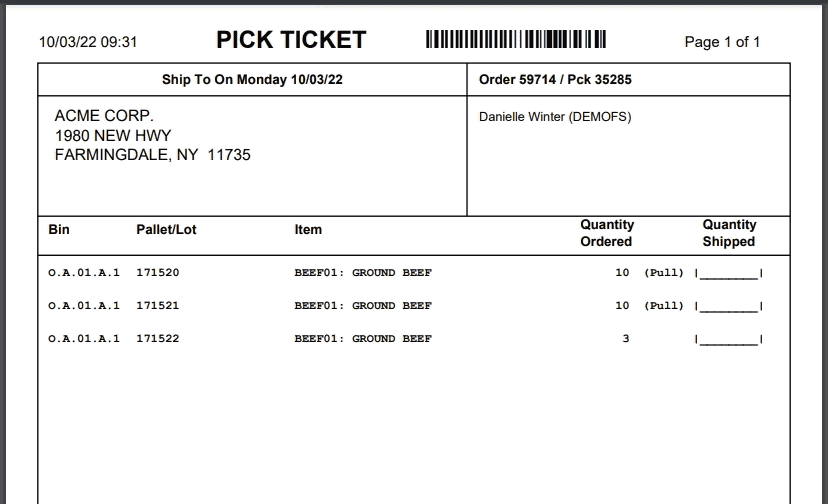
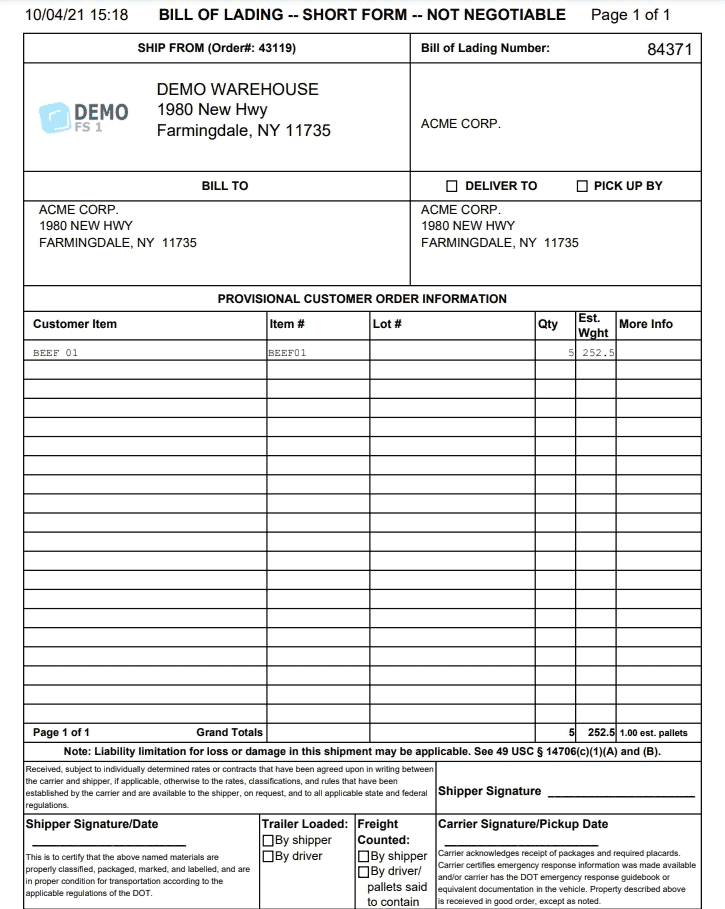
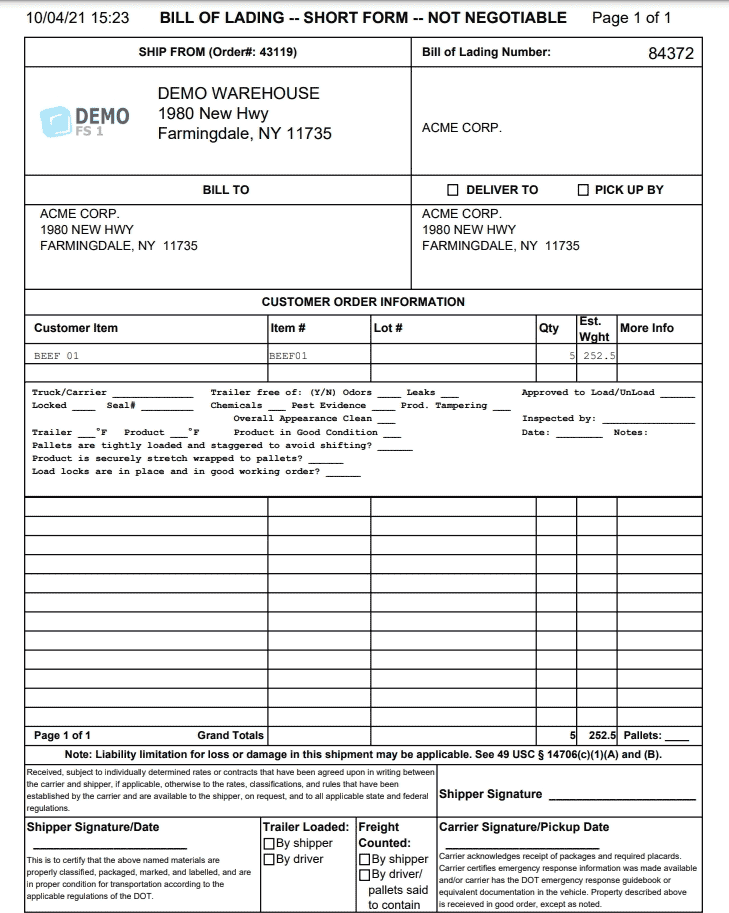
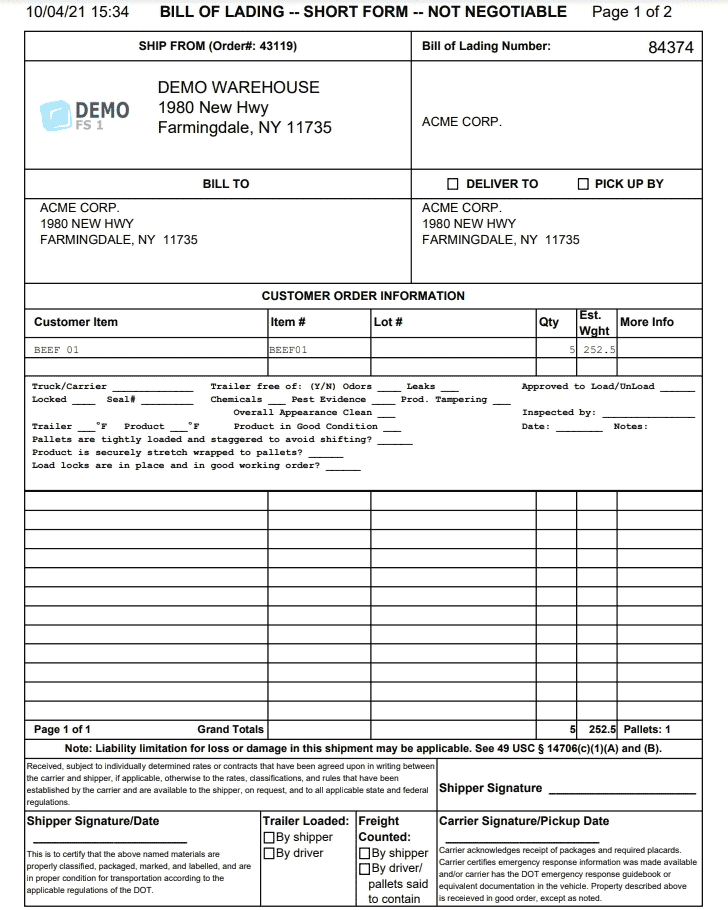
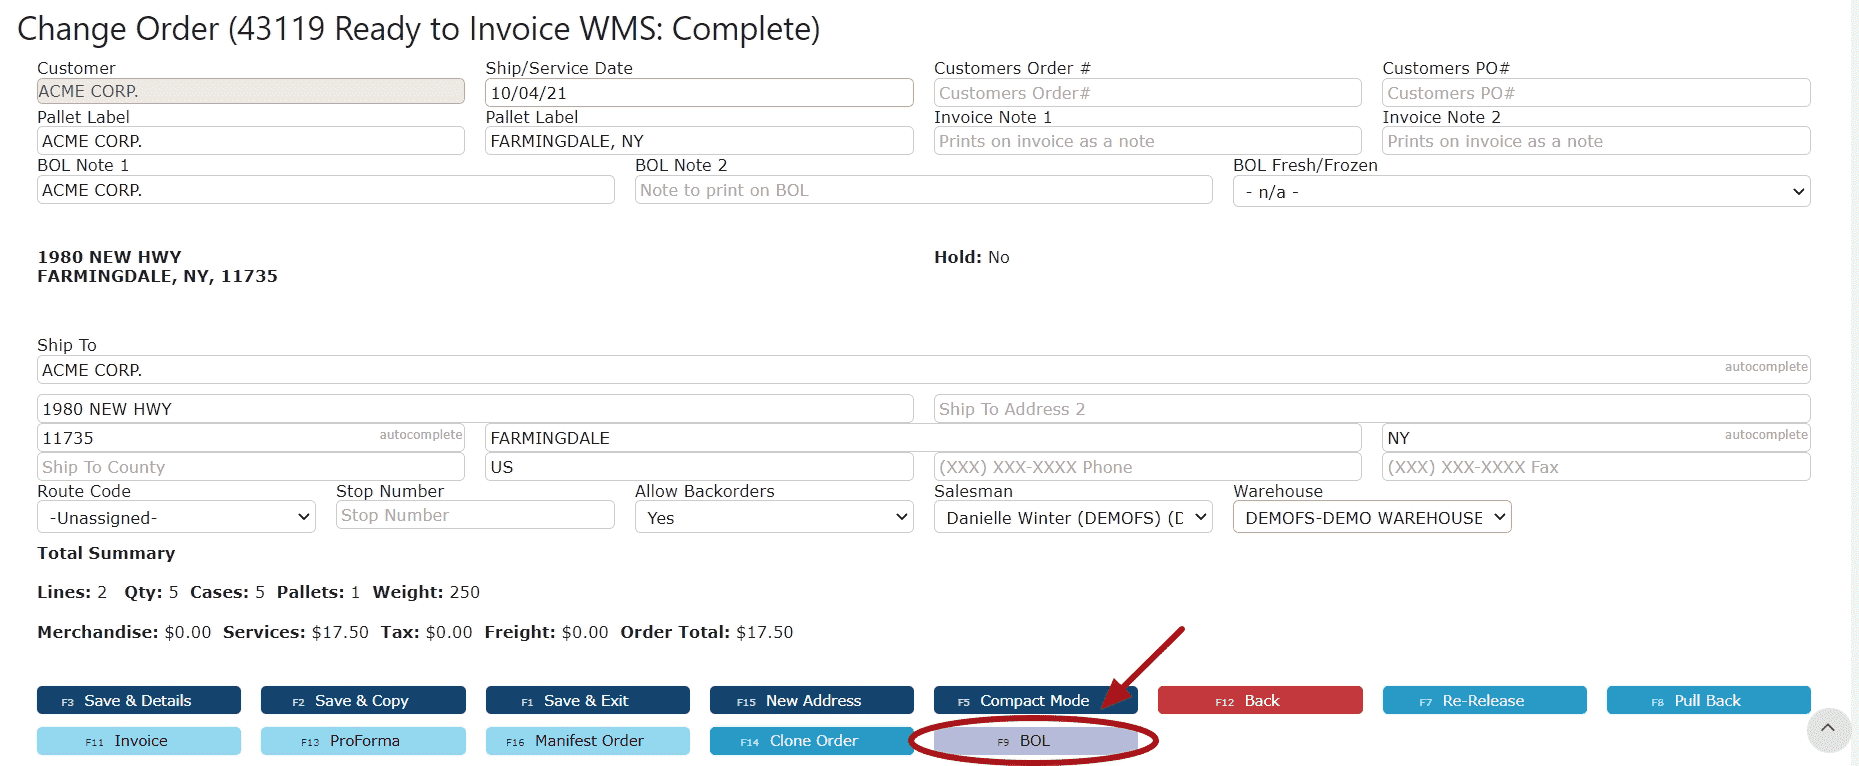
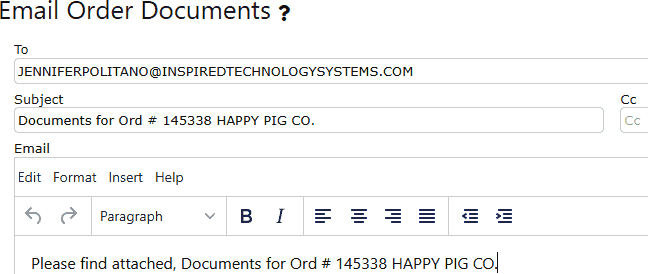
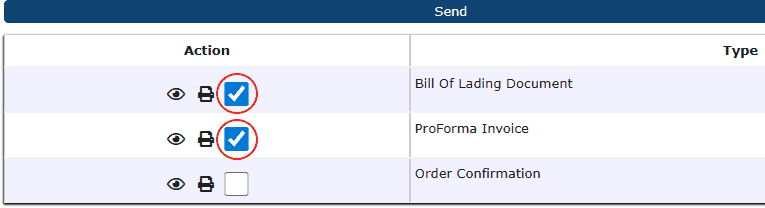
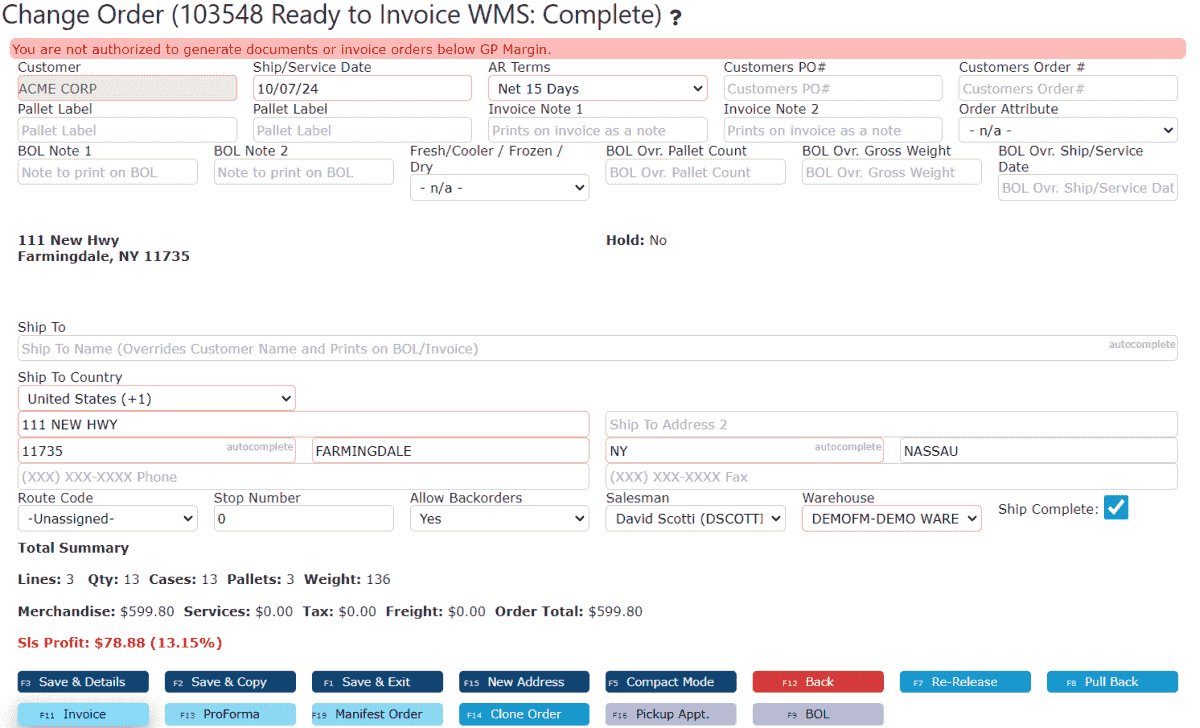
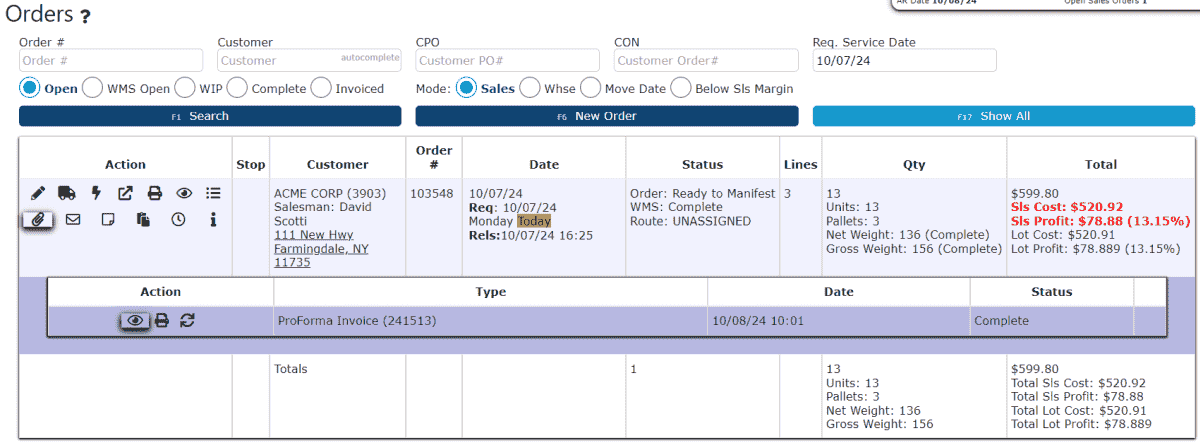
4. Manifesting - Orders are virtually “loaded,” generating picking and shipping documentation (BOLs, manifests, etc.) for visibility and tracking.
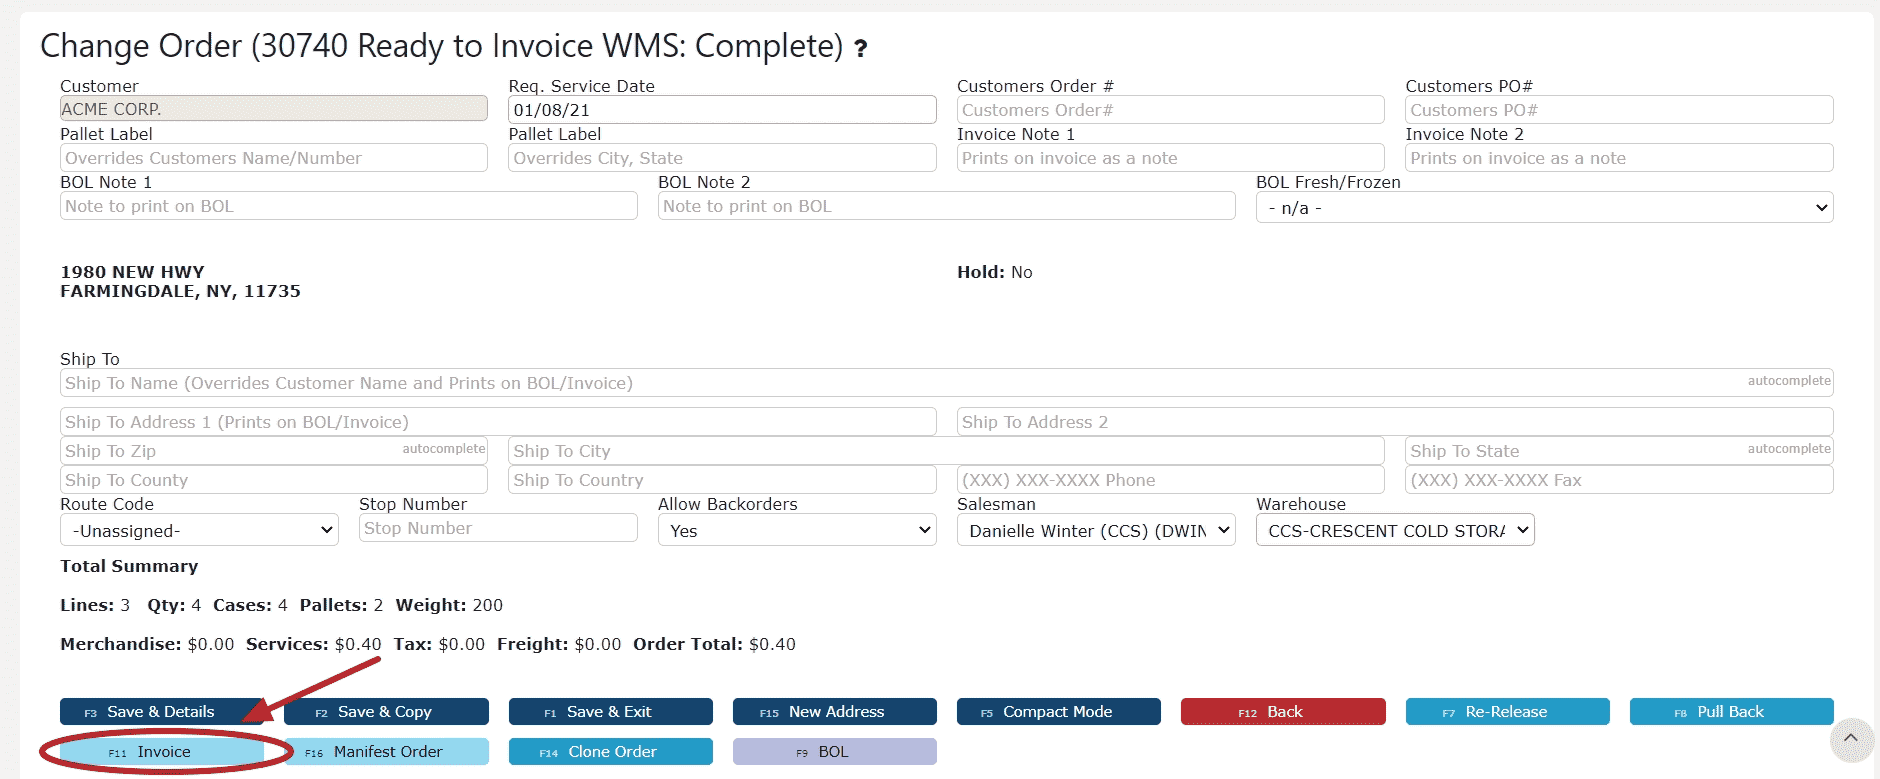
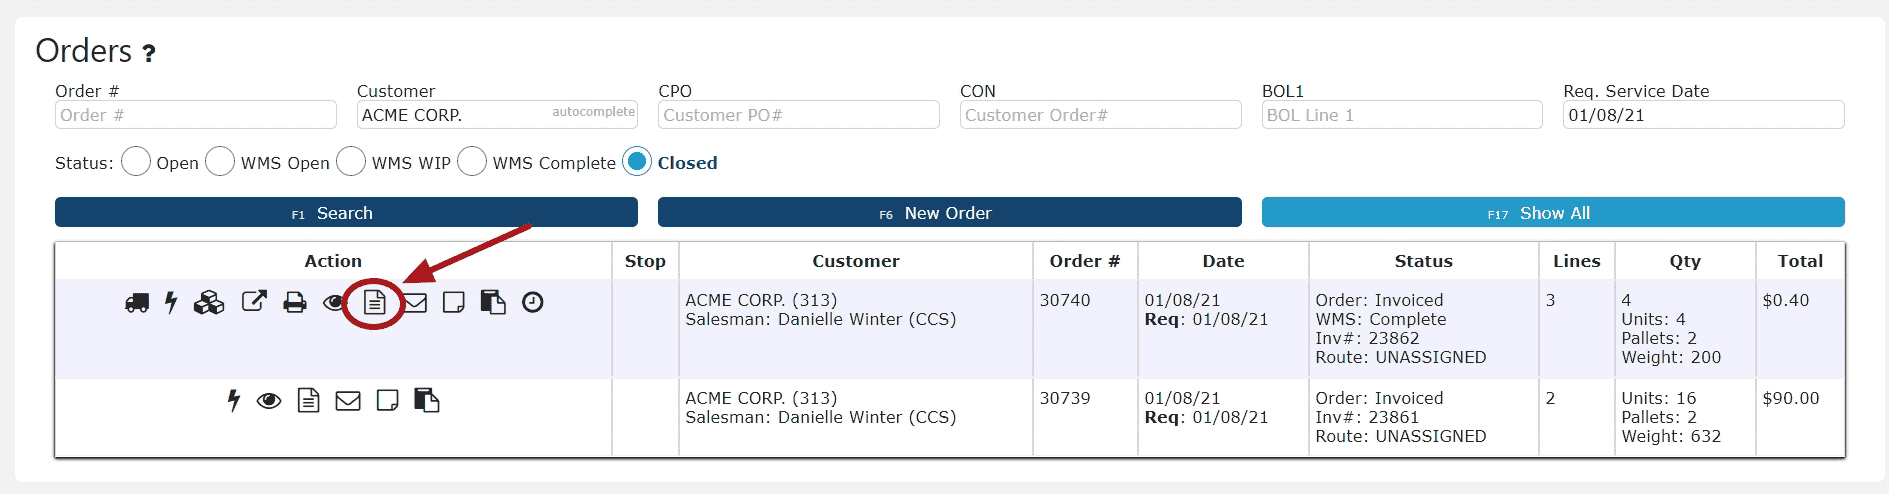
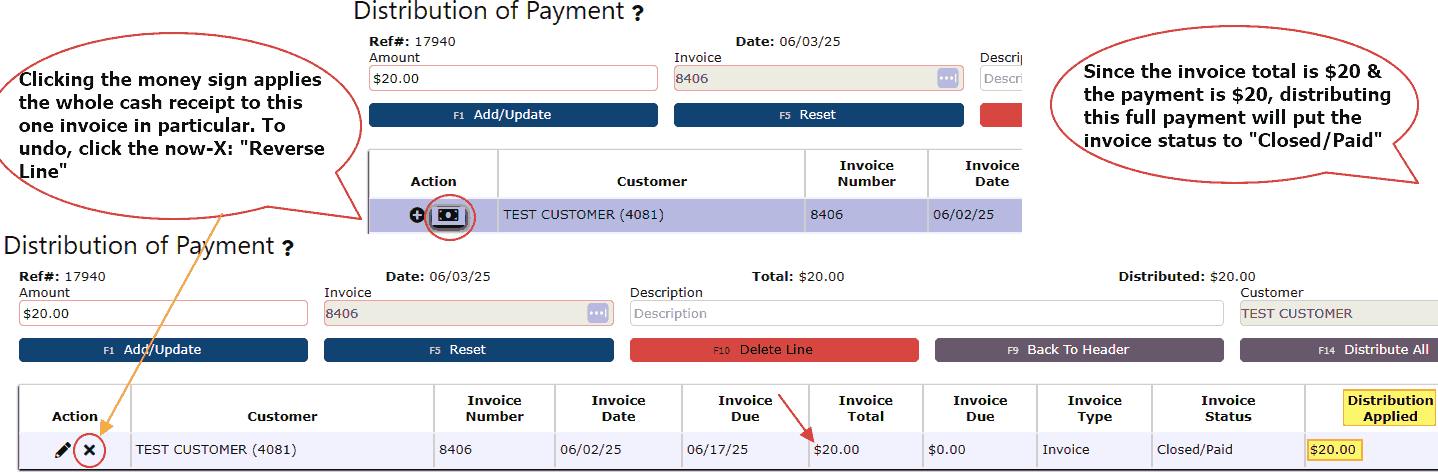
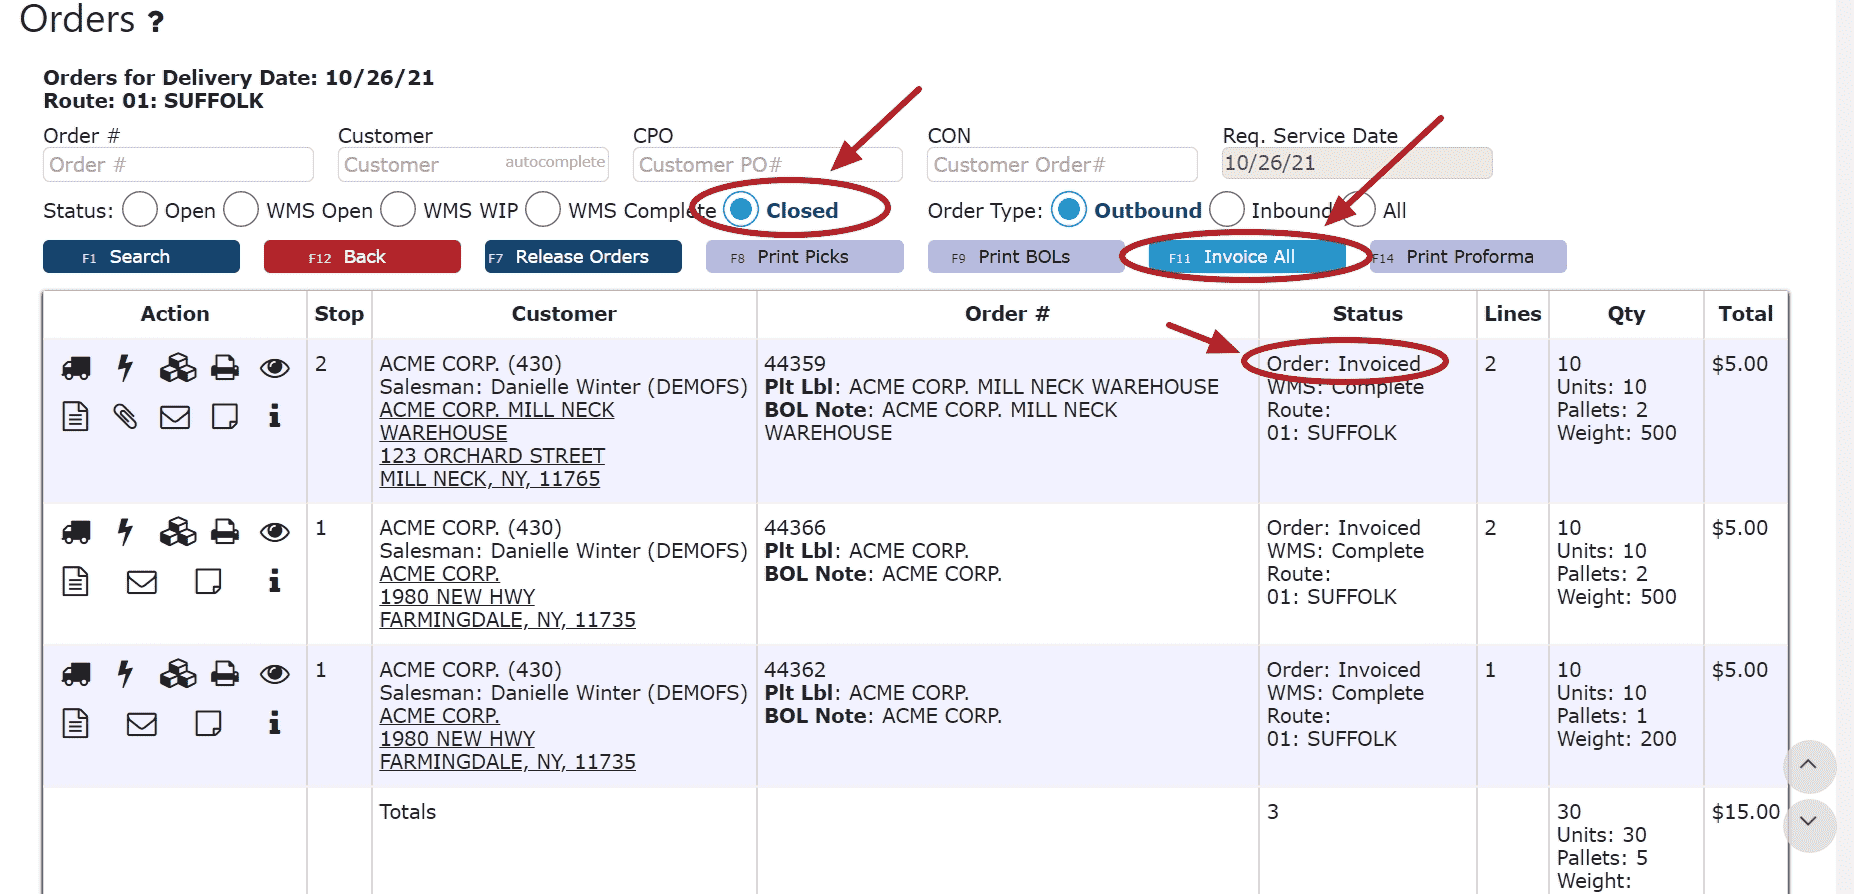
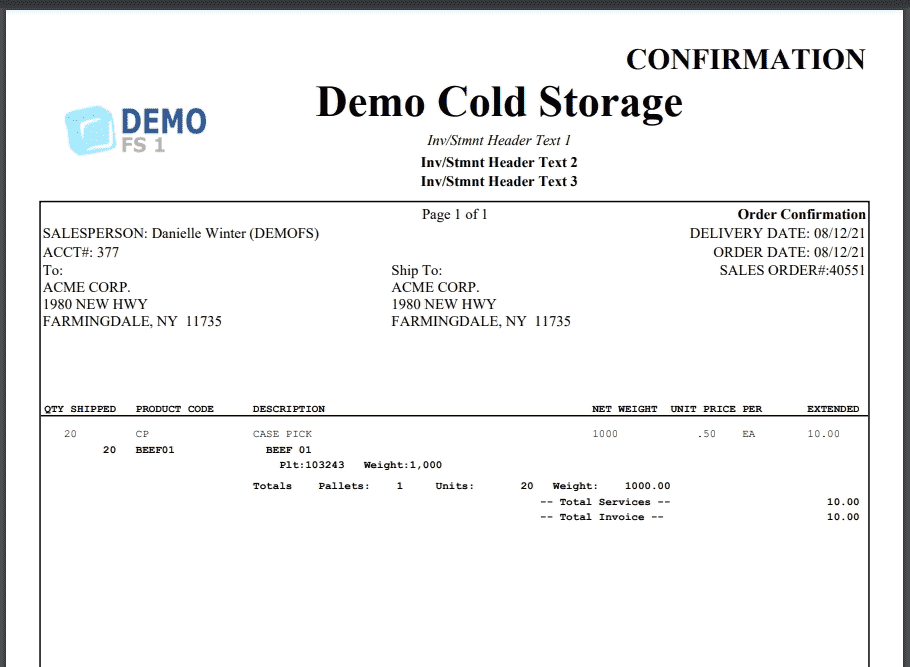
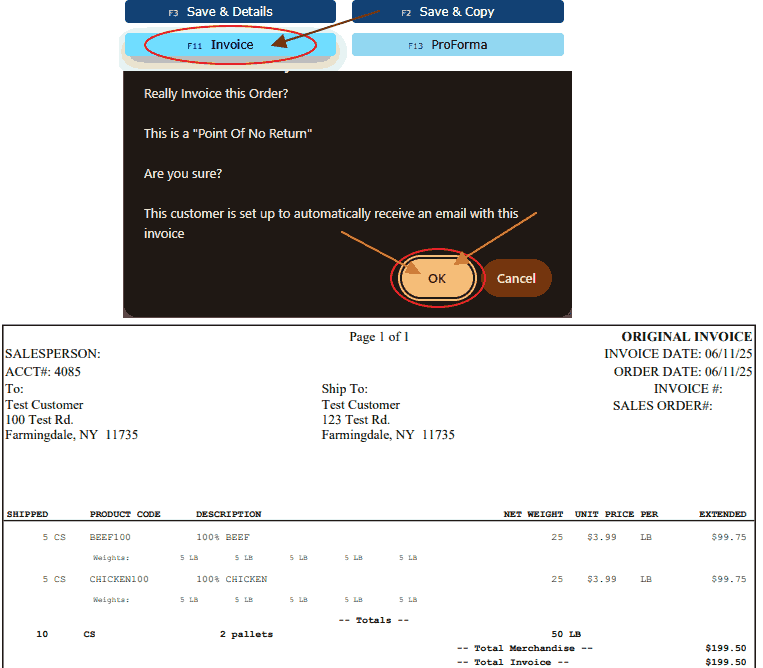
5. Invoicing - Once confirmed, the order moves to invoice creation—factoring in case or pallet pick charges and weights captured during picking.
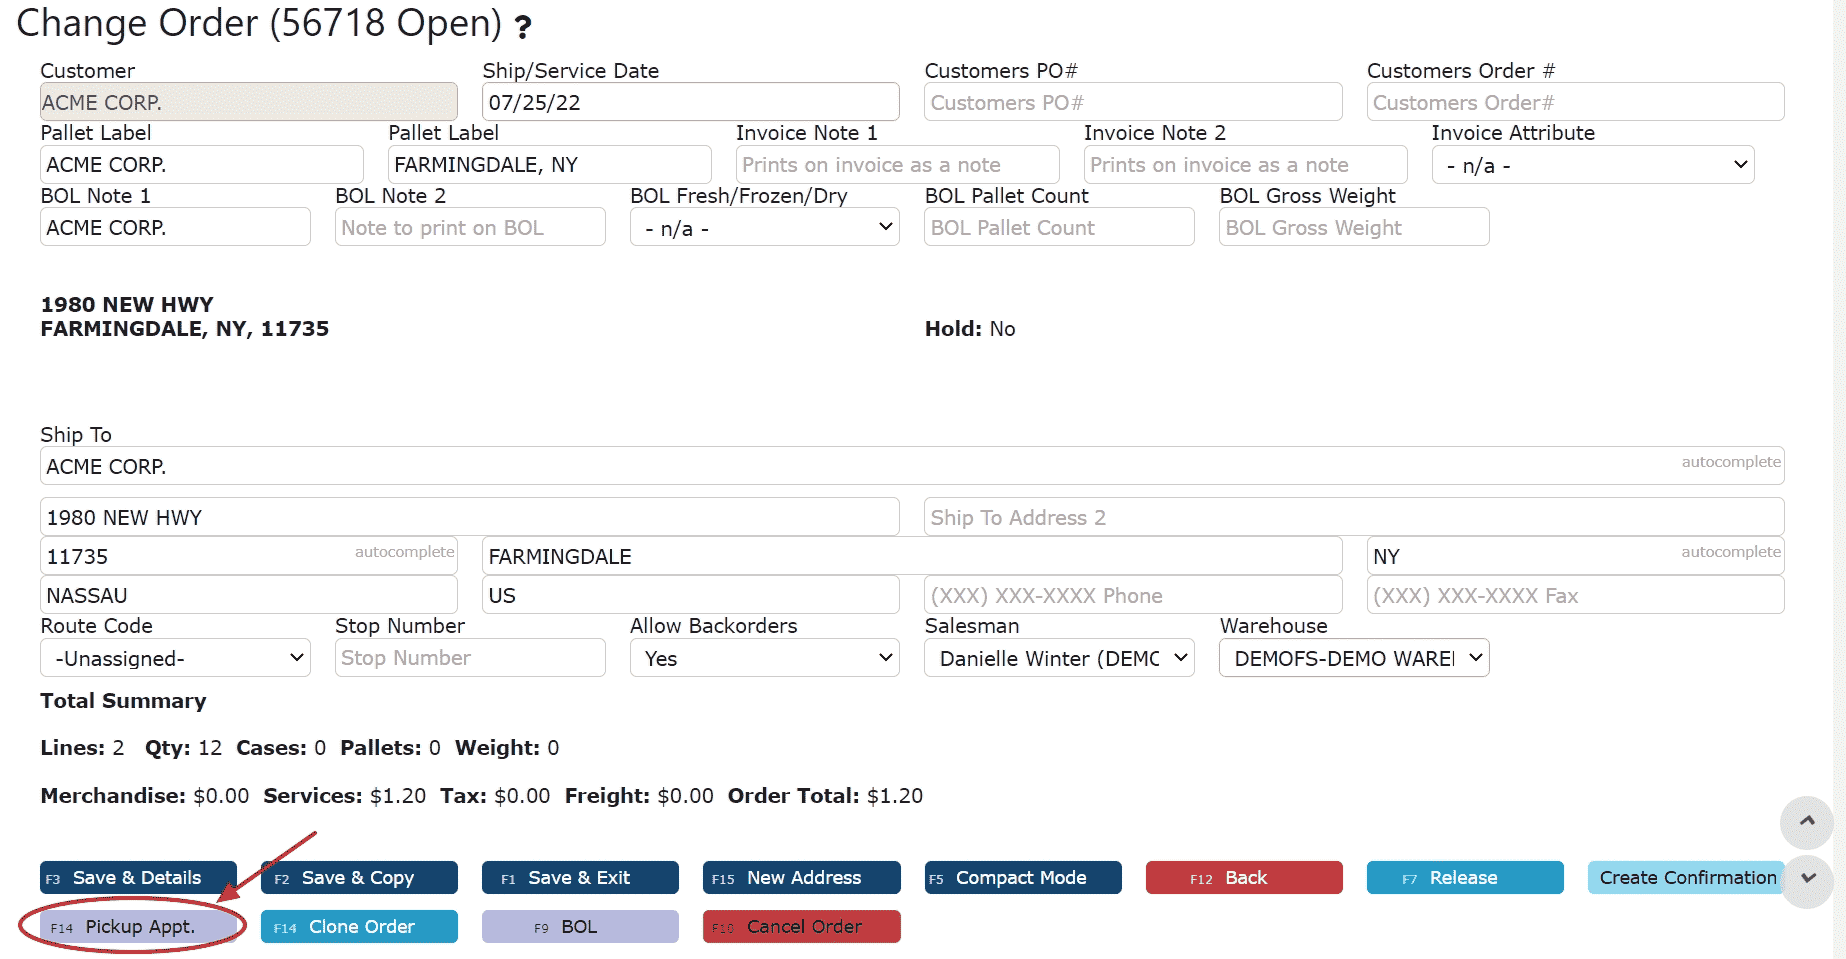
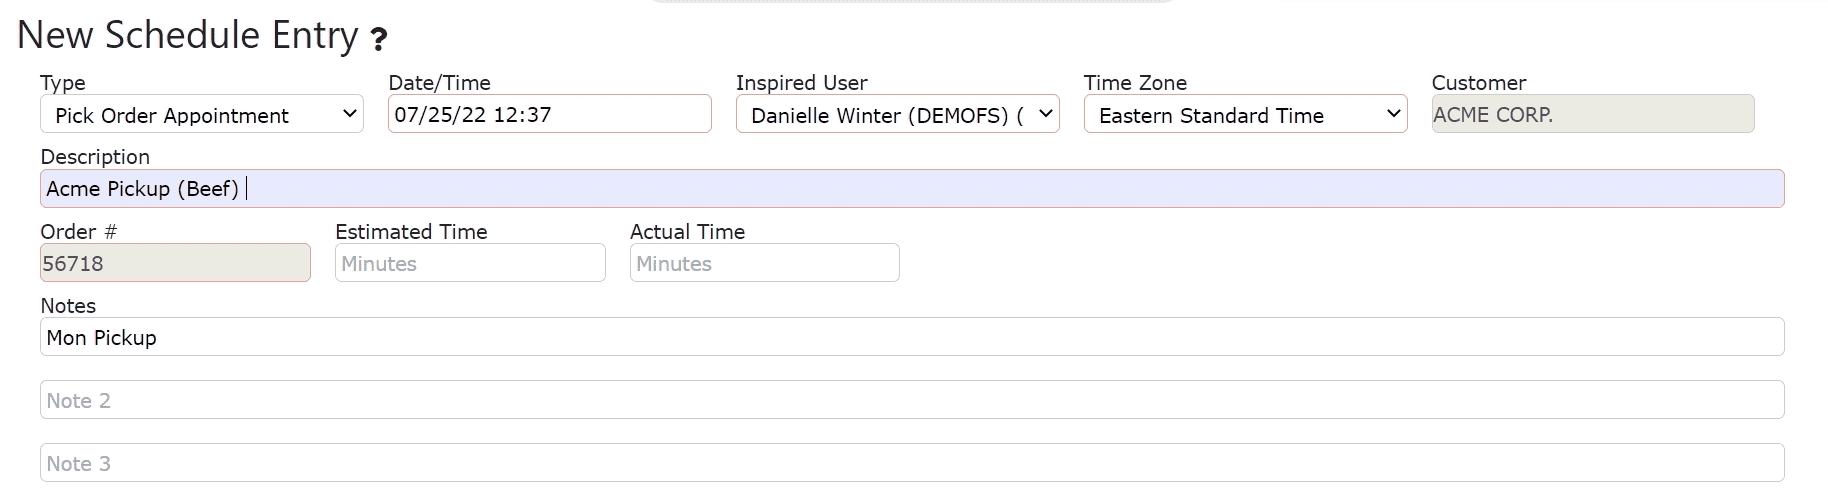
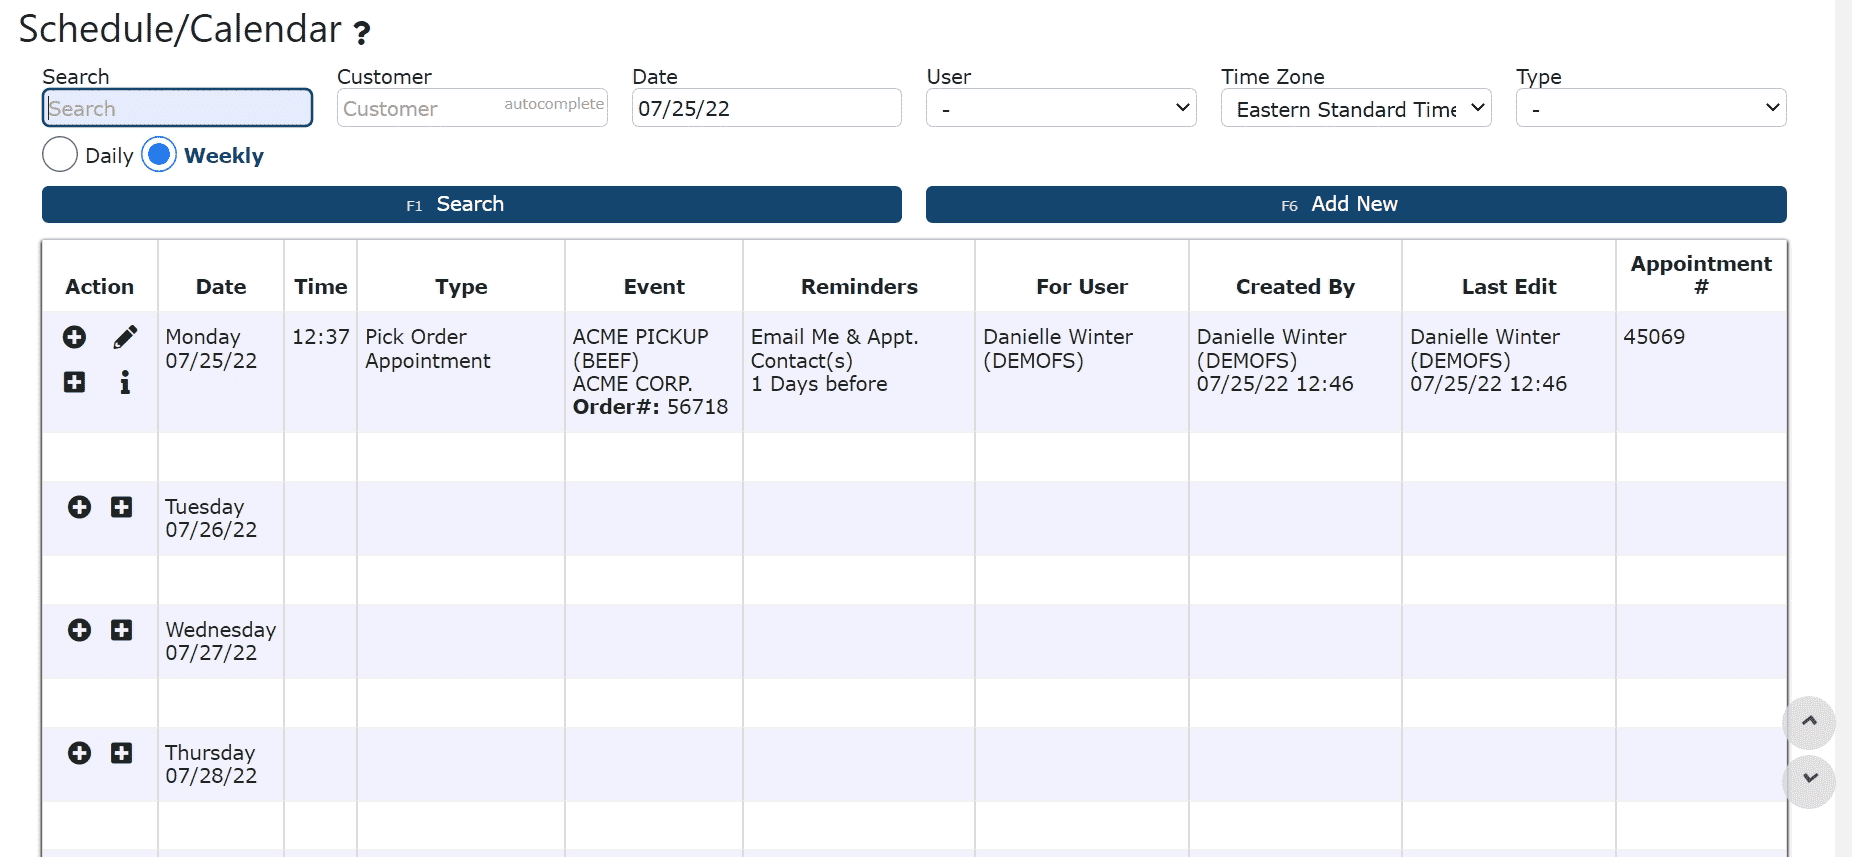
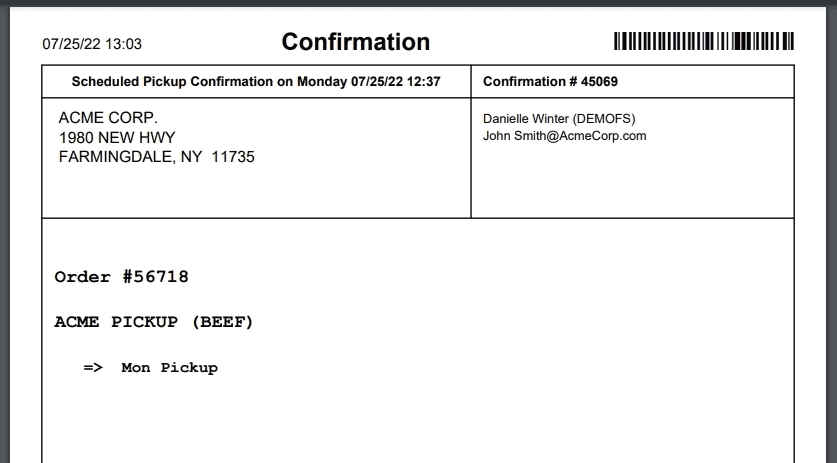
Optional Pickup Scheduling
Enhance visibility for customer pickups with appointment management:
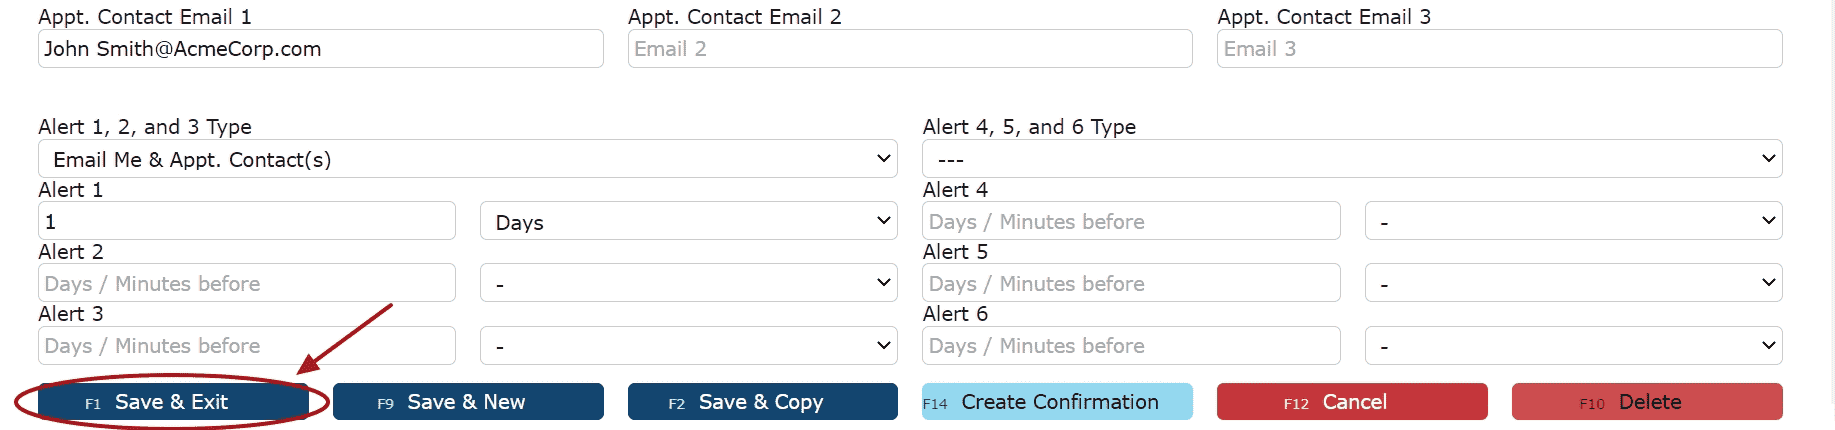
• Schedule Pickups: Add a “Pickup Appt.” on the order to import it into the schedule/calendar.
• Schedule Pickups: Add a “Pickup Appt.” on the order to import it into the schedule/calendar.
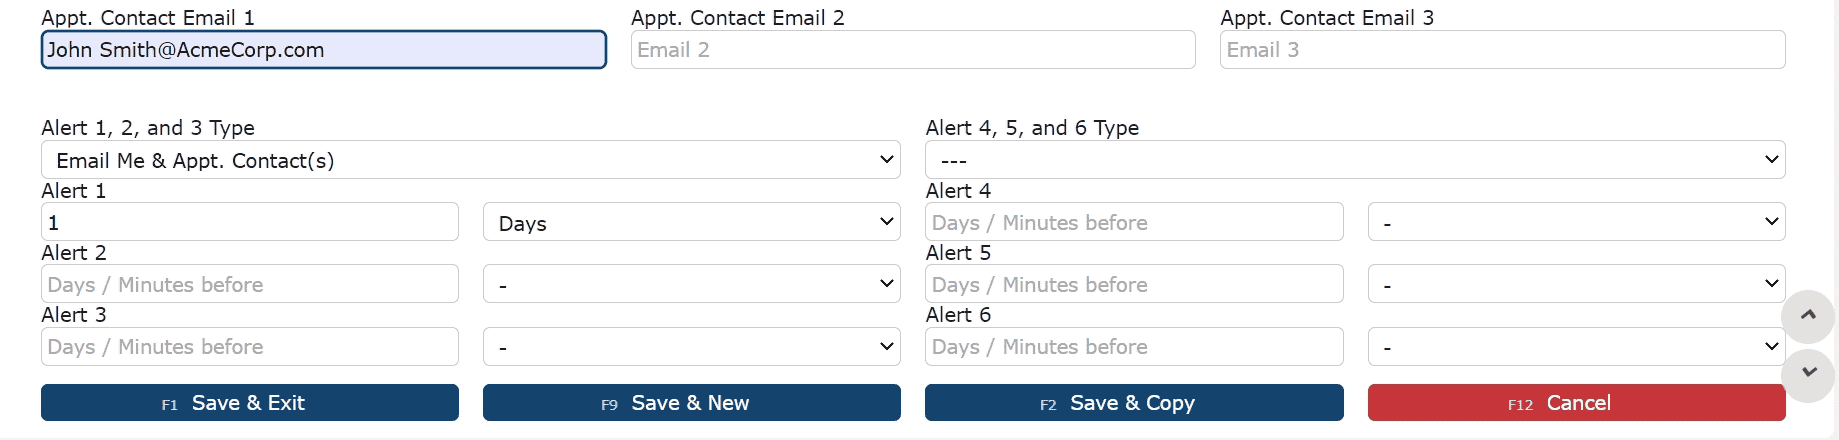
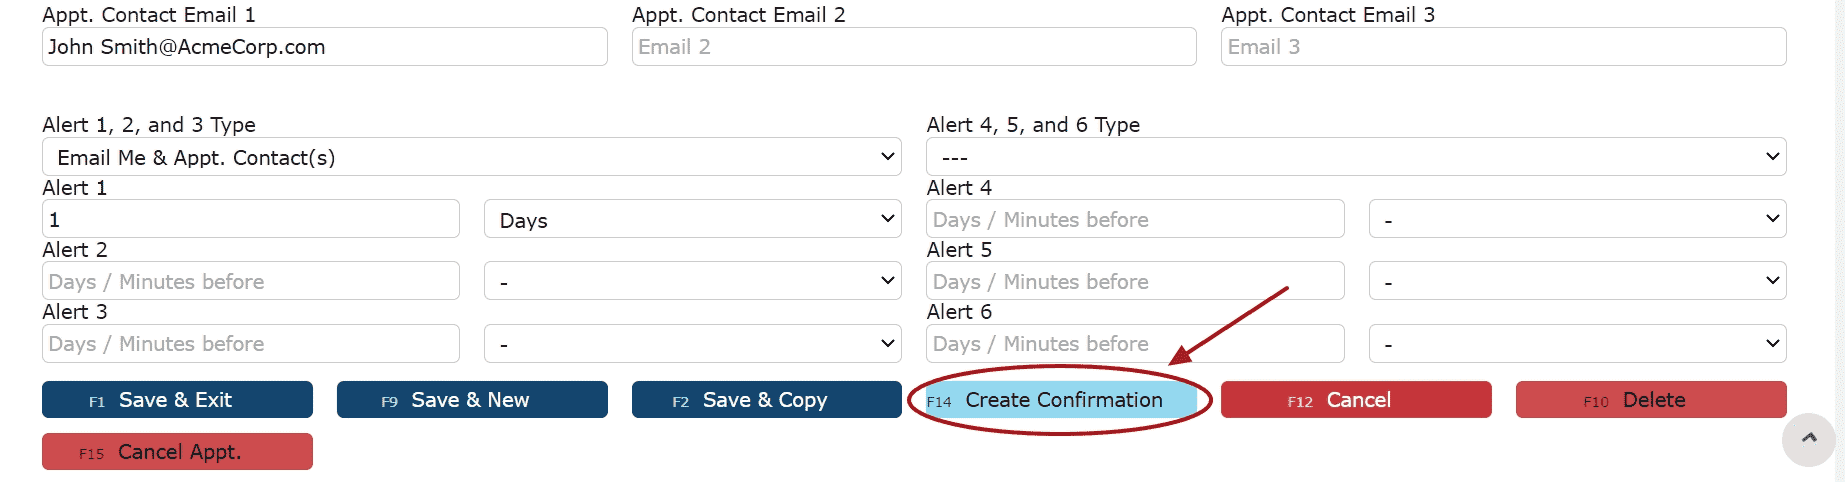
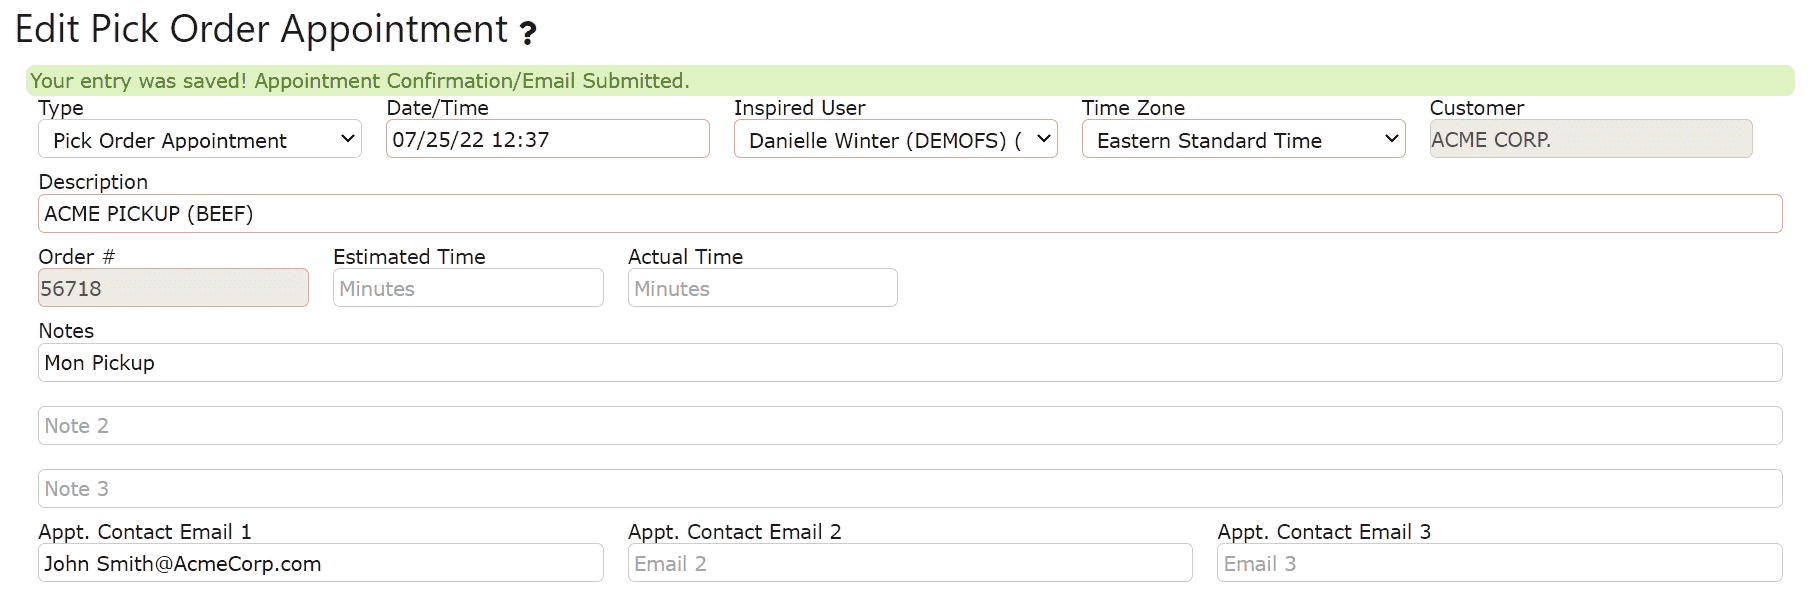
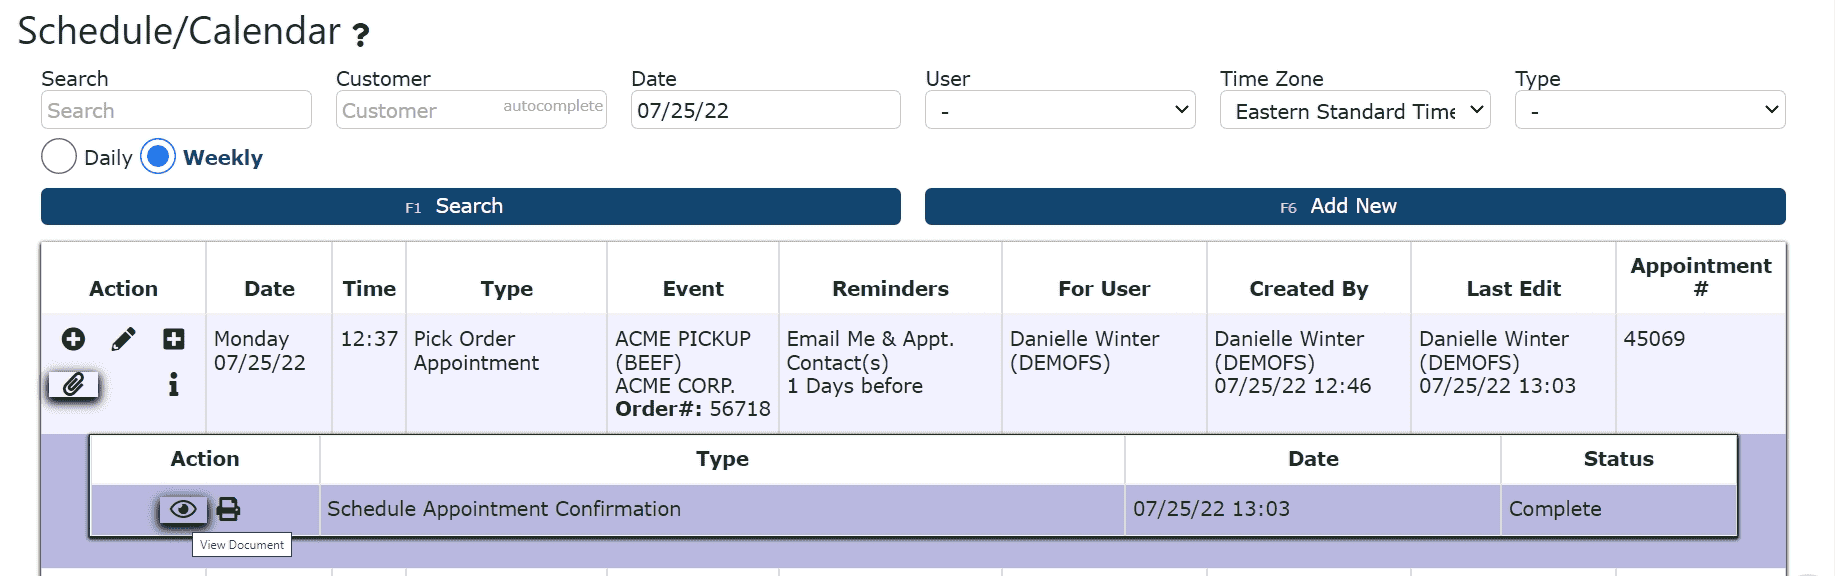
• Include Details: Add descriptions, notes, contact emails, and alerts. Optionally, generate and email a Pickup Confirmation to all appointment contacts.
• These appointments sync with your fulfillment schedule, helping teams stay organized and proactive.