Creating a Service Only Customer Order:
A concise and user-friendly walkthrough for generating a service-only customer order within the system:
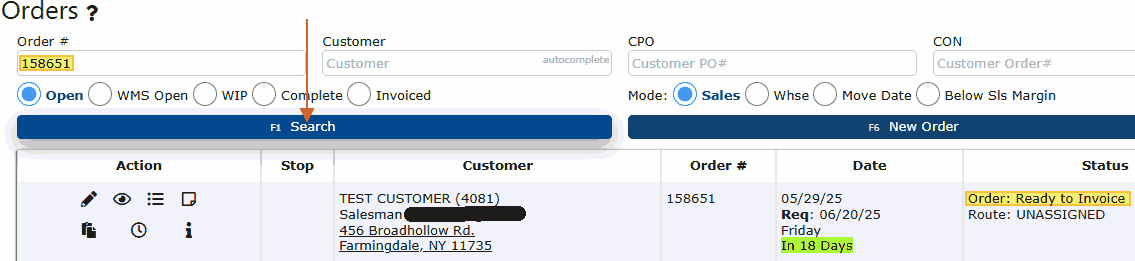
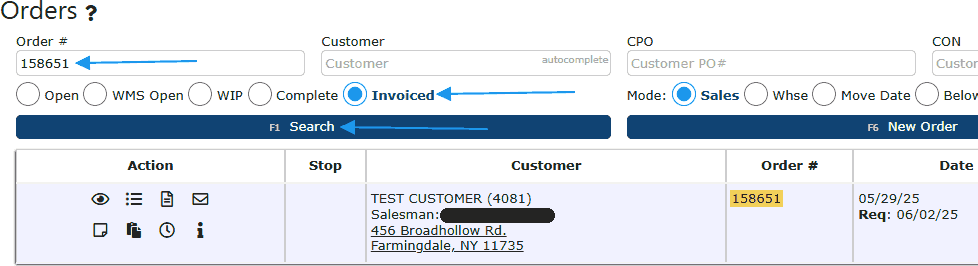
1. Begin by navigating to the
Sales menu and selecting the
Orders option.

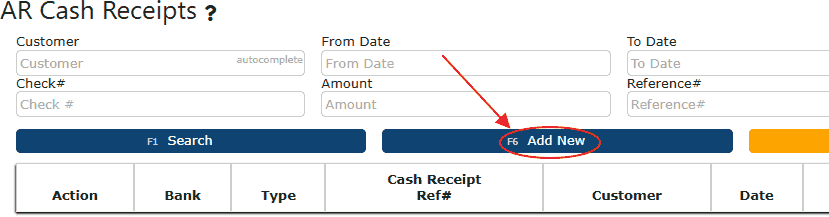
2. You will be directed to the active sales orders screen. To initiate a new service-only order, click the
New Order button located at the top of the page.

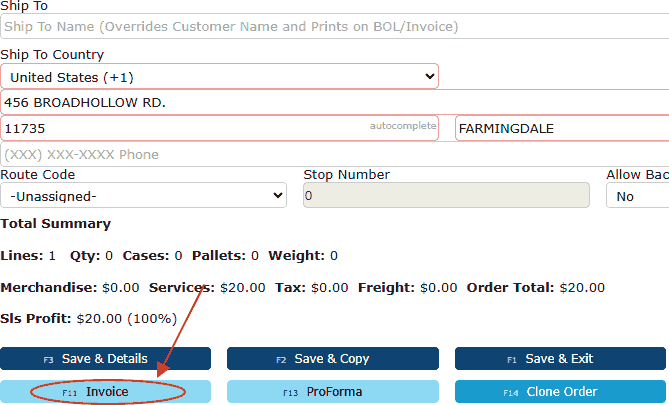
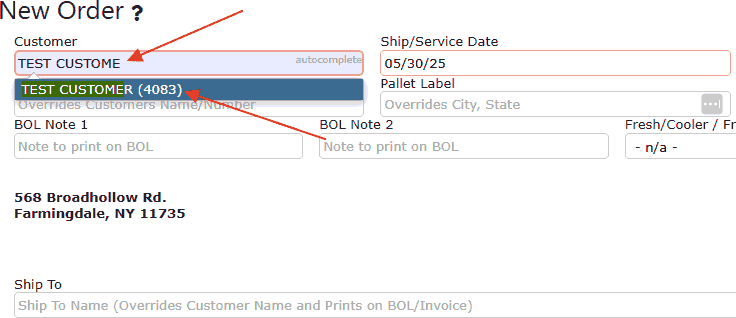
3. This opens the
New Order Header screen. Enter the customer’s name — matching results will appear automatically via the autocomplete feature. Be sure to provide the
Ship To address as well. Once all required fields are completed, click
Save to proceed to the order entry screen.
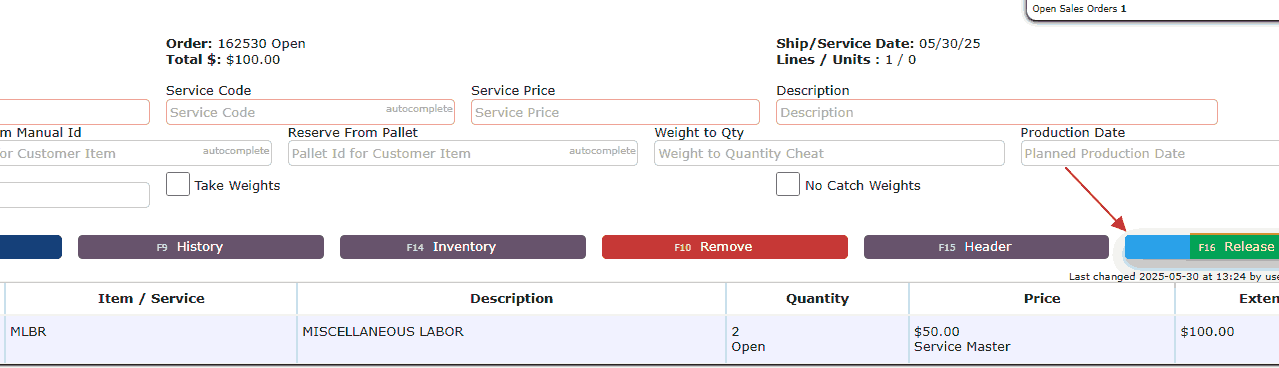
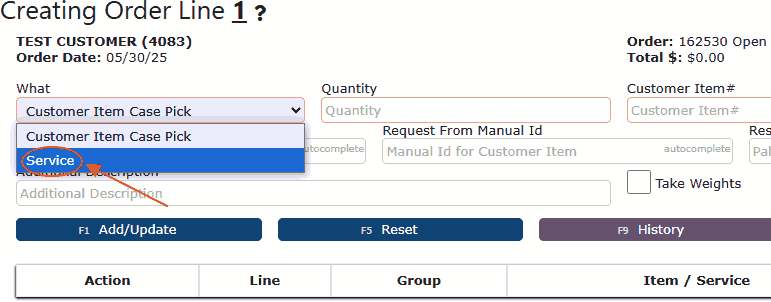
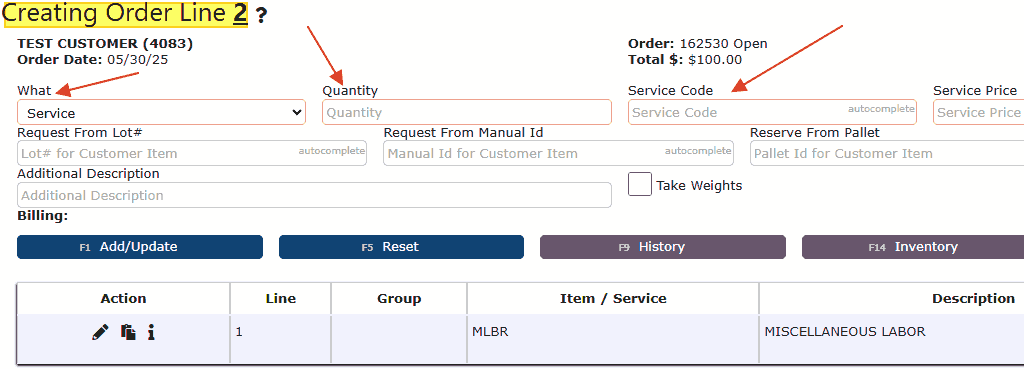
4. The system will now display the
Order Line 1 screen, which begins the order entry process. By default, the system prepares to add an item. To switch this to a service entry, use the
What dropdown menu and select
Service. The interface will adjust accordingly to reflect a service-based order layout.
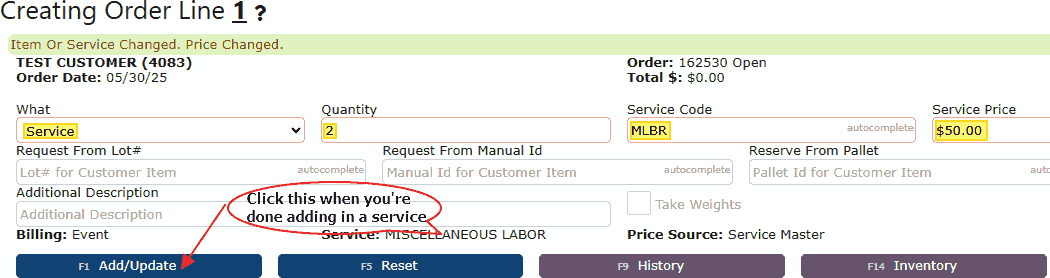
5. After selecting the
Service option, the
Customer Item # field will update to display as
Service Code. Begin entering the appropriate service code related to the services being billed to the customer. As you type, the autocomplete feature will assist by suggesting relevant matches. Also, make sure to enter the
quantity associated with the selected service code. For instance, if the service involved 2 hours of work for a miscellaneous charge, simply input “2” in the
Quantity field. When all details are entered, click the
Add/Update button to apply the service line to the order.
6. Clicking
Add/Update will insert the service line into the customer's order and automatically advance you to the next line, allowing you to enter additional services if needed. Continue adding service codes and corresponding quantities as required.
 Benefits of Service-Only Customer Orders in ERP Systems
•
Streamlined Billing: Easily create orders for services such as labor, consulting, or installations without tying them to inventory items.
• ERP Integration: Manage service-based revenue directly within your ERP system for centralized financial tracking.
• Flexible Entry: Use service codes and quantity fields to accurately reflect hours worked or fees charged.
• Accurate Invoicing: Ensure all customer charges are properly documented and billed in real time.
• Ideal for Service-Driven Businesses: Perfect for companies that rely on non-product-based transactions or need to invoice for custom work.
• Improved Workflow Efficiency: Reduces manual entry errors and provides a clear, step-by-step structure for service order creation.
• Customer-Specific Customization: Tailor service orders by customer, service type, and quantity for precision and clarity.