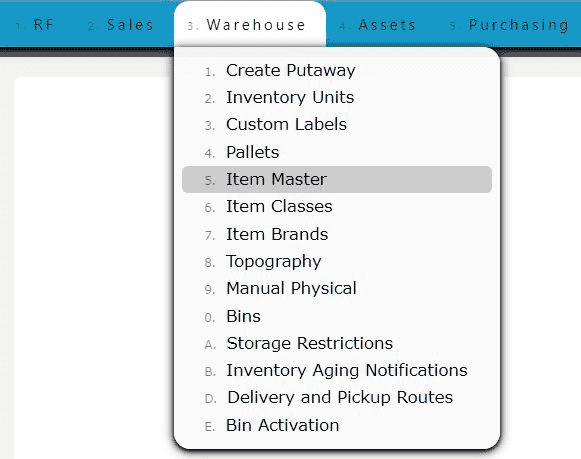
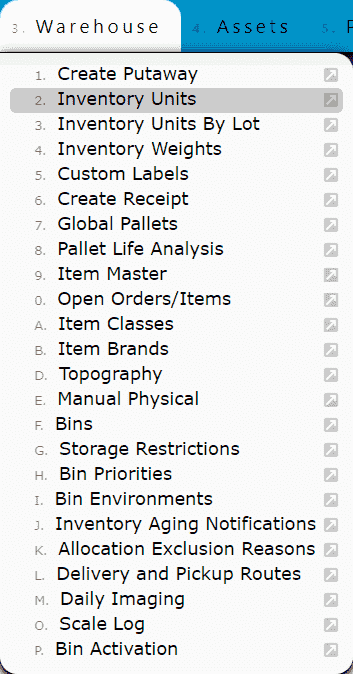
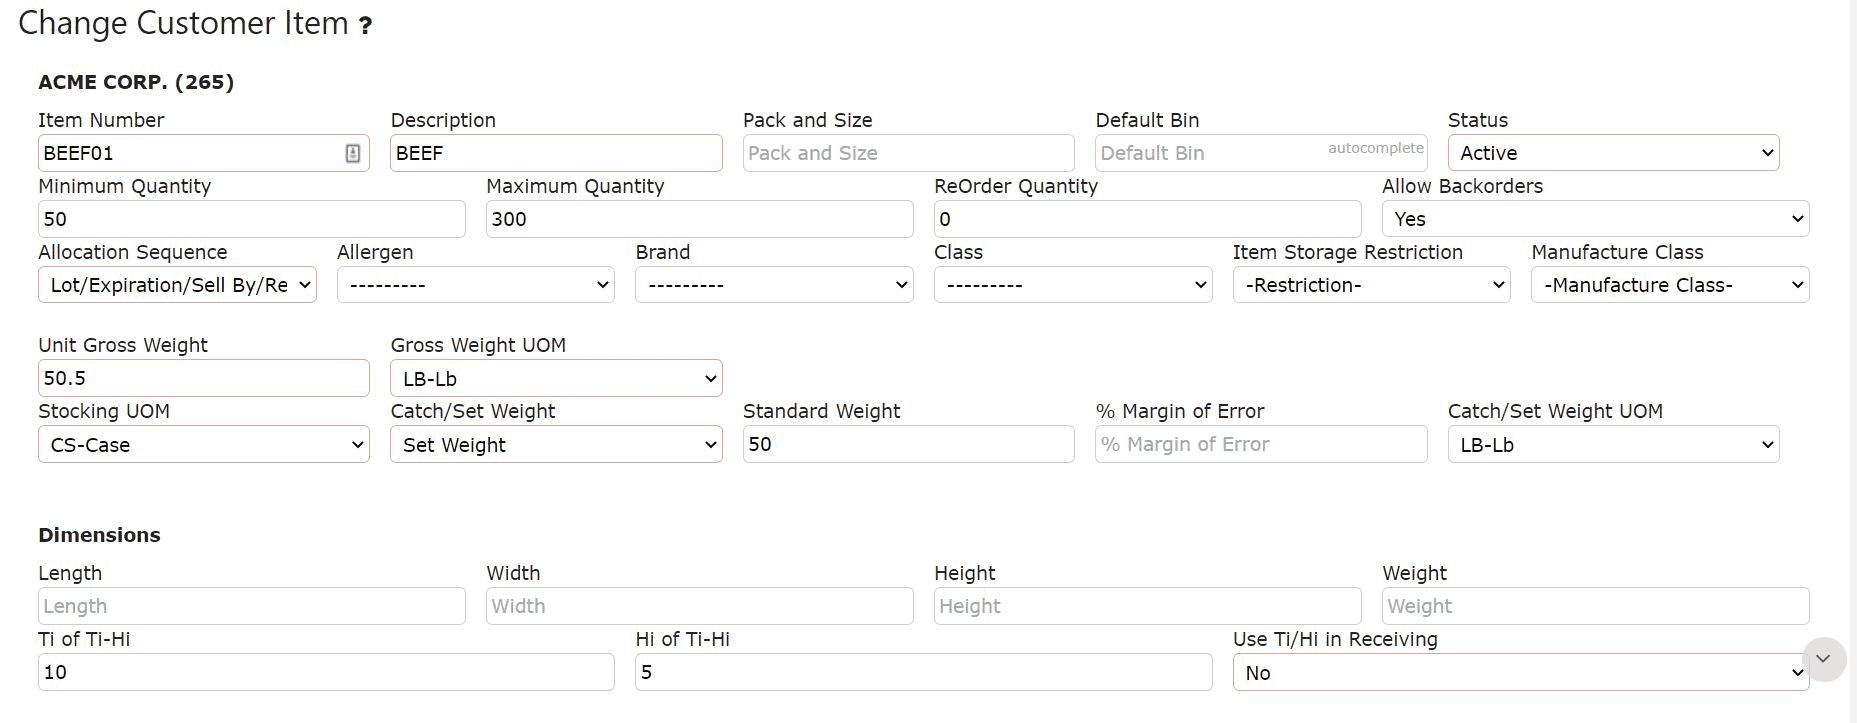
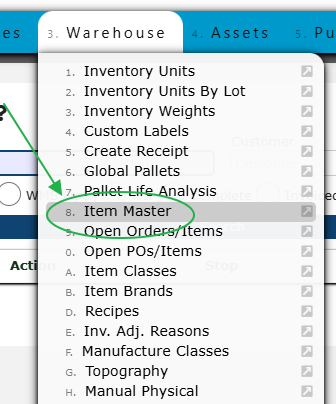
Current Inventory

Overview

  • Products and Inventory

    Current Inventory: 


    Item Master: A master list of every item code entered into the system for a particular customer.  The list contains one record per item code, and summarizes the item's basic information and current standing in inventory.  

    Note: Item Code is synonymous with Item Number, Product Code, Product, Item, and Code 


    Inventory Units: Shows all items currently in stock, manifested and not put away for a particular customer by the pallet. 


    Bin Inventory: Shows all of a particular item in stock separated by bins. 


    Past Inventory:


    Invoiced Units: Shows all units that have been invoiced, including: inbound and outbound units and services.


    Invoiced Pallets: Shows all pallets that have been invoiced for services performed. 


    Pallets:


    Customer Pallets Listing: Shows all pallets in stock, manifested or not putaway for one particular customer 


    Global Pallets Listing: Shows all pallets currently in stock across all customers 


    Inventory Features: 


    Inventory Aging Notifications: System notifications that notify certain employees of possible item expirations. 

    Inventory aging notifications can be set for particular item classes, or for a specific item, and can notify employees a certain number of days leading up to an expiration/use by date, a sell by date or a certain number of days since inventory has been packed.  


    UOM Conversions: Keep track of unit of measure conversions for an item's current unit of measure

    Note: Units of Measure are maintained under the Admin Menu by I.T.

Current Inventory

  • Key Information

    Item Master 

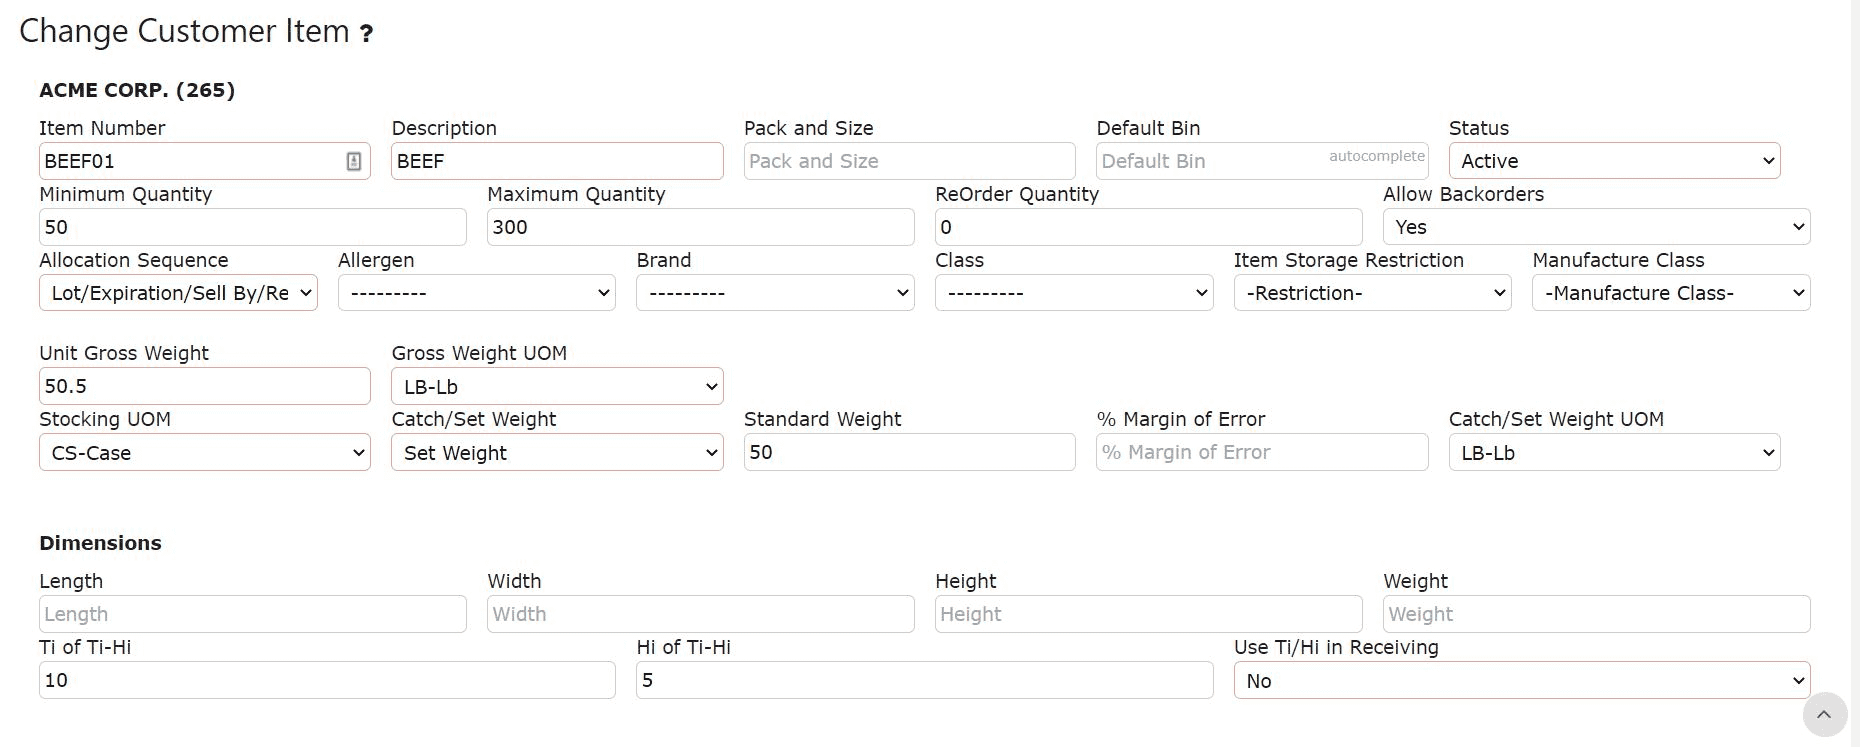
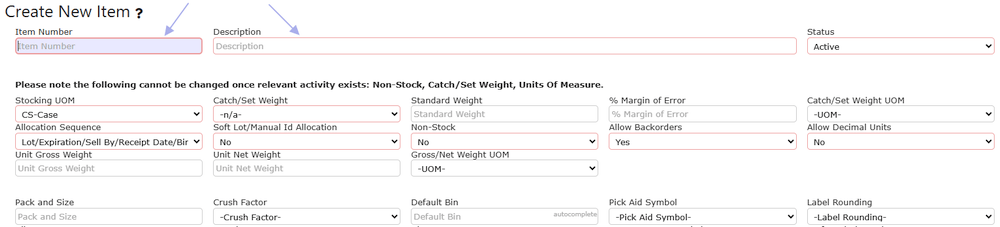
    Pack and Size: Specific multiples of an item per pack 
    Note: Pack size is informational only and will print on invoice documents

    Example:
    5 OZ/6 Count Carton
    2000/pallet 


    Crush Factor: Used to prioritize picking sequence of various items for a single order. A lower crush factor indicates an item is not likely to get crushed by others stacking on top. A higher crush factor indicates the item is more likely to get crushed by others stacking on it.  You can use various combinations of crush factors throughout your inventory to signal the system to pick the least crushable product first, then stacking other more crushable product on top of those. 

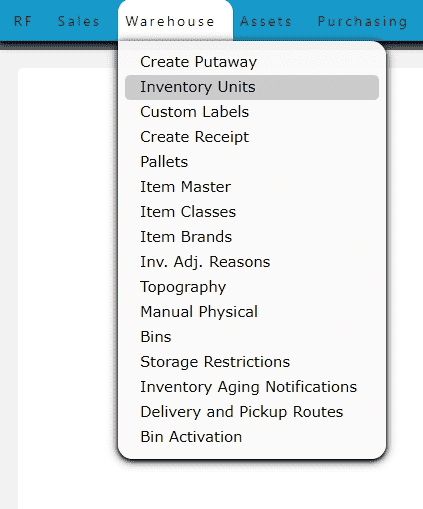
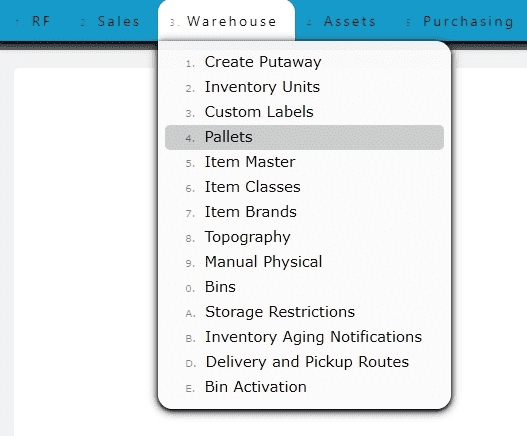
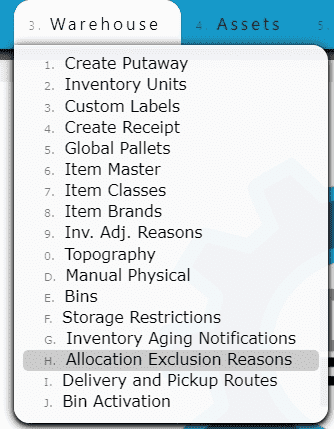
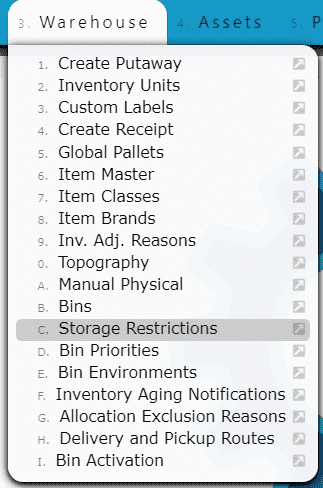
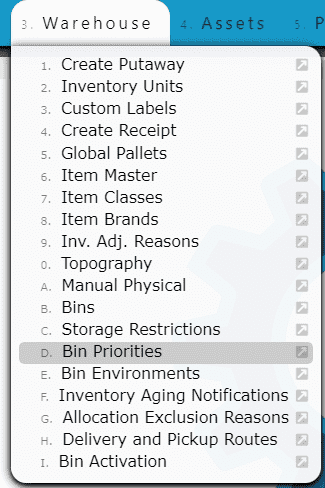
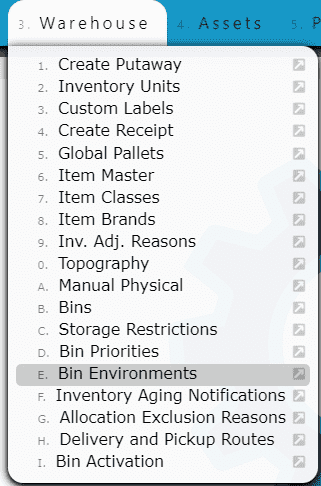
    Brand: Create customer specific brands through the Warehouse Menu

    Class: Create classes of goods through the Warehouse Menu


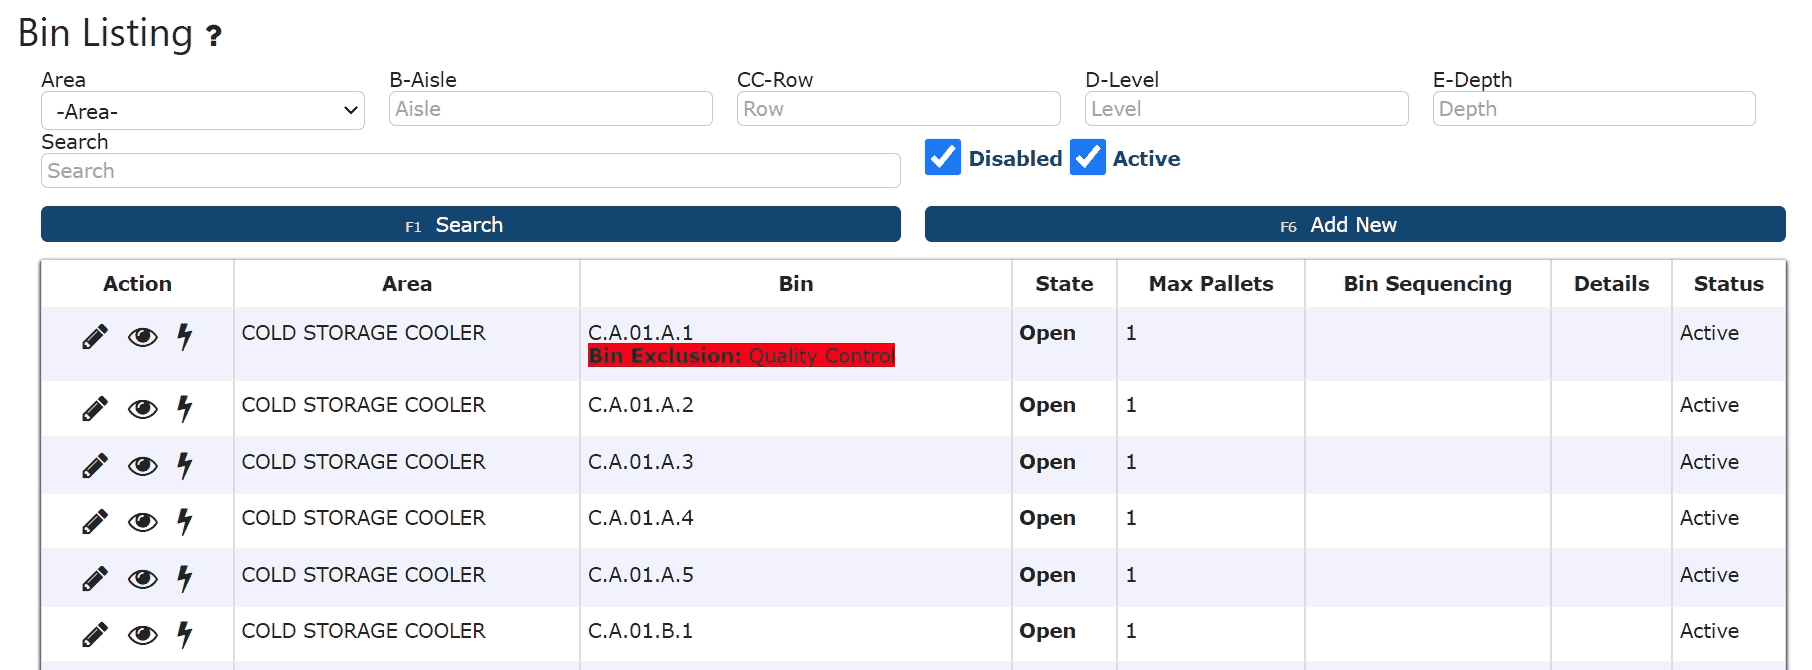
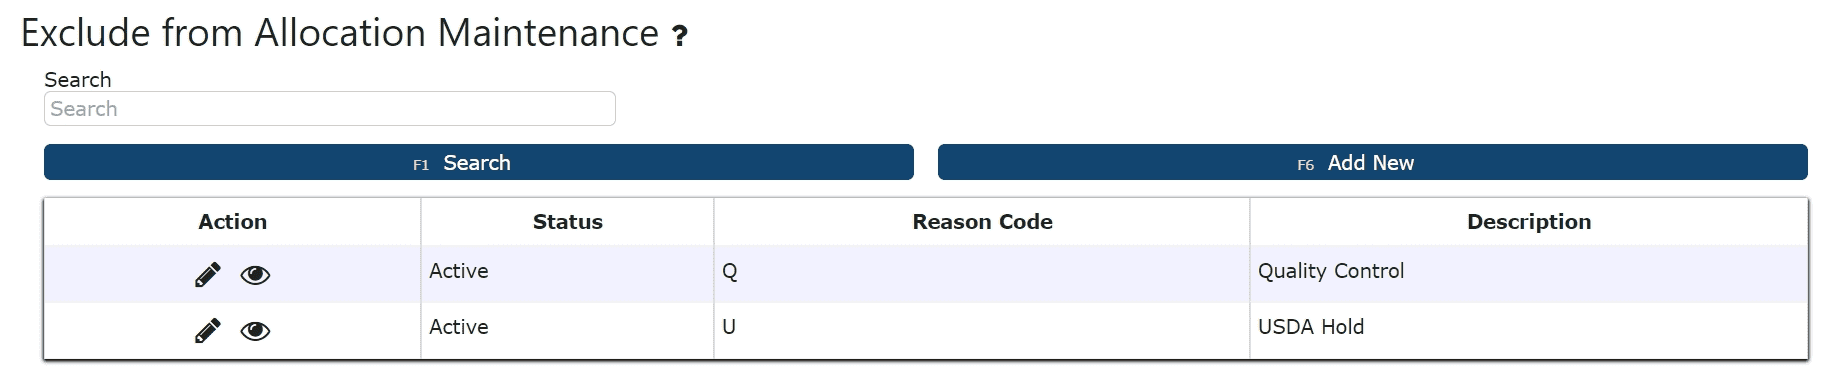
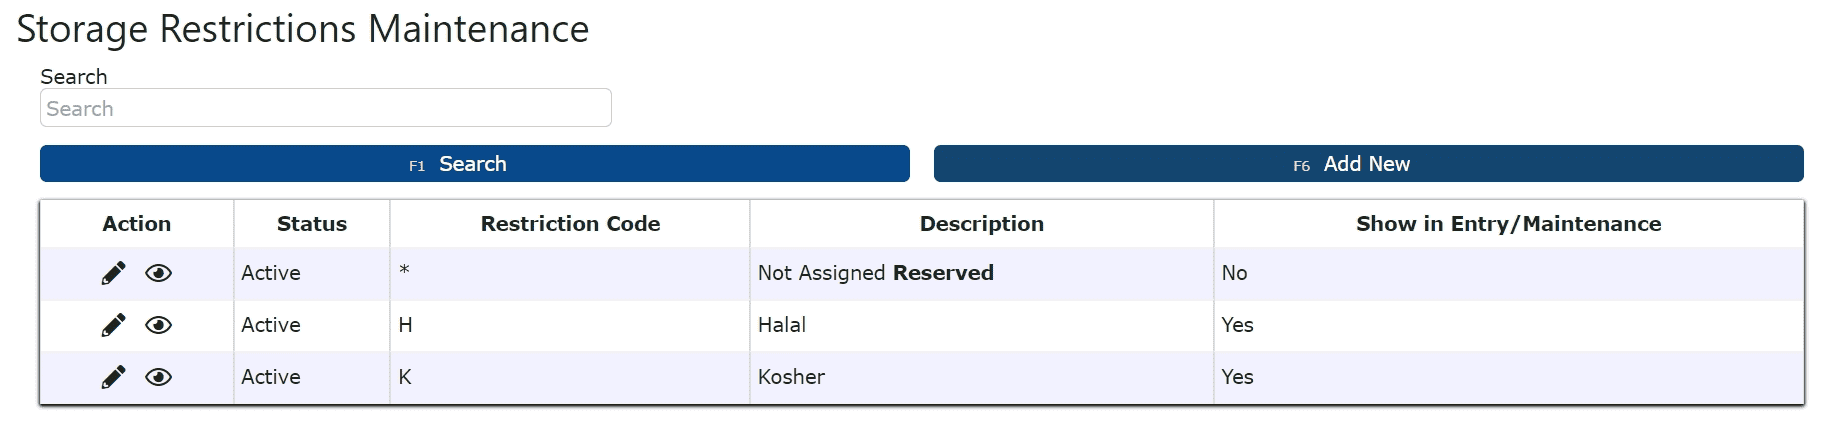
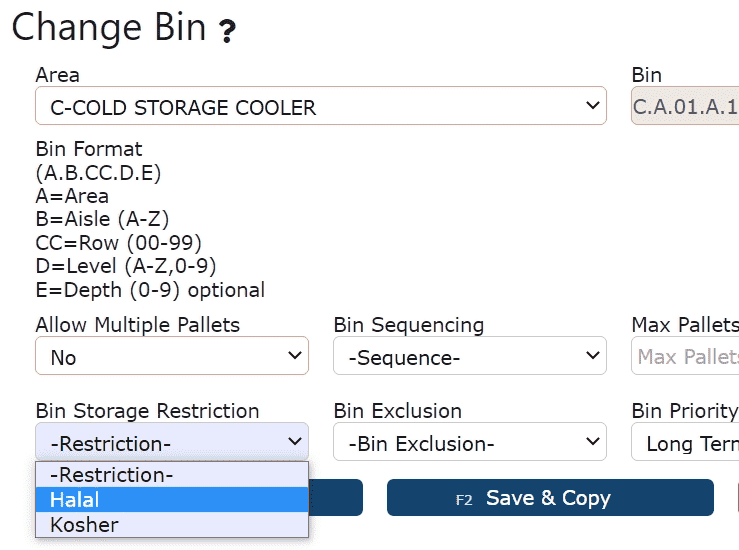
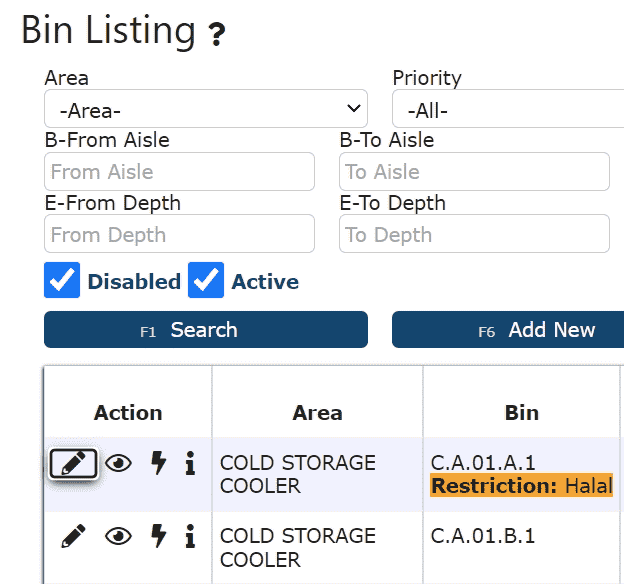
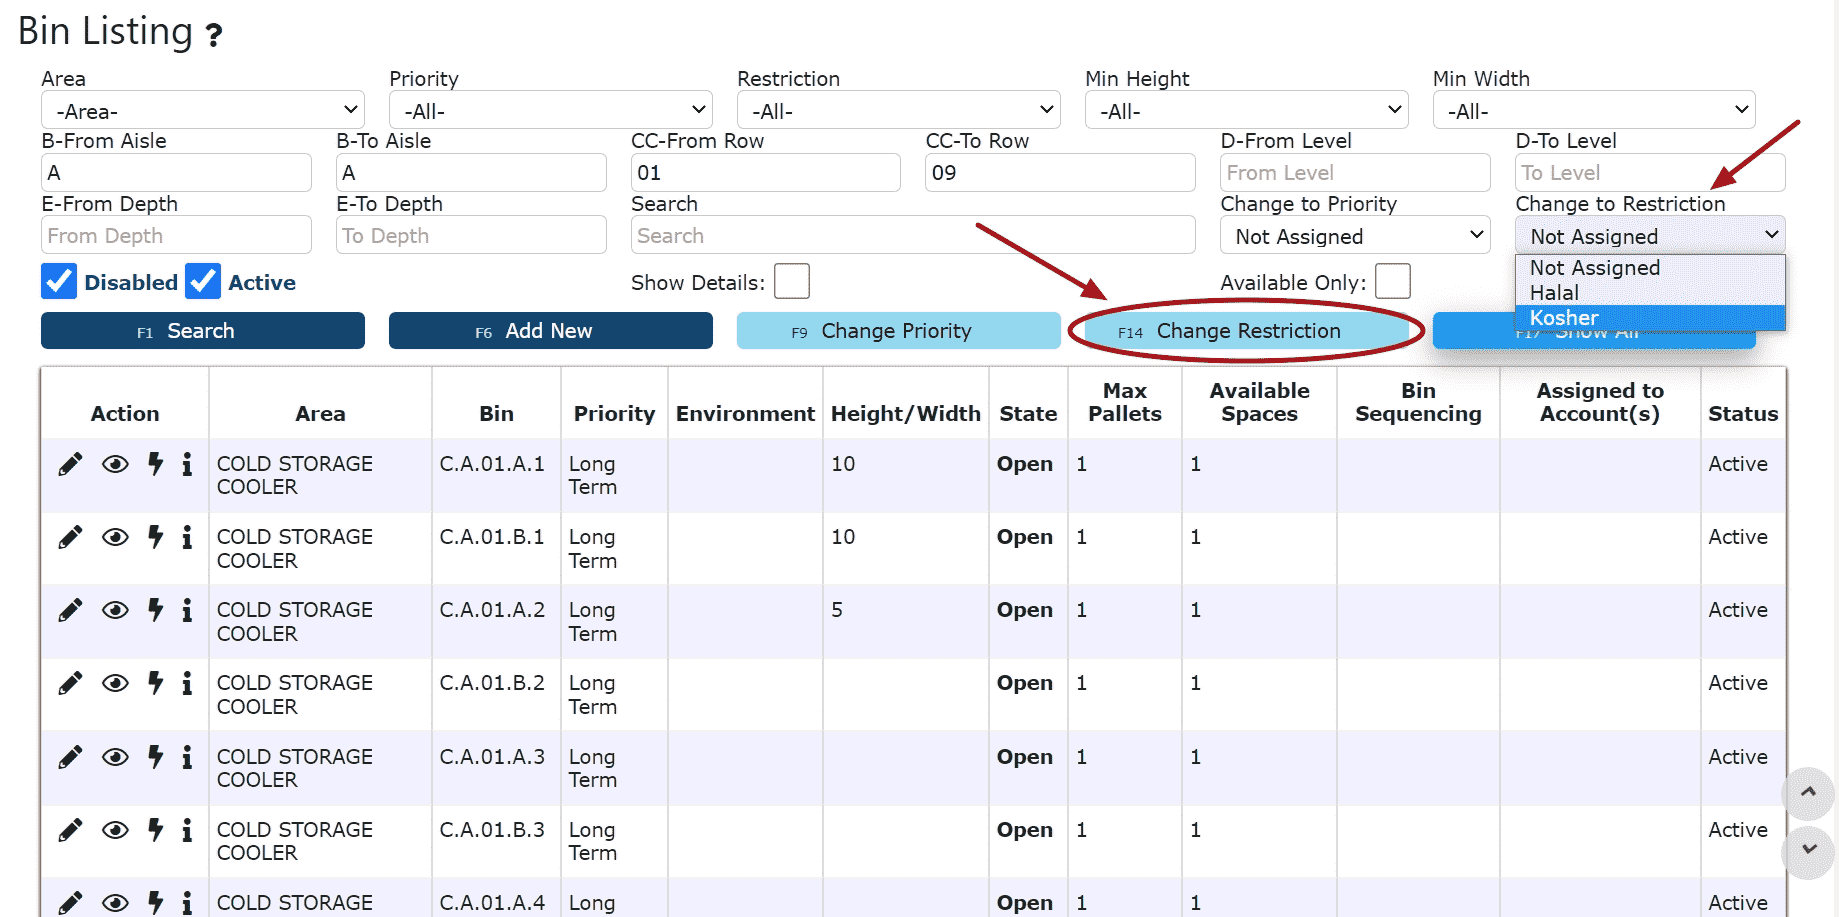
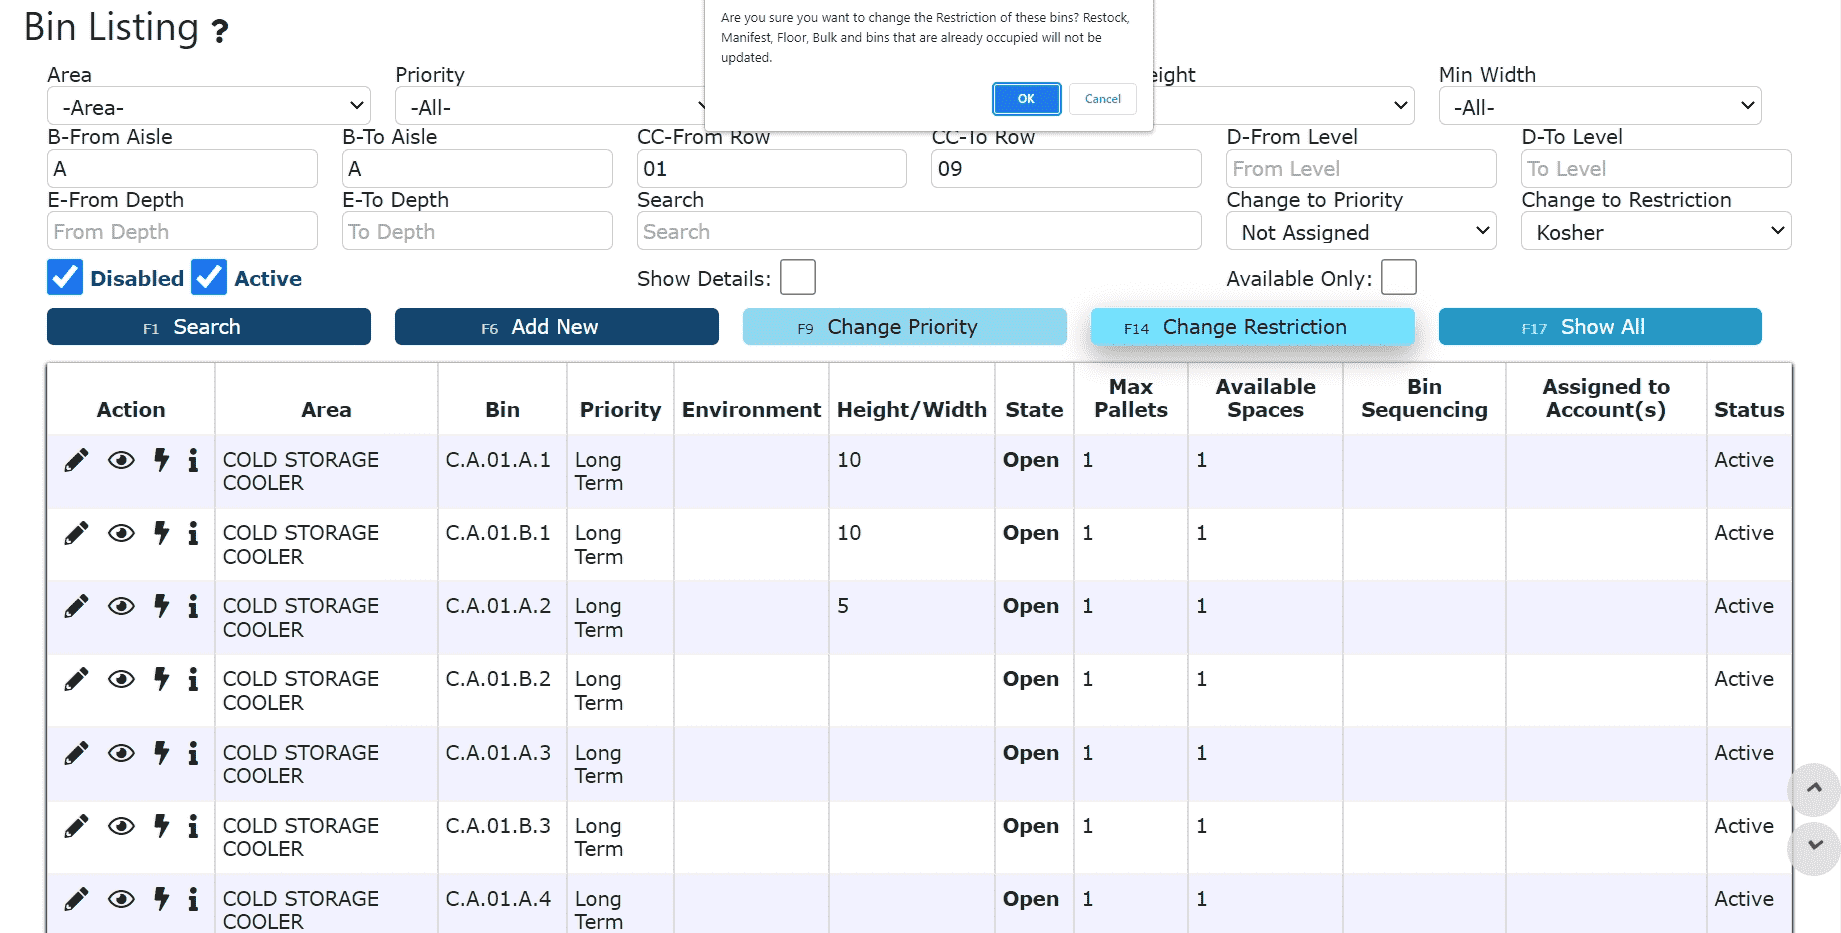
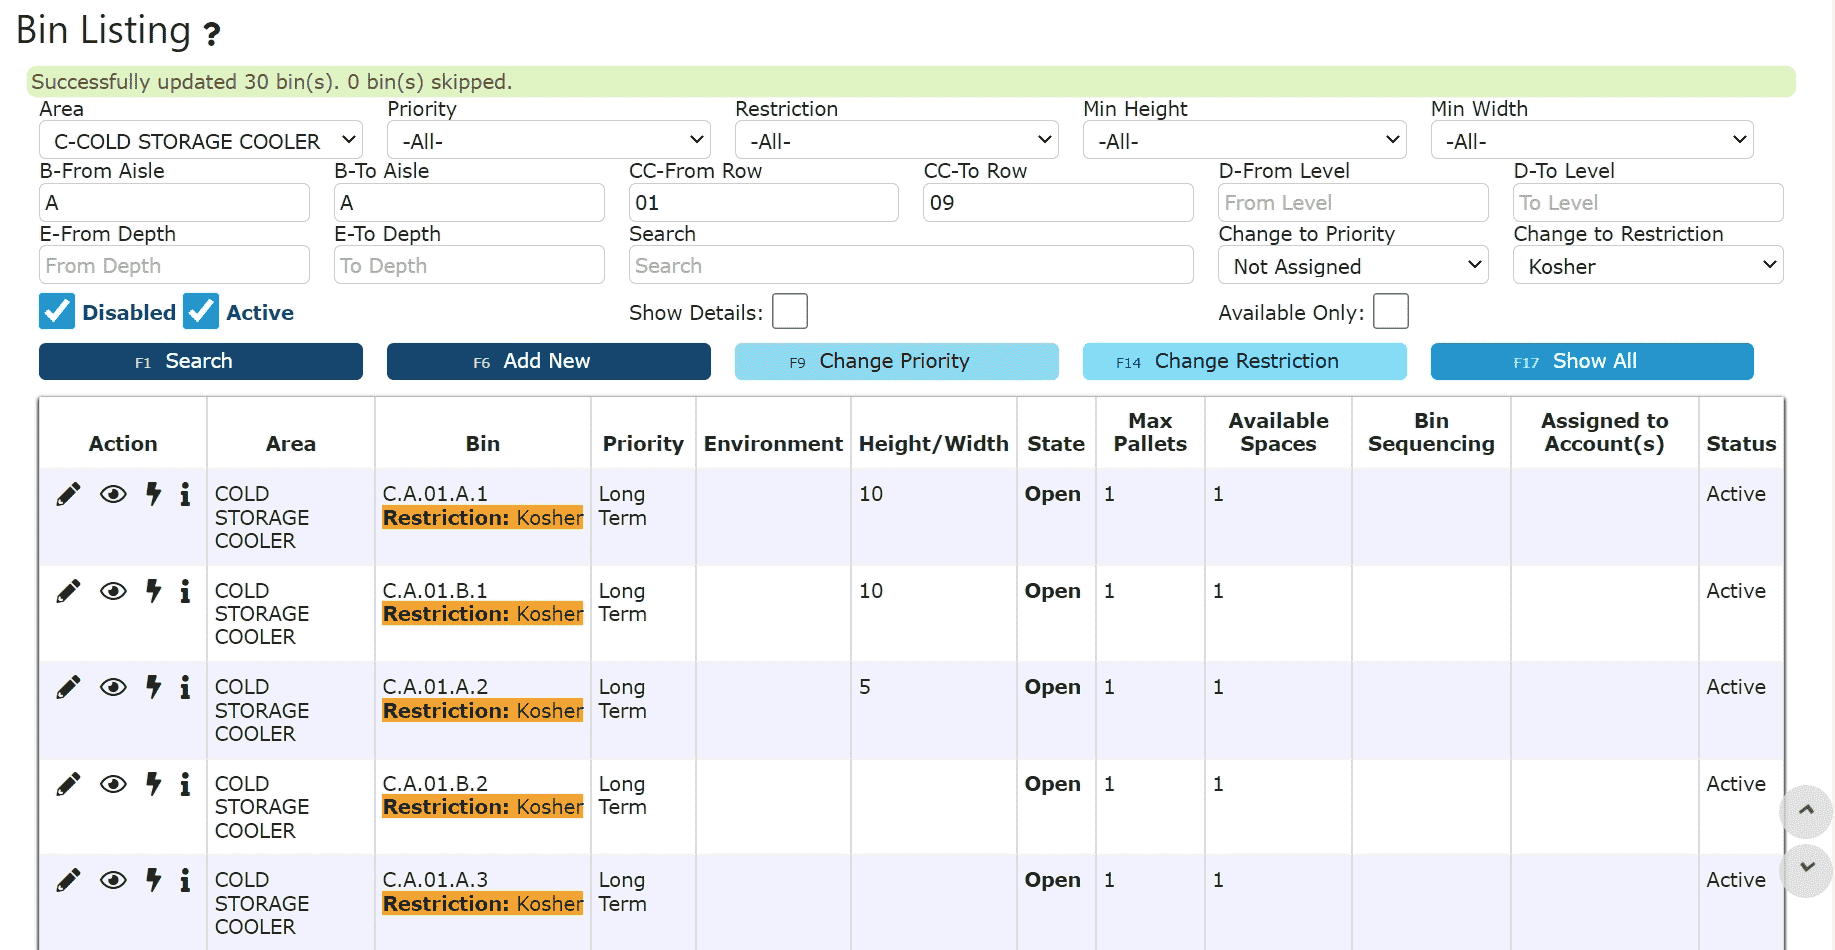
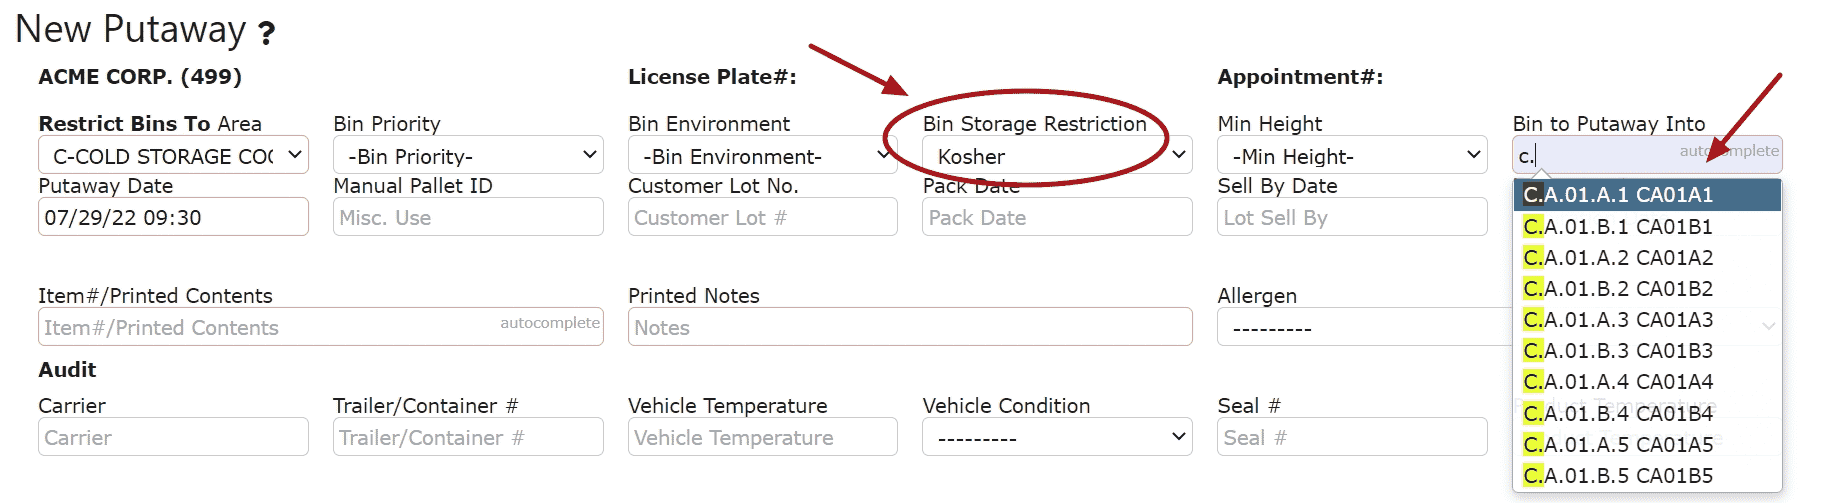
    Storage Restrictions: Create storage restrictions through the Warehouse Menu

    Example: 

    Halal

    Kosher 


    Allocation Sequence: FIFO: Orders will allocate pallets on a first in first out basis (Putaway Date (Earliest Date First). For the same date: Bin Pick Sequence, Depth, then Internal Pallet Id (Lowest Value First))

    LIFO: Orders will allocate pallets on a last in last out basis (Putaway Date (Latest Date First). For the same date: Bin Pick Sequence, Depth, then Internal Pallet Id (Lowest Value First))

    Lot/Expiration/Sell by/Receipt Date: Orders will allocate to pallets in the order of lot number, Lot Value (Lowest Alphabetical first A001, then B001, then B002, etc), For same Lot: Bin Pick Sequence, Depth, then Internal Pallet Id (Lowest Value First), expiration date, sell by date, and then receipt date.  


    Bin Pick Sequence: Picking is done based off of the bin's location in order of: area, aisle, row, depth, and then the height 


    Gross Weight: Total weight of an item including packaging 

    Note: The gross weight maintained for an item will be used for shipping purposes only, not billing, and will only be displayed on the first page of BOLs.

    *Exceptions:

    Catch weight items will display catch weights on the first page of BOLs if applicable 

    No unit pallets will display their pallet weights on the first page of BOLs


    Catch Weight Restrictions:
    Note: Lb and Kg are supported units of measure

    % Margin of Error: determines the amount allowed above and below the standard weight for a catch weight item 

    Example: Catch Weight Item 1

    Standard Weight: 45 lbs 

    %Margin of Error: 50%


    45 x .50 = 22.5 

    45 + 22.5 = 67.5 lbs maximum 

    45 - 22.5 = 22.5 lbs minimum 


    Net Weight: Total weight of a non catch/set weight item.  This information is only collected for items defined as "N/A" as opposed to Catch or Set, and is used for display only on Case Labels.  


    Label Rounding: This rounding rule dictates how many decimal places a weight displayed on a case label will show.  


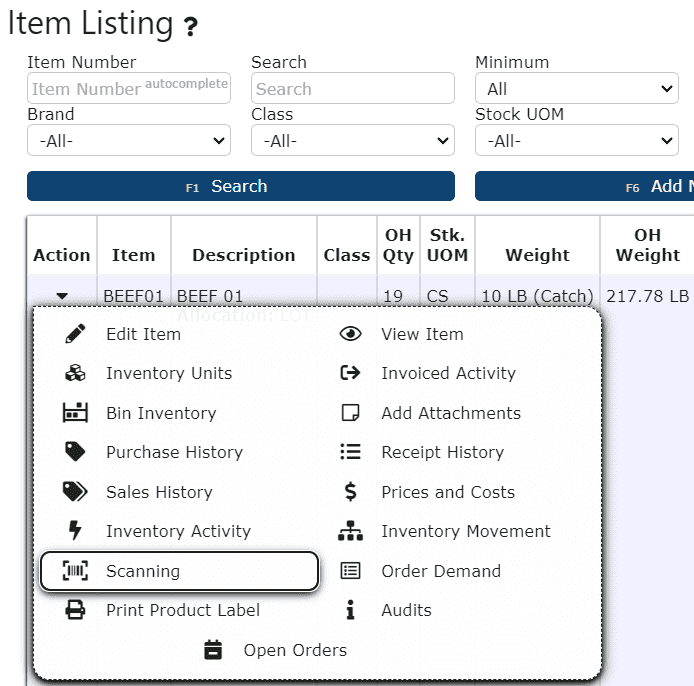
    Pick Aid Symbol: A small symbol can be assigned to any sku in order to help easily identify products during picking etc.  When assigned, the small symbol will automatically print on case labels, product labels, pick tickets, as well as show up on scan guns during the picking process.  


    Voice Pick: Voice picking allows warehouse workers to listen to voice prompts using headsets that direct them to locations throughout the warehouse for order fulfillment.  If enabled, case labels will automatically display a voice picking code which warehouse workers will use to validate their picks.  

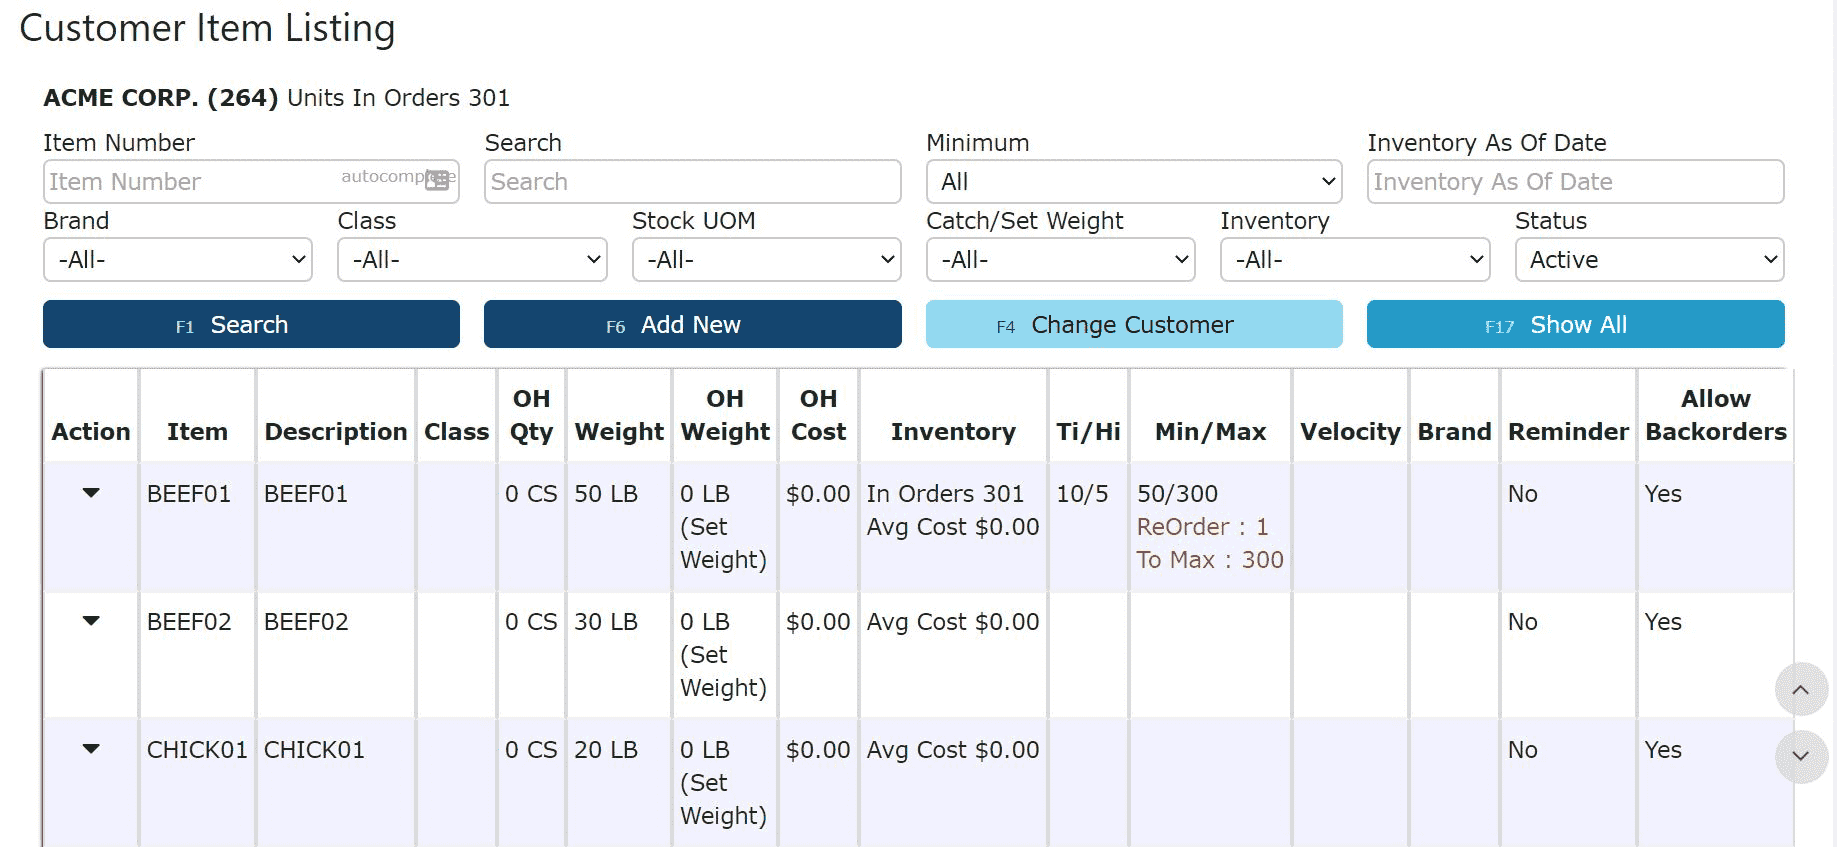
    Ti-Hi: Determines how boxes/cases will be stacked on a pallet

    Ti (Full Layers): How many cases can fit on a single row of a pallet

    Hi: How high you can stack the boxes/cases before squishing down becomes an issue

    Velocity: Item Movement at the inventory level(Putaways, Pulls, Picks)

    *Keep track of which items move/sell the most 

    *First Activity Date recorded once first putaway is created

  • Managing the Item Master

    Creating an Item Code:

    1. Go to the Warehouse Menu and click on the Item Master Sub-Menu


    2. Click on the Add New button  


    3. Fill in all of the necessary information where applicable, then click on one of the Save buttons to save the Item Code.  

    Note: Longer item numbers, although supported, are not recommended for barcoding.  


    Managing an Item Code: 

    Basic Item Information (Allocation sequence, allergen, brand, item storage restrictions etc.) 
    Costs
    UPC/GTIN Codes

    Basic Information: 

    1. Click on the Carrot icon next to the item, then click on the Edit Item icon (Pencil) 


    2. Adjust information as necessary, then click one of the Save buttons to save the changes. 


    Costs: 

    *Maintaining Average Cost for item codes is optional and will be used for informational purposes only


    1. Click on the Costs icon next to the item 


    2. Enter an Average Cost, then click the Save & Exit button to save and return to the Item Listing page. 


    UPC/GTIN: 


    1. Go to the RF Menu and click on the Add UPC/GTIN Sub-Menu. 


    2. Enter the item number, then click the Next Step button 


    3. Scan the GTIN or UPC code, then click the Next Step button 


    4. Review the screen and click the Next Step button to confirm the entry


    5. Go back to the Item Master Listing Page and click on the UPC Codes icon


    6.  View, add new and maintain all UPC/GTIN Codes 

  • Key Information

    Inventory Units:

     
    Catch Weights: 
     
    Catch weights will only be taken into account for total weight/cost calculations if all weights have been assigned, until then the standard weight will be used 

     
    Unit Information Adjustments: 

    All pre-inventory(not putaway/received) cases/information can be adjusted up until it has been formally placed in inventory

    # of cases, item number, description, and weight information cannot be adjusted once putaway/received (RF Adjustments can be used as necessary) 

    Inventory unit information cannot be edited if allocated to an order or pull queue  
     
     
  • Managing Inventory Units

    Managing An Inventory Unit:

    1. Go to the Warehouse Menu and click on the Inventory Units Sub-Menu to view all items in inventory or click on the Inventory Units icon on the Item Master listing page to view a particular item in inventory.


    2. You are now viewing the Inventory Unit Inquiry 


    3. Click on the Edit Inventory Unit icon next to the inventory to be maintained 


    4. Adjust information as necessary and click on one of the Save buttons to save the changes 


    Generating Subtotals and Excel Downloads:

    Subtotals are supported for manual ids, lots and exclusion reasons(both pallet and bin exclusions) 


    1. Select either Manual Id A-Z, Lot A-Z, or Exclusion Reason from the Order By Dropdown 


    2. Click on the Show All Button 


    3. Click on Download Table to download an excel sheet 


    Searching by Date:

    Search inventory using date selections that include: Received/Creation Date, Packed/Production Date, Sell By Date, or Expiration/Use By Date. 

    Limit results to either before or after Packed/Production Dates, Sell By Dates or Expiration/Use by Dates.  

    Received/Created 9/07/21


    Packed After 9/01/21 


    Expiration Before 9/23/21


  • Key Information

    Bin Inventory:

    Catch Weights: 

    Catch weights will only be taken into account for total weight/cost calculations if all weights have been assigned, until then the standard weight will be used
  • Bin Inventory
    1. Go to the Warehouse Menu and click on the Item Master Sub-Menu


    2. You are now viewing the Item Master Listing page 


    3. Click on the Carrot icon next to an item of choice, then click the Bin Inventory icon 


    4. You are now viewing the Bin Inventory page which displays one row per item, per bin.   

  • Topography
    View at a glance, the current capacity for a given warehouse and area.  


    View Warehouse Capacity 


    View Area Capacity 


    View Area & Aisle Capacity 


    View Warehouse Capacity By Customer


    View Area Capacity By Customer 


    View Area & Aisle Capacity By Customer 


    Subtotal By Customer and Download Excel Spreadsheets 


    Review Area and Warehouse Level # of Pallet Spaces 


    Note: The number of pallet spaces per area and warehouse are used to determine both the % of Area and % of Warehouse values at the pallet count level.  The % of Area at the Bin level is calculated based on the total number of active bins within that area.  Contact I.T for area-level pallet space setup.  

    Example: Cold Storage Cooler | 30 Bins Total in Area | 10 Total Pallet Spaces in Area | 45 Total Pallet Spaces in Warehouse

    Open Bin Count : 27 
    Open % of Area : 27/30 x 100 = 90% of bins in the cold storage cooler are open 

    Occupied Bin Count : 3 
    Occupied % of Area : 3/30 x 100 = 10% of bins in the cold storage cooler are occupied 


    Occupied Pallet Count : 3 
    Occupied % of Area : 3/10 x 100 = 30% of the area is occupied by these 3 pallets 
    Occupied % of Warehouse : 3/45 x 100 = 6.6% of the warehouse is occupied by these 3 pallets

Past Inventory

  • Invoiced Units
    1. Go to the Reports Menu and click on the Invoiced Inventory Units Sub-Menu


    2. You are now viewing the Invoiced Inventory Units page

  • Invoiced Pallets
    1. Go to the Reports Menu and click on the Invoiced Inventory Pallets Sub-Menu


    2. You are now viewing the Invoiced Inventory Pallets page 

Pallets

  • Key Information

    Global Pallets: 

    Pallet Information Adjustments: 

    Pre-inventory(Not Putaway/Received) cases/information on a pallet can be adjusted 

    # of cases once putaway/received cannot be adjusted 

    Inventory unit information cannot be edited if allocated to an order or a pull queue 

    Note: When changing the item name, once the item name has been changed through unit maintenance, the printed contents under pallet maintenance must be updated in order to generate new pallet labels with the updated item information. (Go to the Warehouse Menu, then the Pallets Menu, locate the pallet that has been updated, edit it and update the printed contents and print out a new pallet label) 


  • Global Pallets

    Global Pallet Listing: 

    Displays all occupied pallets and their current state across all customers.  


    1. Go to the Warehouse Menu and click on the Pallets Sub-Menu


    2. You are now viewing the Global Pallet Listing page which displays one row, per pallet.  


    Pallet Activity: 

    Displays all activities pertaining to a particular pallet.  Organized by date, time and user who performed the action. 


    1. Click on the Activity icon (Lightning Bolt) next to the pallet of choice 


    2. You are now viewing the Pallet Activity Page

    Pallet Activities include but are not limited to: Pallet Creation 
    Pallet Deletion 
    Adjustments to Quantity, Weight and/or Costs


    Editing Pallet Units: 

    Edit the unit information that pertains to a specific pallet.  


    1. Click on the Contents icon next to the pallet of choice 


    2. You are now viewing the Unit Maintenance page for that pallet.  Adjust information as necessary, then click on the Save & Exit button to save the changes 


  • Customer Pallets

    Customer Pallet Listing: 

    Displays all pallets in stock, not putaway and manifested for a particular customer.


    1.  Go to the Sales Menu and click on the Customer Pallets Sub-Menu 


    2. You are now viewing the Customer Pallets Listing page


    Editing Pallets: 

    1. Click on the Carrot icon and then the Edit Pallet icon (Pencil) next to the pallet of choice 


    2. You are now viewing the pallet's maintenance page.  Adjust information as necessary, then click the Save & Exit button to save the changes.


    Editing Units: 

    1. Click the Edit Units icon next to the pallet of choice 


    2. You are now viewing the Unit Maintenance page for that pallet.  Adjust information as necessary, then click on the Save & Exit button to save the changes. 


    Pallet Activity: 

    Displays all activities pertaining to a particular pallet.  Organized by date, time and user who performed the action. 


    1. Click the Activity icon  (Lightning Bolt) next to the pallet of choice 


    2. You are now viewing the Pallet Activity Page


    Pallet Activities include but are not limited to: Pallet Creation 
    Pallet Deletion 
    Adjustments to Quantity, Weight and/or Costs


  • Pallet Info
    View and maintain a pallet's information.  


    Pallet Contents: 

    1. Go to RF Menu and click on the Pallet Info Sub-Menu 


    2. Enter or scan the pallet id and click the Next Pallet Button 


    Pallet Adjustments: Adjust the unit count on a pallet 


    Weights: Maintain the catch weights assigned to a pallet 


    Move Pallet: Move the pallet into a different bin/location 

Bins

  • Key Information

    Bins:


    (A.B.CC.D.E)
    A=Area
    B=Aisle (A-Z)
    CC=Row (00-99)
    D=Level (A-Z)
    E=Depth (0-9) optional

    Example: C.A.01.A.1 
    Area ( C ): Cooler 
    Aisle ( A ): First aisle 
    Row ( 01 ): Second row 
    Level ( A ): Ground level
    Depth ( 1 ): First in line


    Bin Sequencing:
    Pushback:  One bin that contains a maximum number of multiple pallets located in a particular order inside the bin 

    Note:
    Allow multiple pallets must be set to yes, max pallets must be given a value and floor and manifest bins set to no

    Bulk: 
    One bin that contains multiple pallets without a set maximum defined 

    Note:
    Allow multiple pallets must be set to yes and floor and manifest bins set to no

    Bulk Limited:
    One bin that contains multiple pallets with a set maximum defined 

    Note:
    Allow multiple pallets must be set to yes and floor and manifest bins set to no


    Max Pallets: A set limit on the number of pallets a bin is allowed to carry

    Pallet Count: Total number of pallets currently occupying the bin


    Bin Features: 
    Bin Storage Restriction: Assign a storage restriction to a bin to prevent certain items from entering certain bins

    Bin Priority: Assign a priority to a bin to help automate bin selection for pallets (ie. Long Term, Short Term) 

    Bin Environment: Assign a bin environment to a bin to prevent certain items from entering certain bins (ie. Freezer, Cooler)

    Bin Height: Assign a height to a bin to help automate bin selection for pallets that require a minimum height  

    Bin Exclusion: Prevent the contents of this bin from being allocated for customer orders.  All pallets located inside of an excluded bin will be prevented from being allocated for picking. 

    Note:
    Any pallet or case not already allocated to an order or pull queue can be moved in and out of excluded bins. 

    Customer Bin Assignments: Assign specific bins to be used only for certain customers 


    Bin State:
    Occupied Bins: Pallet(s) are in the bin and NOTHING is scheduled
    Scheduled Bins:  Pallet(s) are scheduled to be putaway or received into this bin
    *Scheduled status regardless if it is technically occupied by other pallets
    Open: No pallets are located in the bin and it is available for pallet input 


  • Managing Bins

    Creating a Bin:


    1. Go to the Warehouse Menu and click on the Bins Sub-Menu 


    2. Click on the Add New button 


    3. Fill in all of the necessary information, then click on one of the Save buttons to save the bin 


    1. Activate the bin 

    Note: All bins by default are disabled and must be activated in order to be used  


    Activating a Bin:


    1. Go to the Warehouse Menu and click on the Bin Activation Sub-Menu 


    2. Enter the Bin to Activate, then click the Activate button 


    Managing a Bin

    1. Click on the Manage icon next to the bin of choice 


    2. Adjust information as necessary, then click on one of the Save buttons to save the changes 
    (Edit, bin info etc., other bin screens)


    Disabling a Bin

    1. Click on the Manage icon next to the bin of choice 


    2. Click on the Disable button 
    *Once the bin has been disabled, it must be reactivated in order to be used 


    3. The bin is now disabled 


    Bin Activity

    Displays a list of all activities associated with a particular bin.

    Activites can include: 

    Moving pallets to and from the bin
    Deleting pallets  


    1. Click on the Activity icon (Lightning bolt) next to the bin of choice 


    2. You are now viewing the Bin Activity Listing page 


    Excluding a Bin

    Exclude bins from being allocated to for customer orders. 

    1. Click on the Manage Icon next to the bin of choice 


    2. Select an exclusion reason from the Bin Exclusion Dropdown and click on one of the Save Buttons to save the entry 


    3. The bin is now excluded from being used for allocation/picking for all outbound customer orders


    Maintaining Bin Exclusion Reasons:

     
    1. Go to the Warehouse Menu and click on the Allocation Exclusion Reasons Sub-Menu


    2.  Add and maintain exclusion reasons to apply to both bins and pallets

  • Bin Exclusions
    Use bin exclusions to prevent the contents of a bin from being allocated to customer orders.  All pallets located inside of an excluded bin will be prevented from being allocated for picking. 
     
    Note:Any pallet or case not already allocated to an order or pull queue can be moved in and out of excluded bins. 


    Creating a Bin Exclusion: 

    1. Go to the Warehouse Menu and click on the Allocation Exclusion Reasons Sub-Menu 


    2. Add and maintain exclusion reasons 

    Note: Exclusion reasons can be assigned to a particular bin or pallet 


    Assigning an Exclusion to a Bin: 

    1. Click on the Manage Icon next to the bin of choice 


    2. Select an exclusion reason from the Bin Exclusion Dropdown and click on one of the Save Buttons to save the entry 


    3. The bin is now excluded from being used for allocation/picking for all outbound customer orders


  • Bin Restrictions
    Prevent certain items from entering certain bins.  


    Creating a Bin Restriction: 

    1. Go to the Warehouse Menu and click on the Storage Restrictions Sub-Menu 


    2. Add and maintain storage restrictions  


    Assigning a Restriction to a Bin: 

    1. Click on the Manage Icon next to the bin of choice 


    2. Select a storage restriction from the Storage Restriction Dropdown and click on one of the Save Buttons to save the entry 


    3. The bin will now no longer allow any item that has a different restriction


    Assigning a Restriction to Multiple Bins: 

    1. Search for the bin(s) you'd like to update


    2. Select an option from the Change to Restriction Drop-down, and click on the Change Restriction Button 


    3. Click Okay on the confirmation pop-up 


    4. Now when selecting a restriction during a putaway, only bins assigned that restriction will be available for selection


  • Bin Priorities

    Assign a priority to a bin to help automate bin selection for pallets


    Creating a Bin Priority: 

    1. Go to the Warehouse Menu and click on the Bin Priorities Sub-Menu 


    2. Add and maintain bin priorities


    Assigning a Priority to a Bin: 

    1. Click on the Manage Icon next to the bin of choice


    2. Select a bin priority from the Bin Priority Dropdown and click on one of the Save Buttons to save the entry


    3. Now when selecting a priority during a putaway, only bins assigned that priority will be available for selection    


    Assigning a Priority to Multiple Bins:  

    1. Search for the bin(s) you'd like to update


    2. Select an option from the Change to Priority Drop-down, and click on the Change Priority Button


    3. Click Okay on the confirmation pop-up


  • Bin Height
    Assign a height to a bin to help automate bin selection for pallets that require a minimum height.


    Assigning a Height to a Bin:    

    1. Click on the Manage Icon next to the bin of choice 


    2. Select a height from the Bin Height Dropdown and click on one of the Save Buttons to save the entry 


    3. Now when specifying a minimum height required during a putaway, only bins that meet that minimum height will be available for selection   


  • Bin Environments
    Assign a bin environment to a bin to prevent certain items from entering certain bins 


    Creating a Bin Environment: 

    1. Go to the Warehouse Menu and click on the Bin Environments Sub-Menu 


    2. Add and maintain bin environments


    Assigning an Environment to a Bin: 

    1. Click on the Manage Icon next to the bin of choice


    2. Select a bin environment from the Bin Environment Dropdown and click on one of the Save Buttons to save the entry


    3. Now when selecting a priority during a putaway, only bins assigned that priority will be available for selection


Inventory Features

  • Item Attachments
    Upload photos of labels, actual product images, and any other information deemed relevant for a particular product.

    1. Click on the Add Attachments Icon 


    2. Click on the Add New Button 


    3. Click on the Choose File Button and select a file to upload


    4. Add a description, then click Save 


  • Inventory Aging Notifications

    Inventory Aging Notification by Class 

    1.  Go to the Warehouse Menu and click on the Inventory Aging Notifications Sub-Menu


    2. Click on the Add New button 


    3. Fill in the necessary information, then click on one of the Save buttons to save the notification 

    Example: Start sending System Notifications on a daily basis to David Scotti when any item in the Beef item class has a sell by date in 14 days or less


    4. Emails or system notifications will be sent out accordingly 

    Example: System Notification 


    Inventory Aging Notification by Item 

    1. Go to the Warehouse Menu and click on the Item Master Sub-Menu 


    2. Click on the Carrot icon and then the Edit Item icon next to the item of choice 


    3. Click on the Aging Notifications button 


    4. Click on the Add New button 


    5. Fill in the necessary information and click one of the Save buttons to save the notification 

    Example: Start sending Email Notifications to all Warehouse Managers daily once there is inventory for BEEF01 that has a sell by in 14 days or less


    6. Emails or system notifications will be sent out accordingly 

    Example: Email Notification
  • UPC/GTIN Codes

    UPC Codes:

    UPC barcodes can be scanned throughout the RF system in any item input field prompt, in lieu of manually typing in the information.  UPC codes must be associated first, with their respective item number in order to use the UPC barcodes for scanning.     

    Associating UPC Codes: 

    1. Go to the Warehouse Menu and click on the Item Master Sub-Menu


    2. Click on the Scanning Icon 


    3. Select UPC from the Barcode Format Dropdown, then click on the Add New Button 


    4. Click on the Scan Button 


    5. Scan the UPC code, then click on the Next Step Button 


    6. The UPC code is now associated with an item 


    GS1-128(GTIN) Codes: 

    GS1-128(GTIN) barcodes can be scanned throughout the RF system in any item input field prompt, in lieu of manually typing in the information.  Any information contained within the barcode including the item number, lot etc. will preload accordingly as well.  GTIN codes must be associated first, with their respective item number in order to use the GTIN barcodes for scanning. 

    GTIN barcodes can also be scanned to take catch weights.  While associating the GTIN with the item code is not necessary in this instance, it is recommended.     

    Associating GTIN Codes: 

    1. Go to the Warehouse Menu and click on the Item Master Sub-Menu


    2. Click on the Scanning Icon 


    3. Select GTIN Codes from the Type Dropdown, then click on the Add New Button 


    4. Click on the Scan Button 


    5. Scan the GTIN code, then click on the Next Step Button 


    6. The GTIN code is now associated with an item 


    Associating Re-Label GTIN Codes:
     
    Re-Label GTIN Codes are GTIN codes that your customers may use that differ from the GTIN Codes that you utilize.  These Re-Label GTIN Codes can be used to generate separate labels that your customers can use when receiving product. 
     
    1. To make a GTIN Code available for Re-Label, add a new GTIN Code association for that GTIN, then add both a Re-Label Description and Re-Label Printed Text.

    Note: The Re-Label Printed Text will be displayed and printed directly on the label, while th Re-Label Description is purely internal only and will not show up on the label.