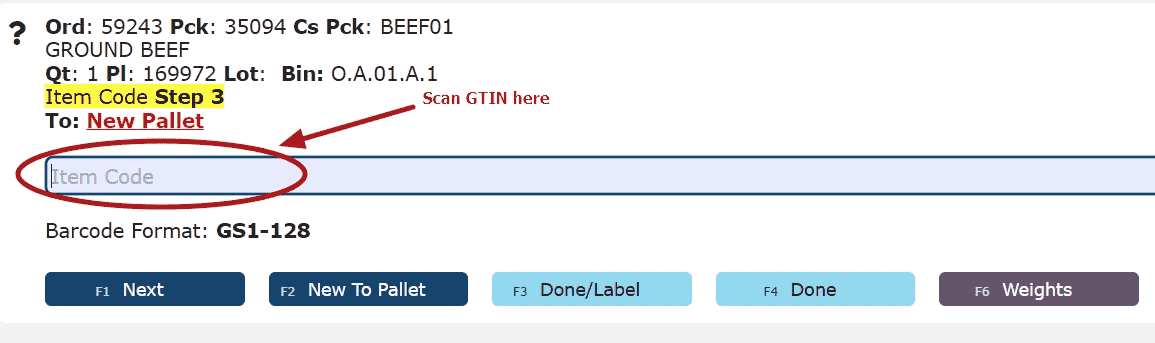
Any process that requests information that is held in a barcode will accept a scan in lieu of performing the manual entry of the information.
Ex: Picking
Disclaimer:
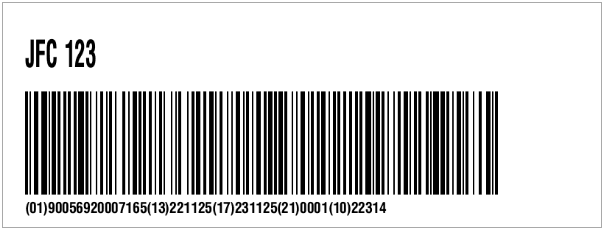
When selecting a GS128 Barcode option for label printing, note components of the barcode will only be included if the data is applicable and available.
For example:(a) the weight is only included for catch-weight items if a weight has been collected
(b) the standard weight will display for set weight items
(c) the gross weight will display for non-set weight and non-catch weight items
(d) an expiration or use by date is only included when that date has been entered for that inventory unit
(e) lot number is only included when a lot number exists for that inventory unit. Etc.
Please test samples before committing to a format in a production cycle to avoid overflowing the label with a barcode that is too large.
Supported Labels Include:
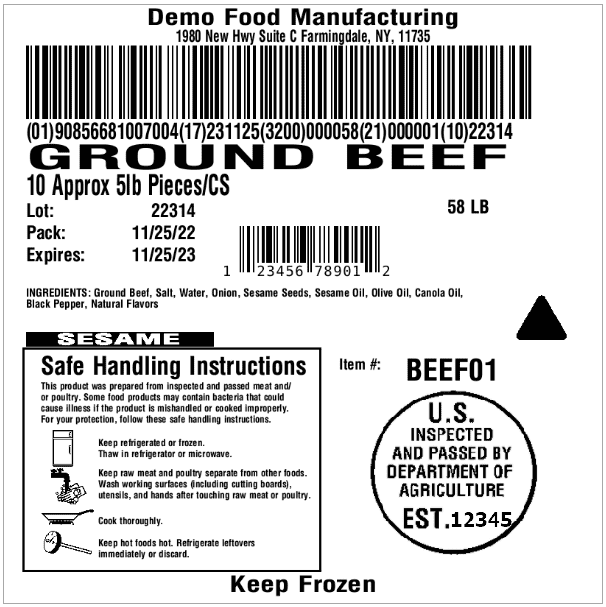
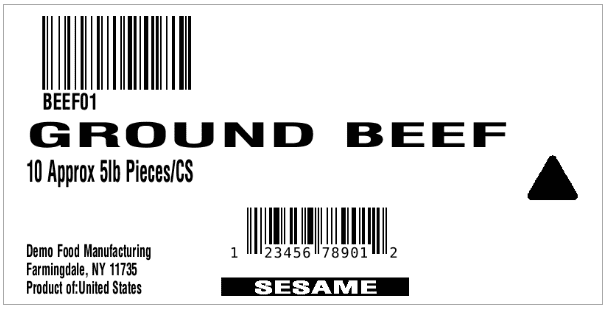
Case Labels: Labels placed on a case of items in inventory. 1 label per case, which can include 1 UPC barcode and 1 GTIN barcode that includes all of the case's information. UPC/GTIN codes must be associated with the item in order to print barcodes and a weight if applicable. If no GTIN is associated with the item, an Item Number Barcode will print instead. If there is a lot specified and no GTIN Code, then a Lot # barcode will print along with the Item Number barcode.
Supported Label Sizing/Format: Case label format can either be assigned per item class and/or assigned per item. Items must either be assigned an item class that has been assigned a case label format, or assigned an override case label format directly within the item master in order to generate and print case labels.
4x2 Labels
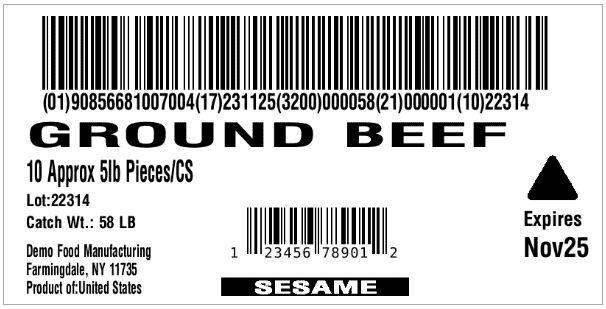
4x4 Labels
Note: Case labels print to the Asset/Component/Item/Case Label Printer setup under your user profile
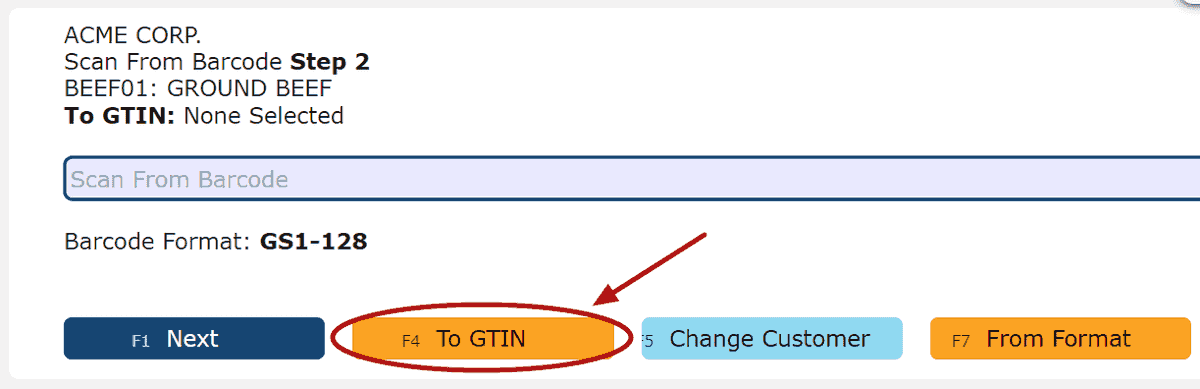
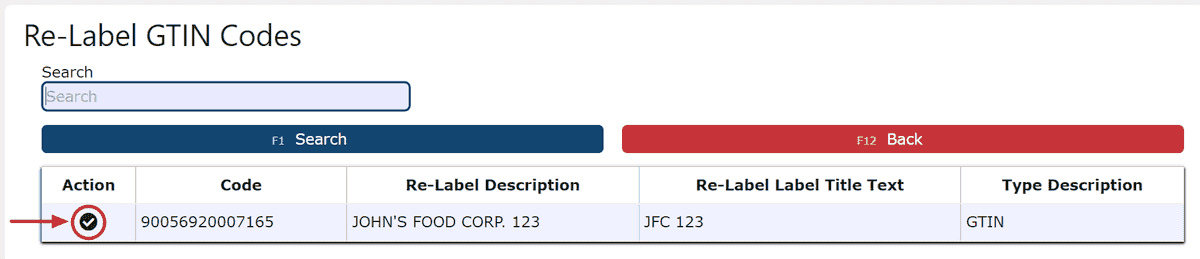
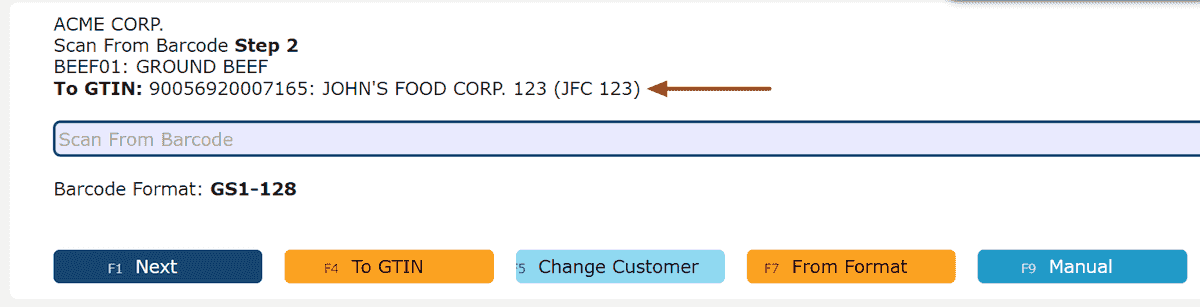
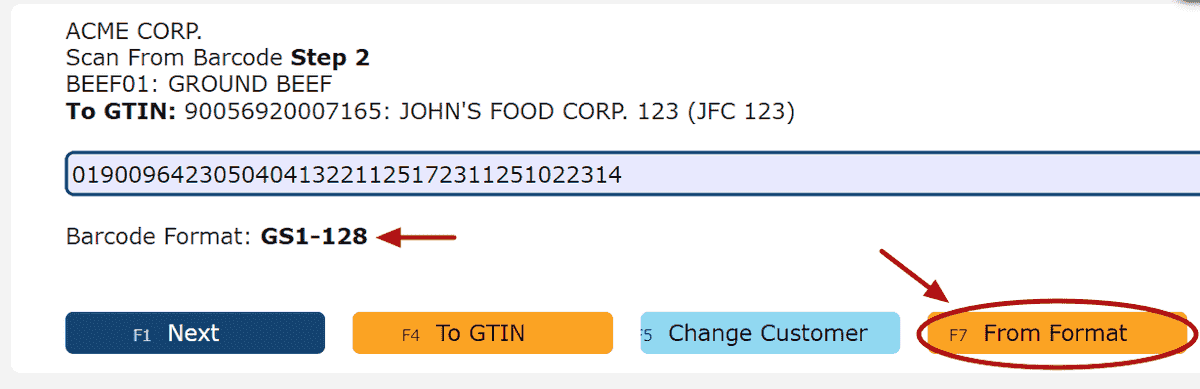
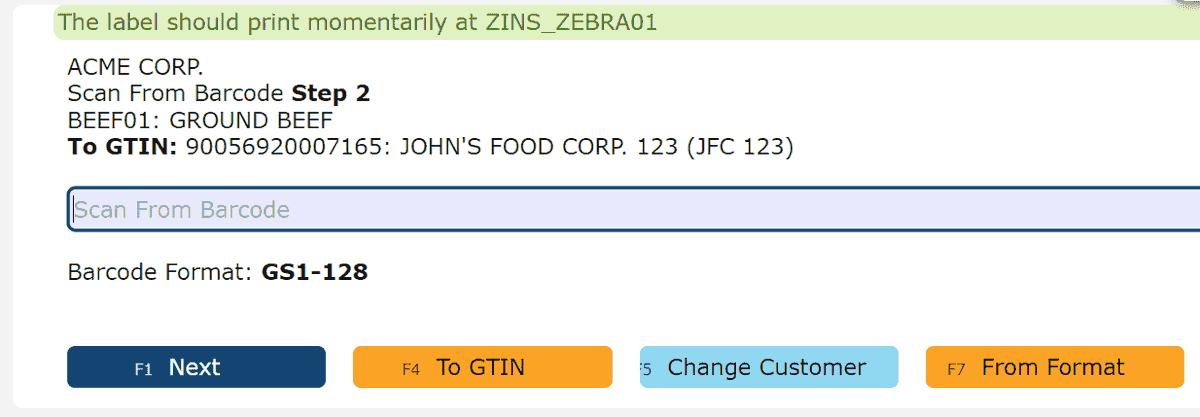
GTIN Re-Labels: 1.5'' labels that can be generated with a GTIN barcode that differs from your GTIN currently associated with the product code.
(Commonly used for customers who would like to scan in their inbound product using their own GTIN number)
Note: GTIN Re-labels print to the Asset/Component/Item/Case Label Printer setup under your user profile.
Product Labels: Labels placed on each item in inventory. These labels include 1 barcode for the item number in addition to a UPC code.
(Commonly used for items for internal inventory purposes, items that aren't actually sold/would require a special made product label)
Note: Product labels print to the Asset/Component/Item/Case Label Printer setup under your user profile
Pallet Labels: Labels placed on each pallet in inventory.
Supported PDF Pallet Label Formats:
• 1-Up Landscape 8.5 x 11
• 1-Up Portrait 8.5 x 11
• 2-Up Portrait 8.5 x 11
Note: Pallet labels print to the Pallet Label Printer setup under your user profile. Both laser and thermal printers are supported.
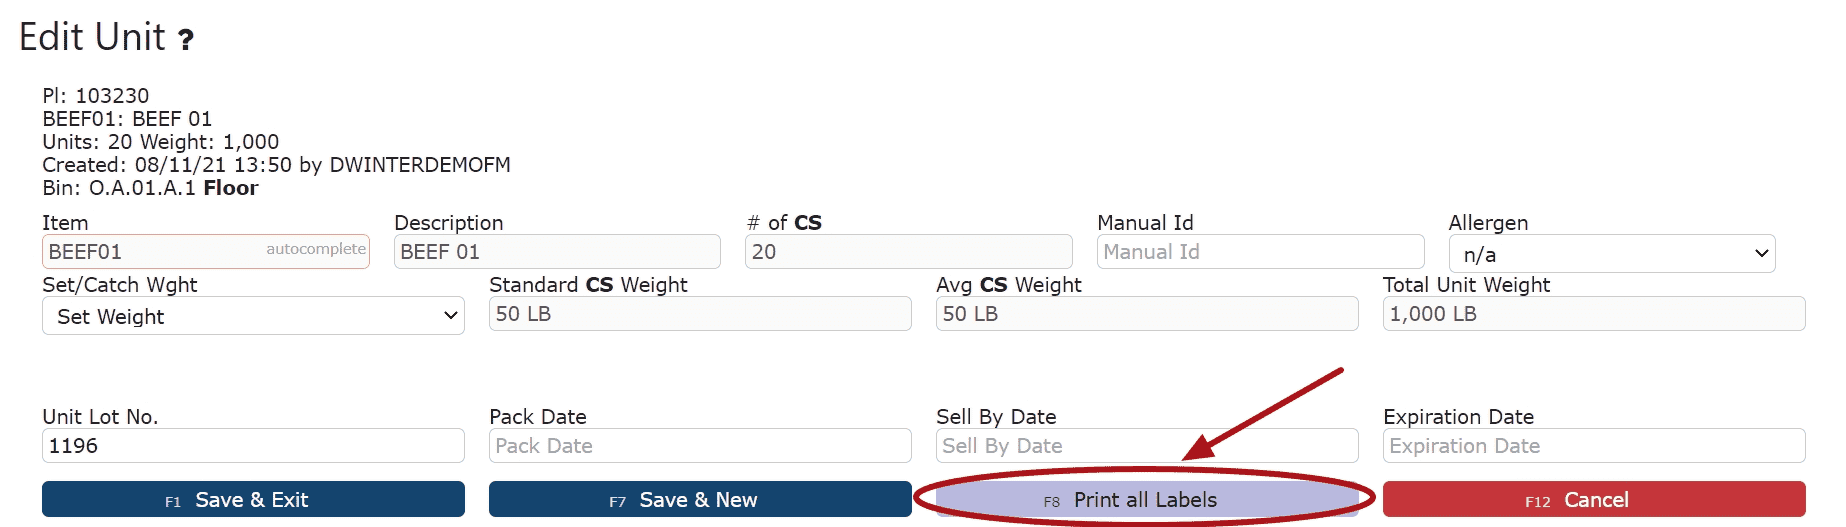
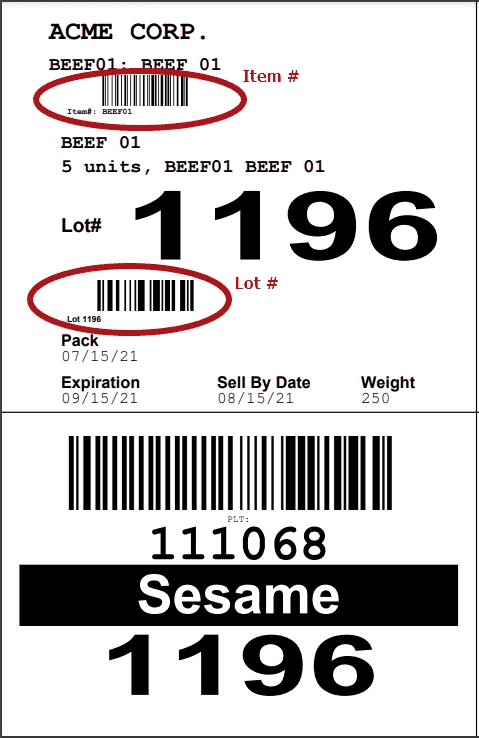
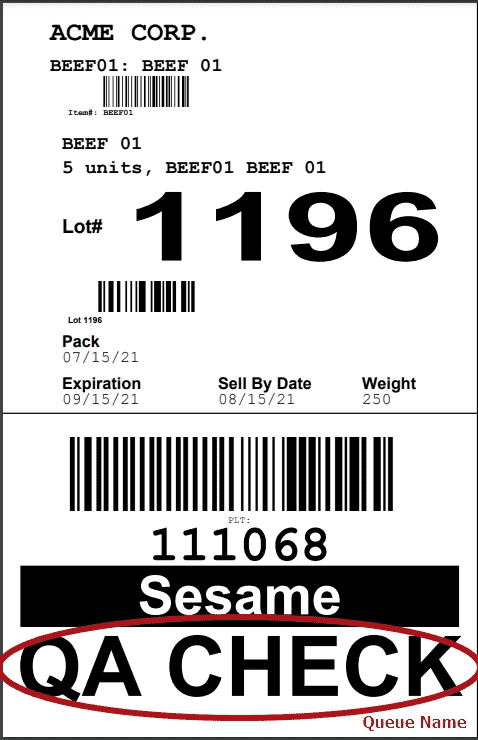
Inventory Pallet Labels: Labels placed on pallets during putaways, and anytime throughout the pallet's stay within the warehouse to identify it. These labels include barcodes for the item, pallet id and lot #.
Other Information Included:- Item or Mixed
- # of Units
- Lot
- Lot Pack Date
- Expiration Date
- Sell by Date
- Weight
- Allergen
- Manual ID
- Bin
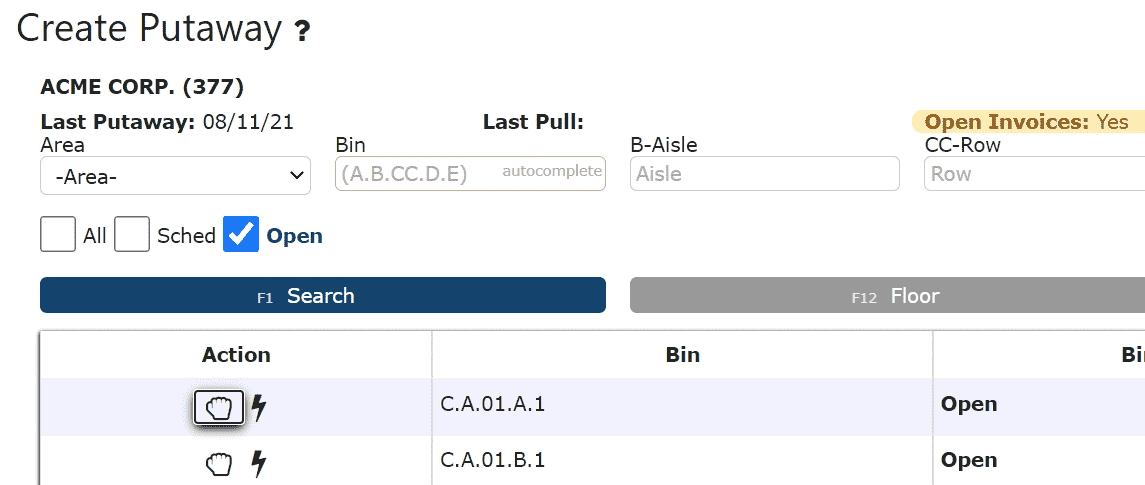
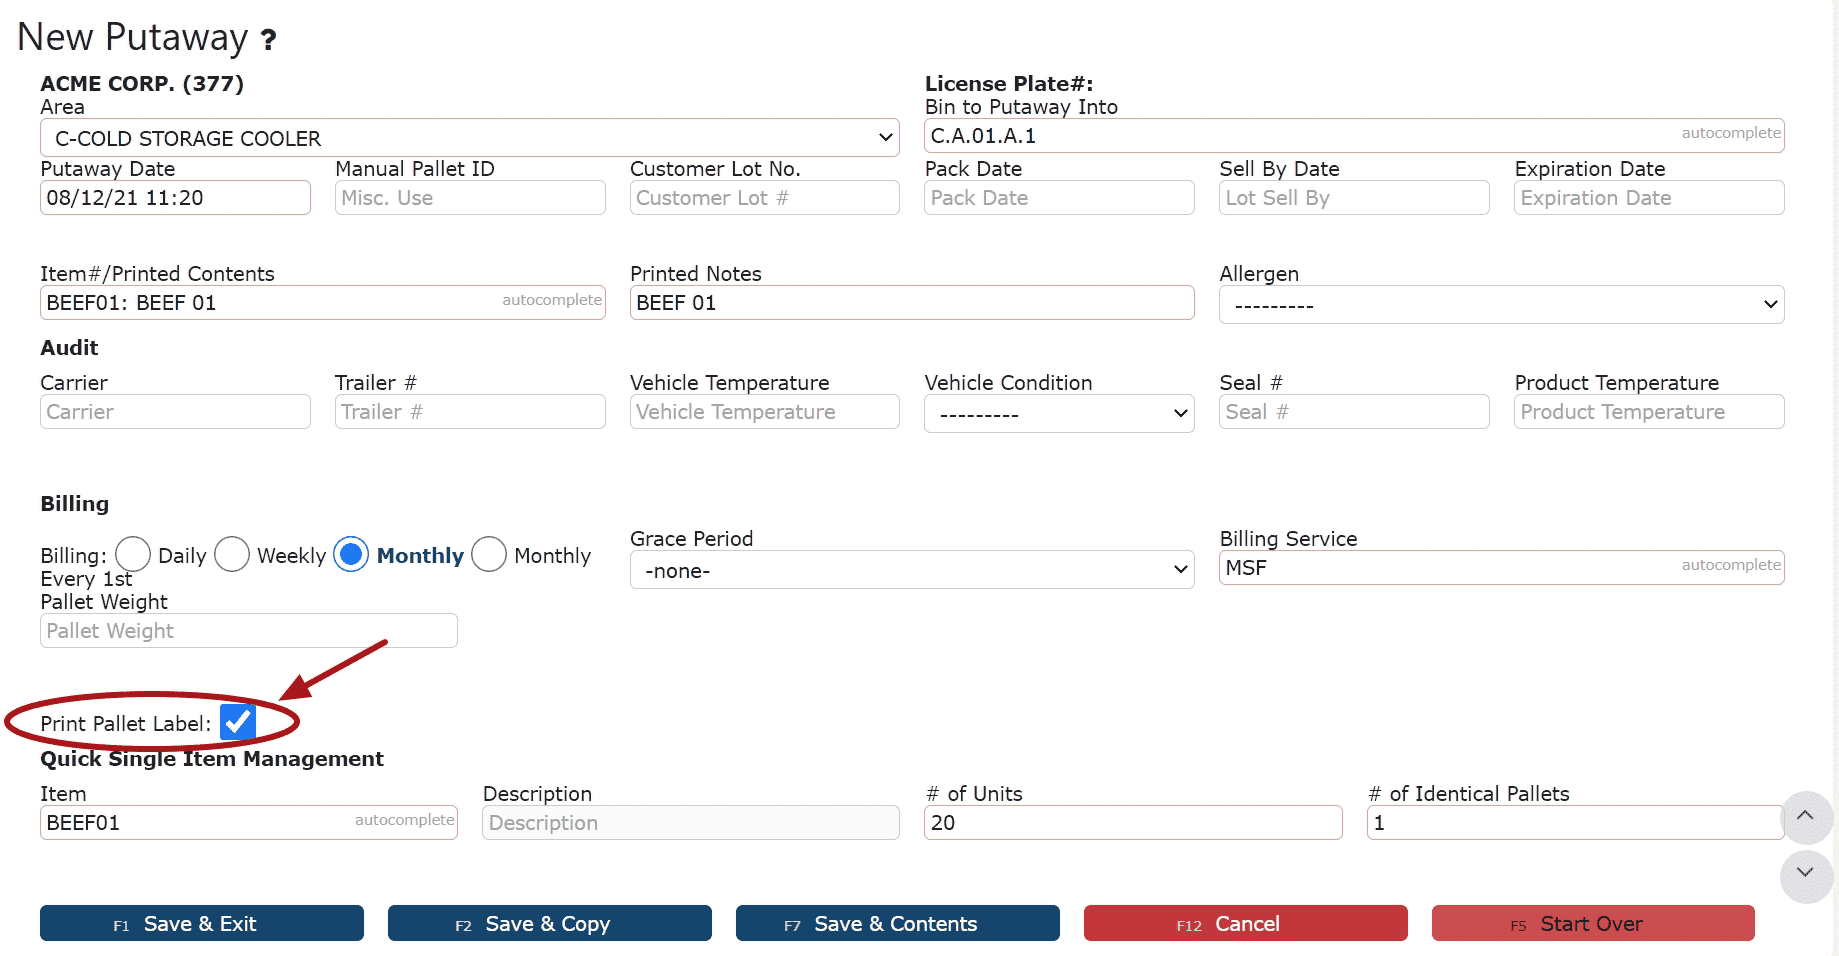
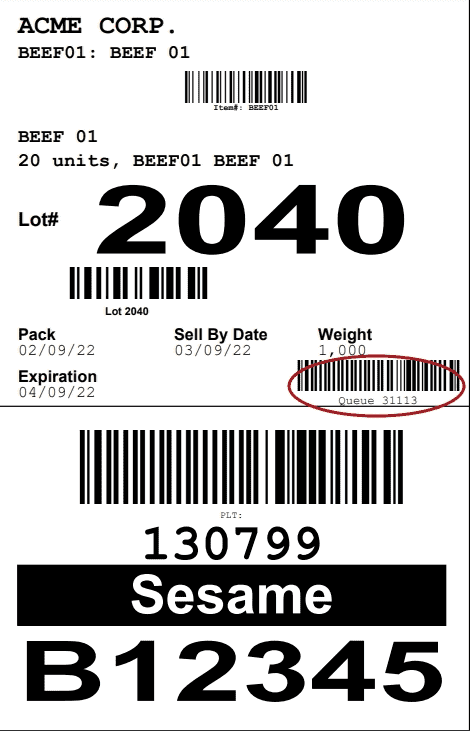
Putaway Pallet Label: Labels printed during the putaway creation process, ahead of actually performing the putaway into inventory. These labels will contain a barcode with the Putaway Queue # the pallet belongs to, and can be scanned to initiate performing the putaway.

Warehouse Pallet Label:
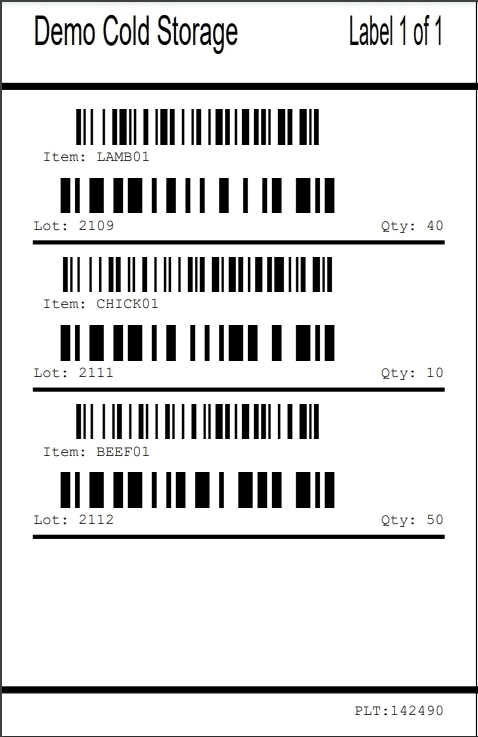
Mixed Pallet Labels: Labels placed on mixed pallets that contain multiple items and/or lots. These labels include barcodes for each item # or GS1-128 code (if associated), and lot number, and can be used during the verification process.
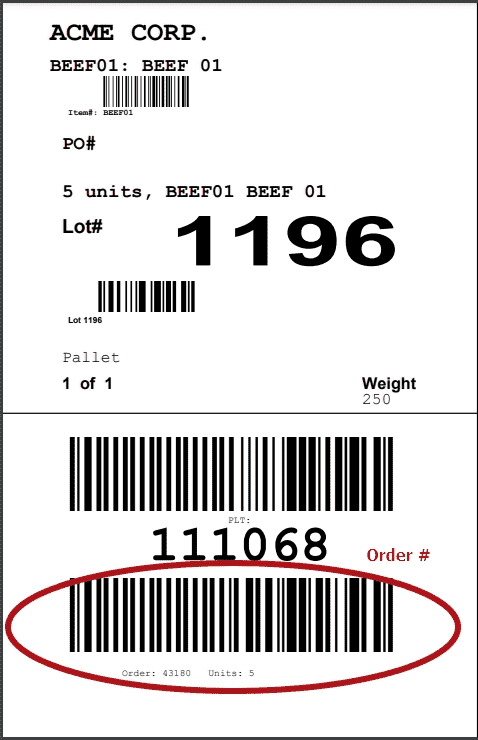
Post Pick/Verification Order Pallet Labels: Labels placed on pallets after picking or verification has taken place for outbound pick orders. These labels include barcodes for the item, lot, pallet id and order #, and also indicate the total case count on the order as of the moment the label was printed.
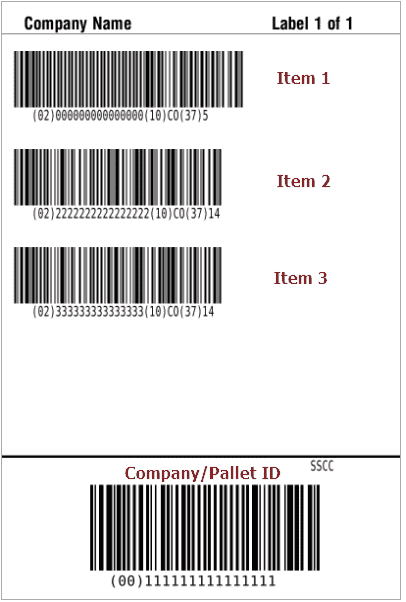
Outbound Order Pallet Unit Labels: Labels placed on outbound shipment pallets. Includes 1 barcode per item, which includes the case quantity across all lots. As well as a barcode for the company/pallet id.
(Commonly requested by receiving parties of product who want to efficiently scan their inbounds received into their inventory management system)
Note:Outbound Order Pallet Unit Labels will be printed automatically along with regular order pallet labels only after verification has taken place, as long as a GS128 SSCC (Serial Shipping Container Code) is setup and each item has a GTIN code associated with it.
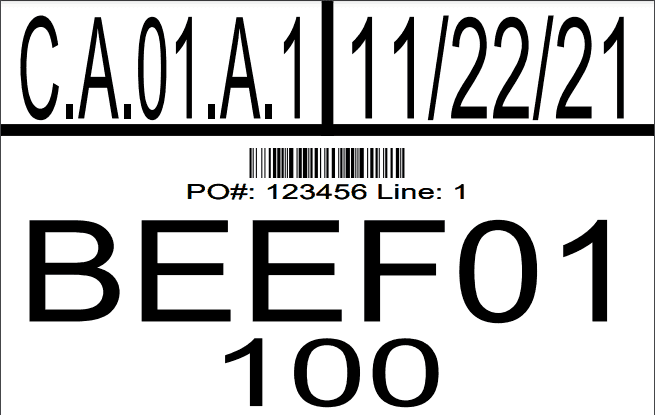
Pull Queue Pallet Labels: New labels placed on pallets as they are created/moved around the warehouse using pull queues. These labels include barcodes for the item#and pallet id, and display the "queue name" assigned when creating the pull queue, as opposed to the bin or manual id/lot information at the bottom of the label.
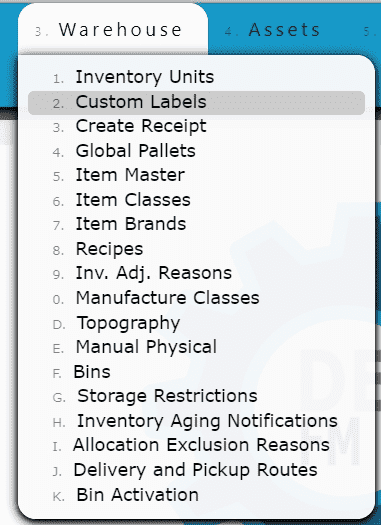
Custom Labels: Create your own custom labels to fill in with any miscellaneous information.
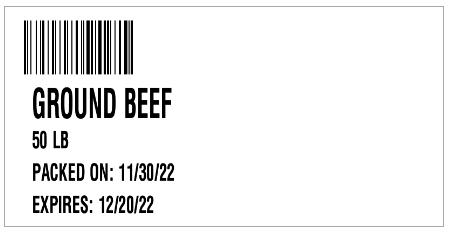
Options Include:Simple Case Label 4x2 - These can be placed on pallets in addition to, or in lieu of the standard system case labels.
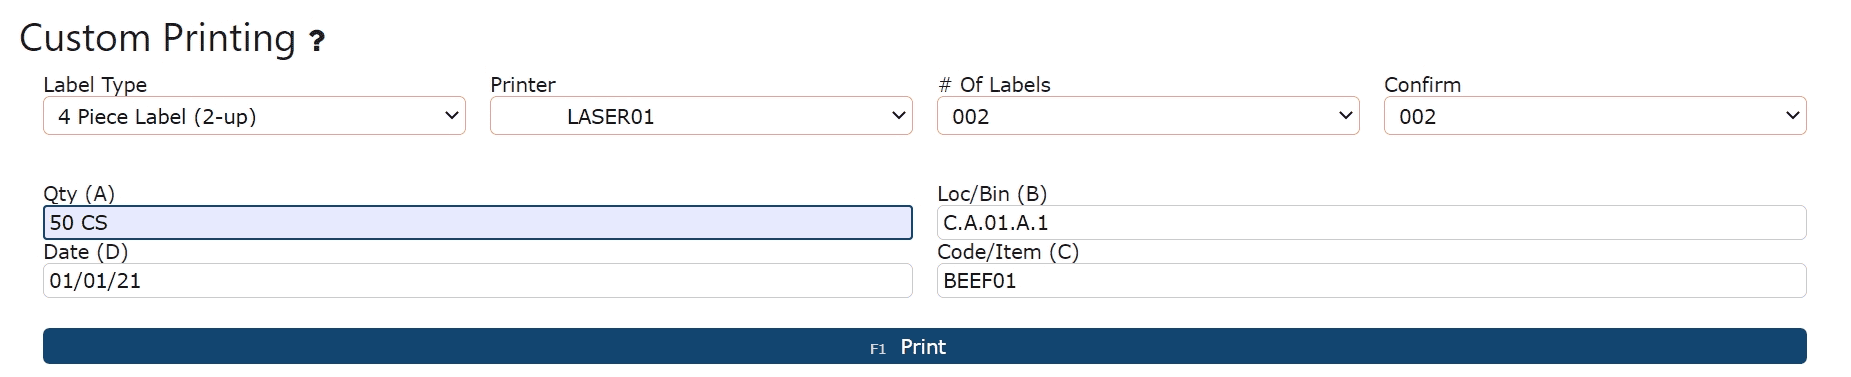
4-Piece Label (8.5x11) - These can be placed on pallets in addition to, or in lieu of the standard system pallet labels.
3-Line Label (2x2)
Note: Custom labels print to the printer selected during creation of the label. Case labels and 3-line labels only print to thermal printers. 4-piece labels can print to either laser or thermal printers.
The appropriate printer must be selected and loaded with the correct label size that corresponds to the selected label type.
Simple Case Label 4x2:
4-Piece Label:
3-Line Label:
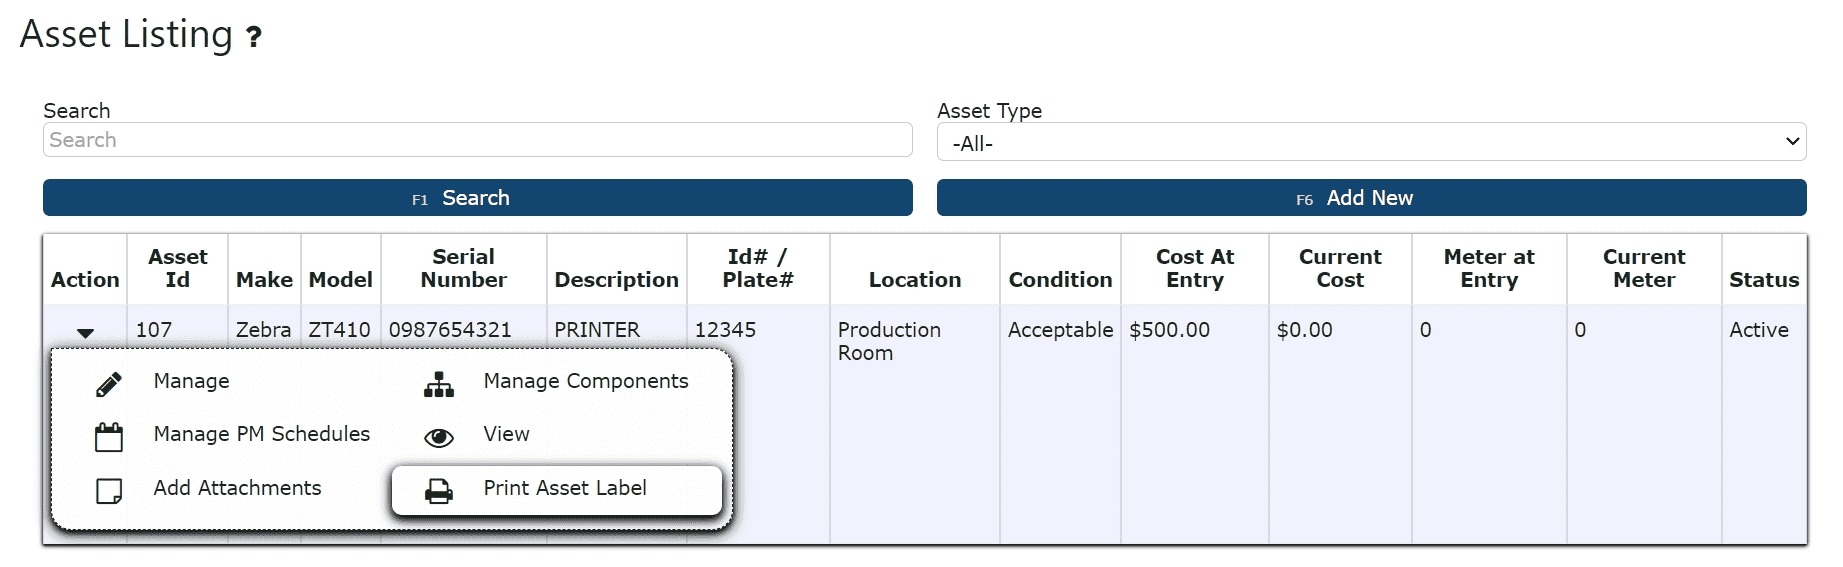
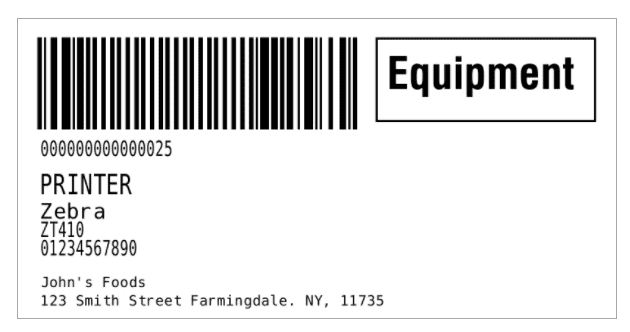
Asset Labels: Labels placed on assets/equipment. These labels include 1 barcode for the asset's id and can be scanned during the performance of maintenance events.
Note: Asset labels print to the Asset/Component/Item/Case Label Printer setup under your user profile
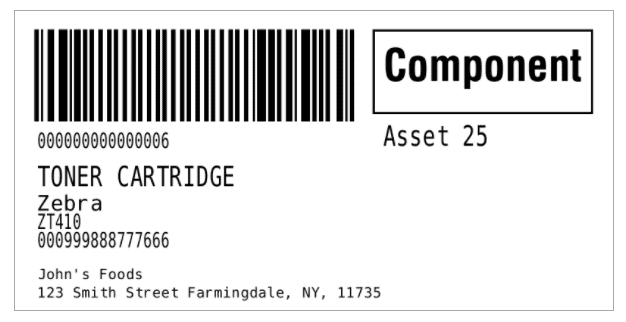
Component Labels: Labels placed of an asset's component(s). These labels include 1 barcode for the component's id and can be scanned during the performance of maintenance events.
Note: Component labels print to the Asset/Component/Item/Case Label Printer setup under your user profile