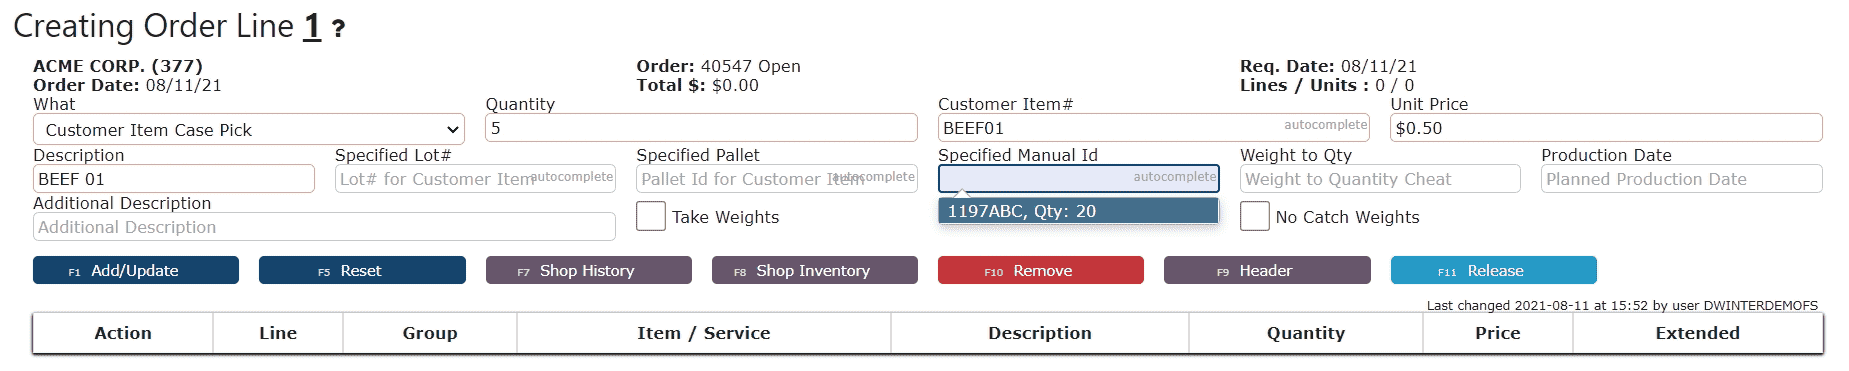
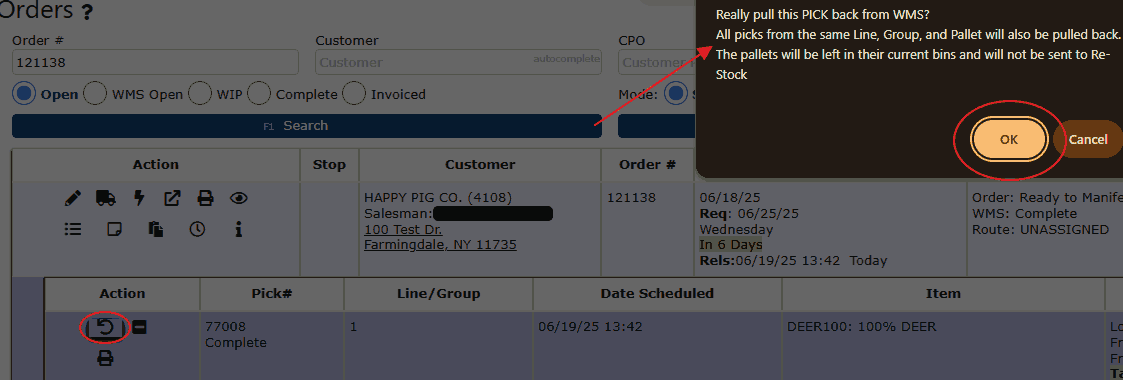
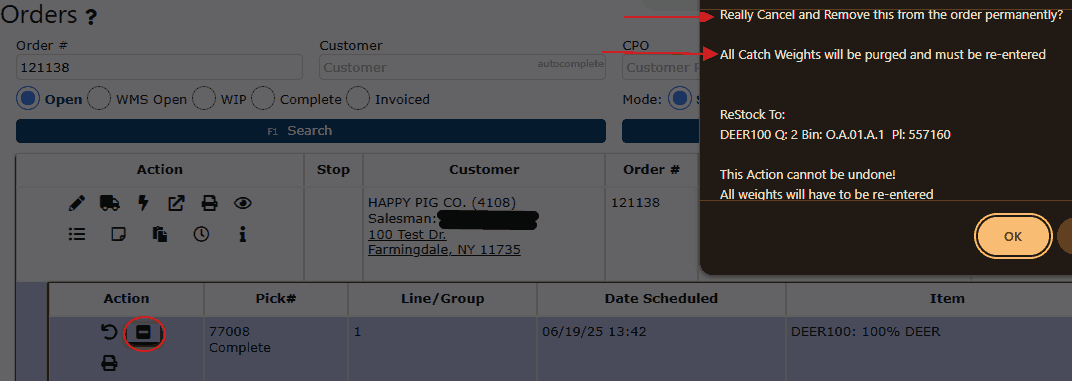
Outbound Customer Picking Orders:
An outbound process that allows inventory to be allocated and picked for outbound shipments.
Outbound Pick Process:
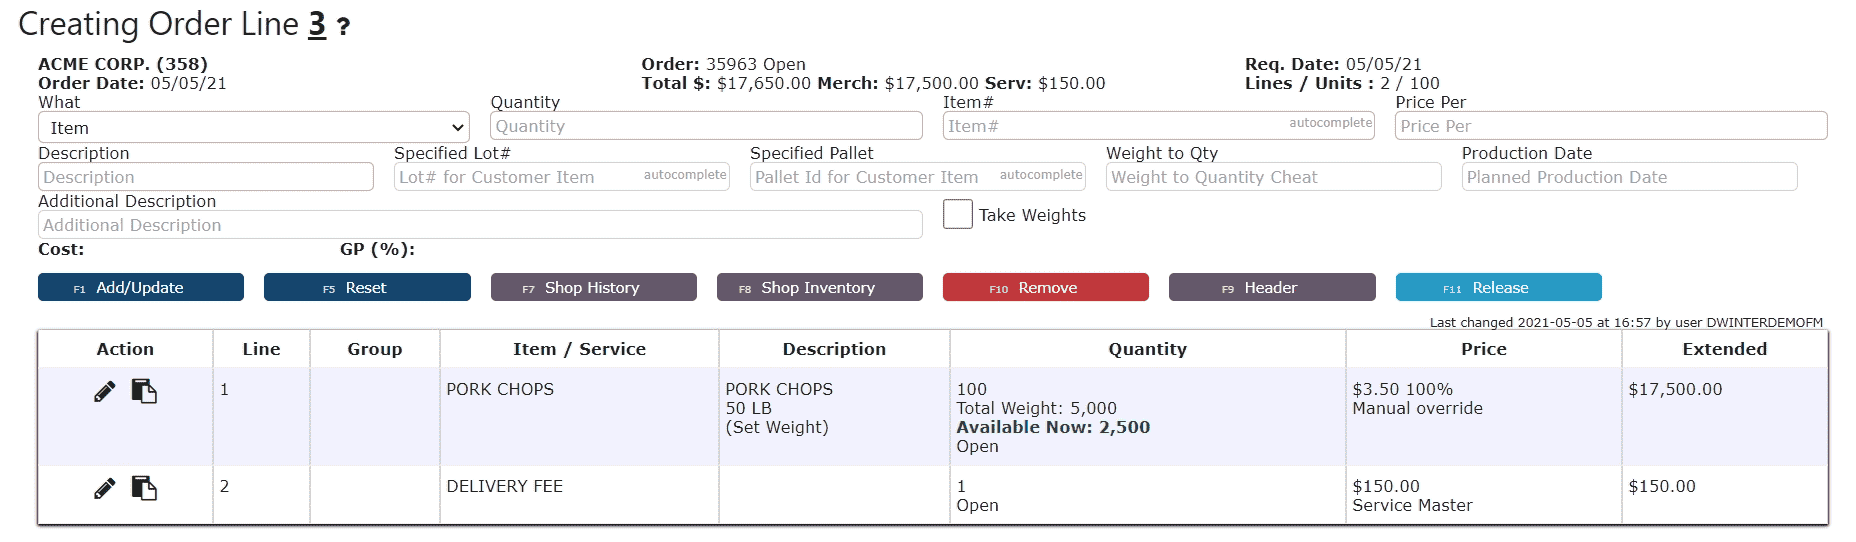
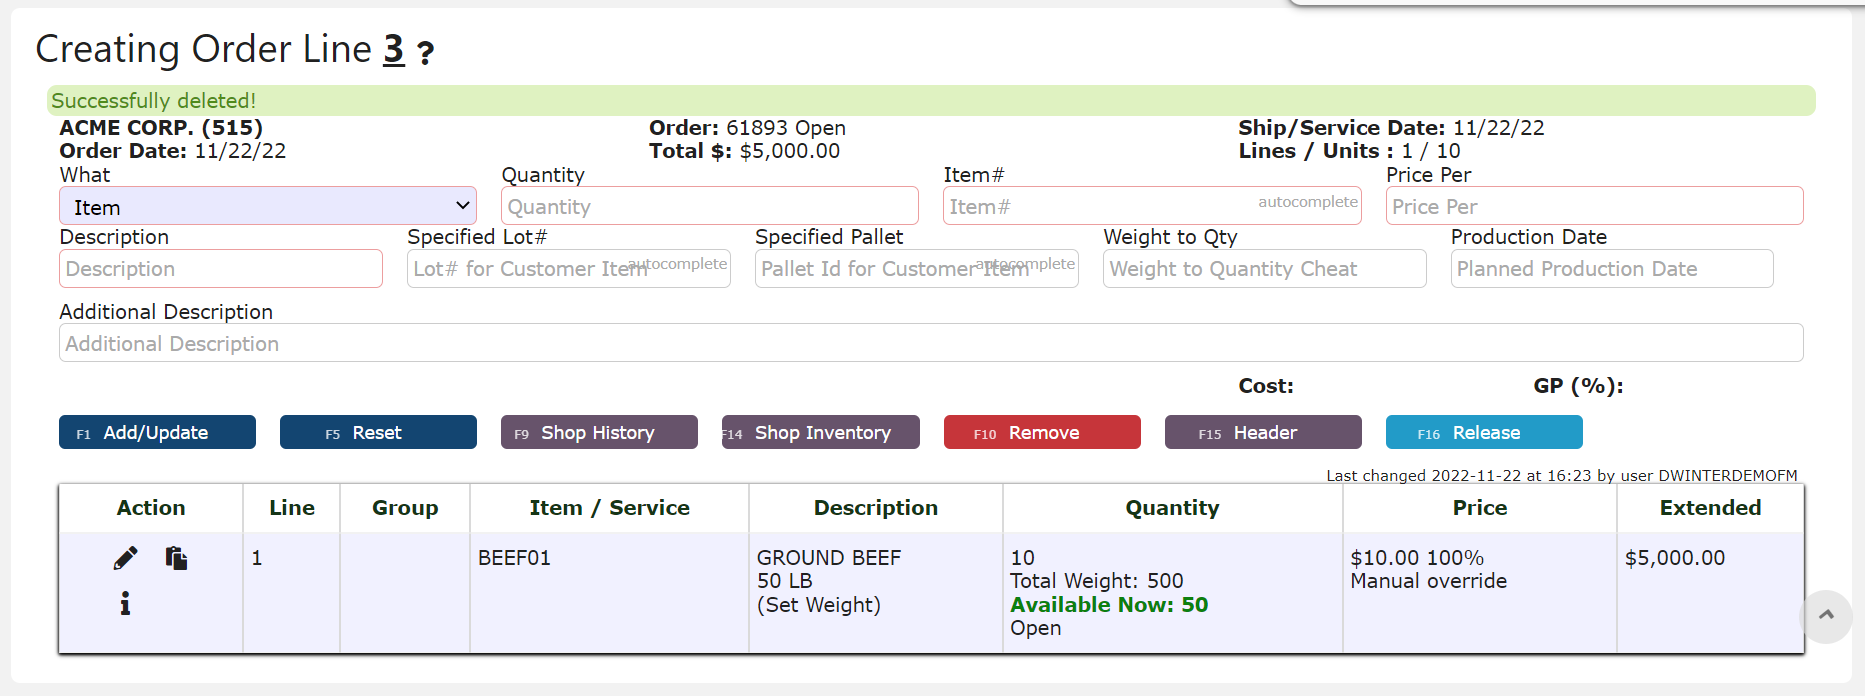
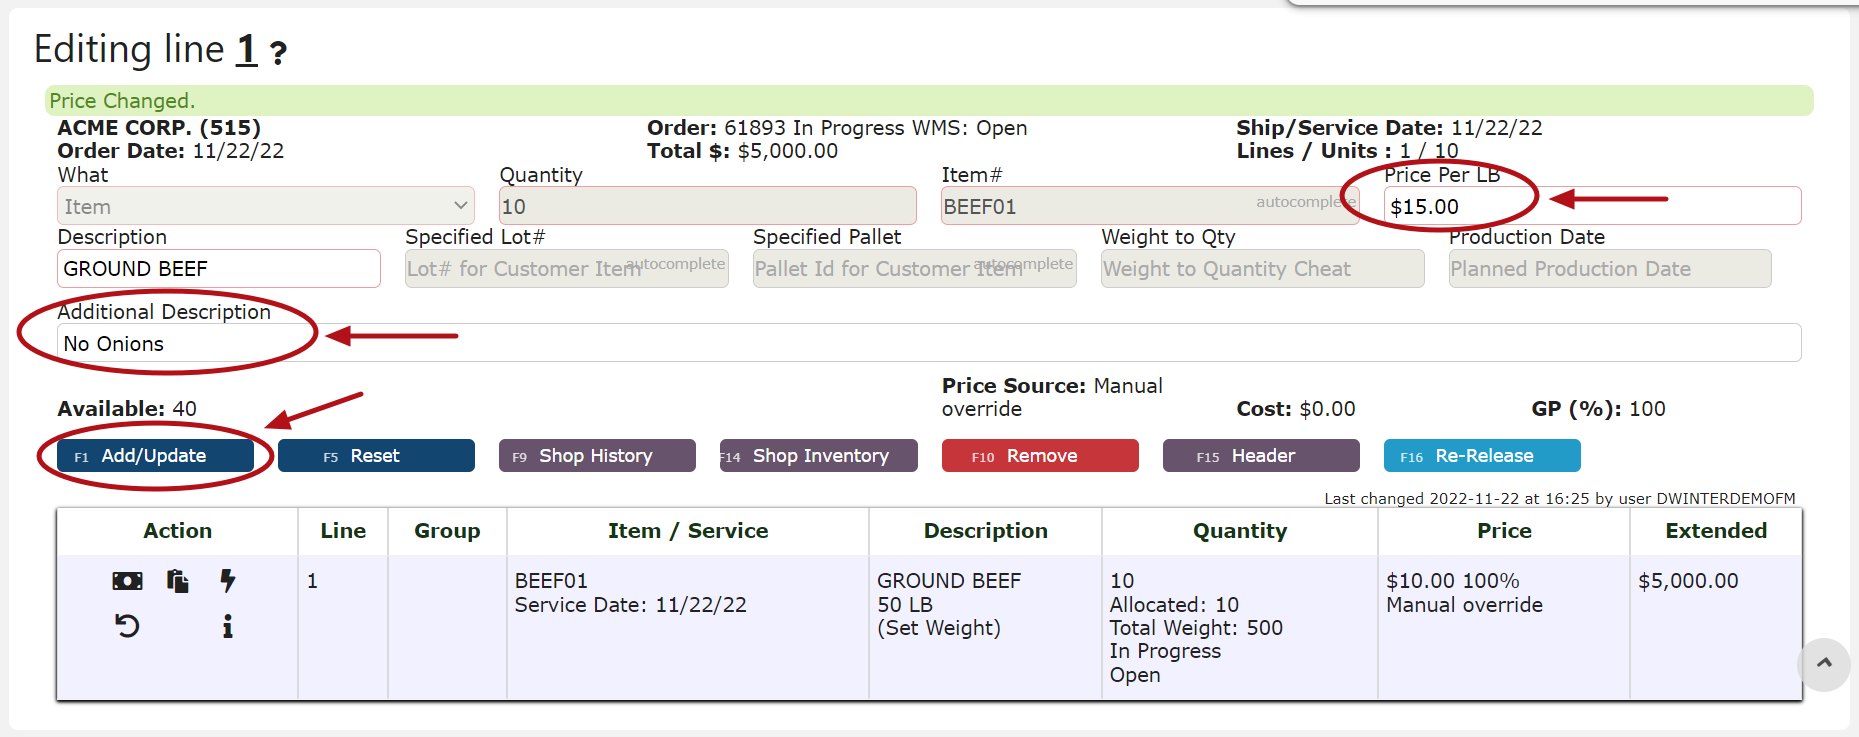
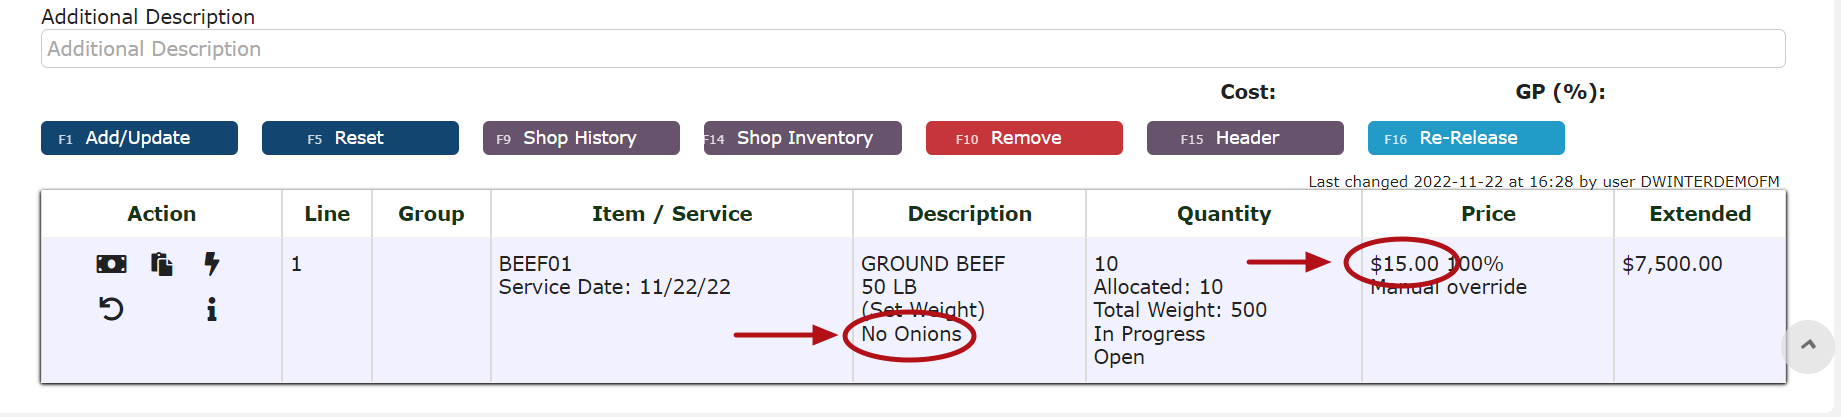
1. Order Creation and Release
2. Picking
3. Verifying
4. Manifesting
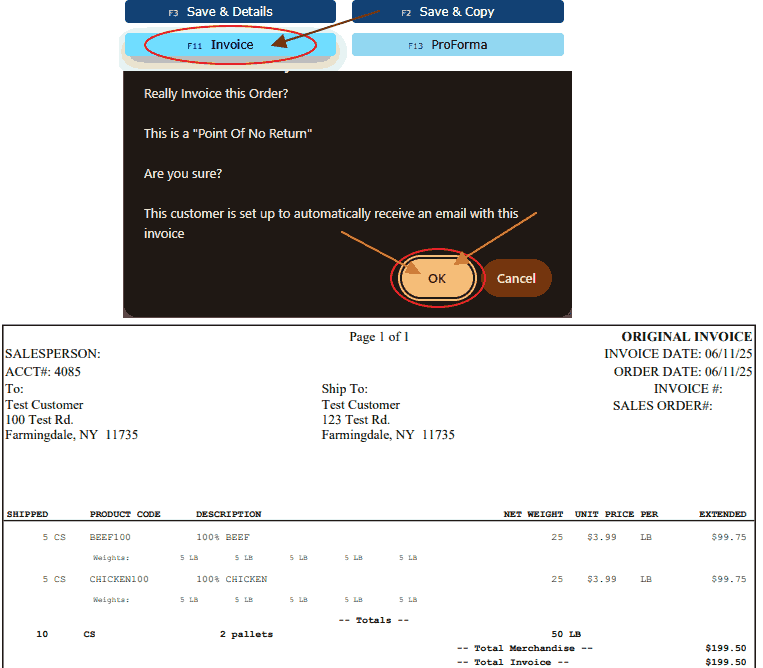
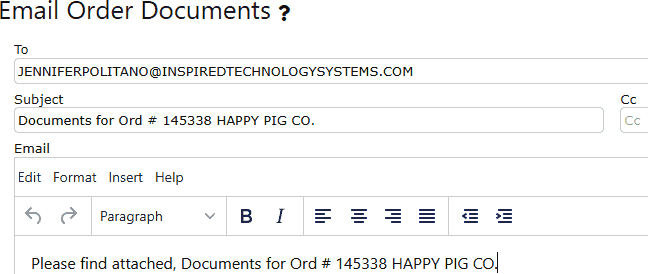
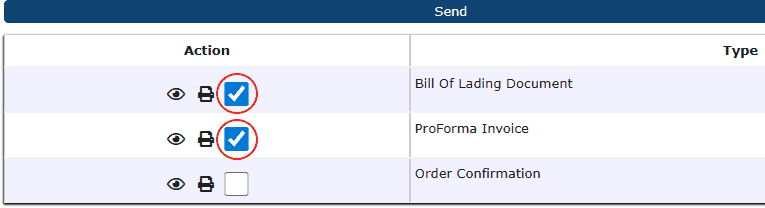
5. Invoicing


Key Information:
Customer pick order management in Inspired ERP follows a structured workflow to ensure accurate order fulfillment and inventory tracking. This process typically involves releasing the order, waving it to the pick queue, completing the pick in the warehouse, and verifying the items before moving forward to manifesting.
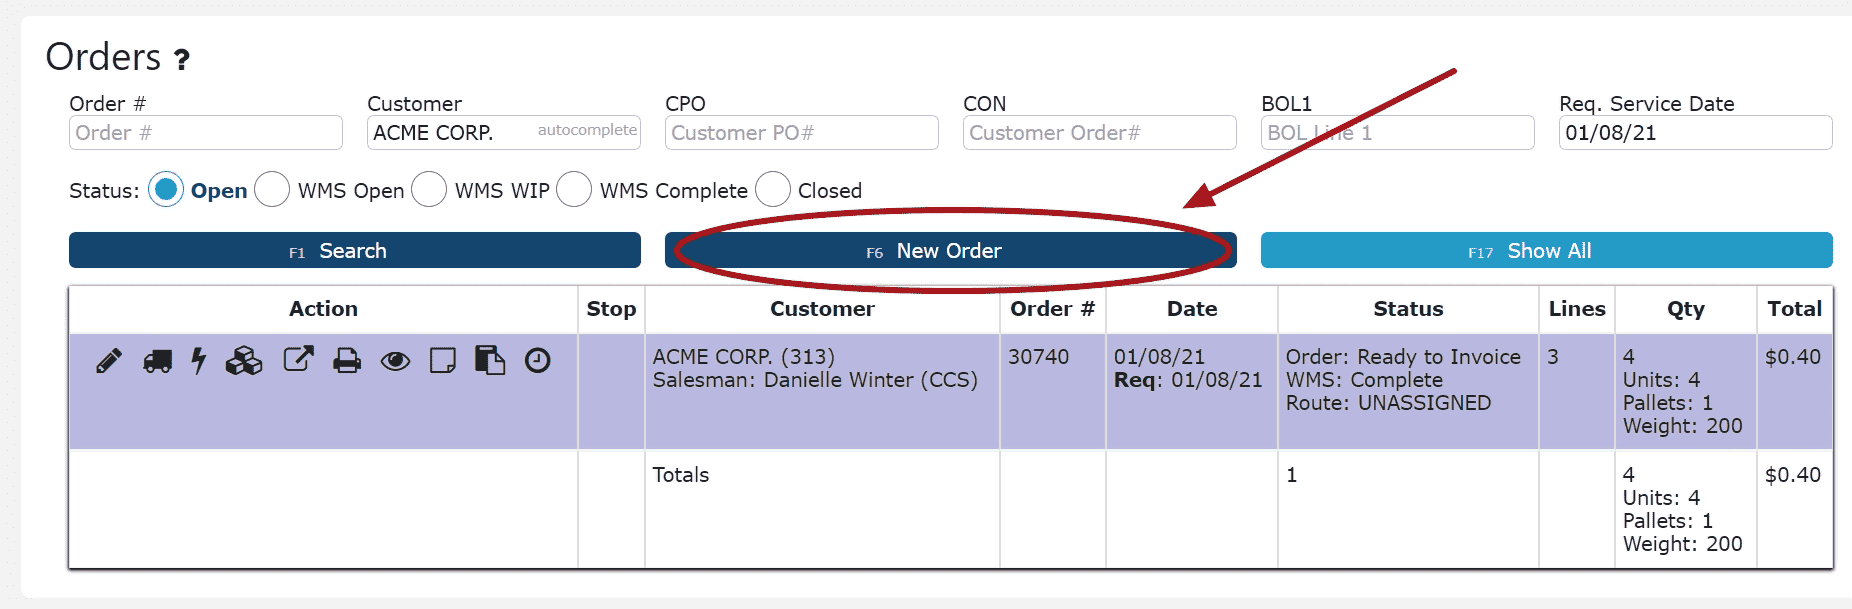
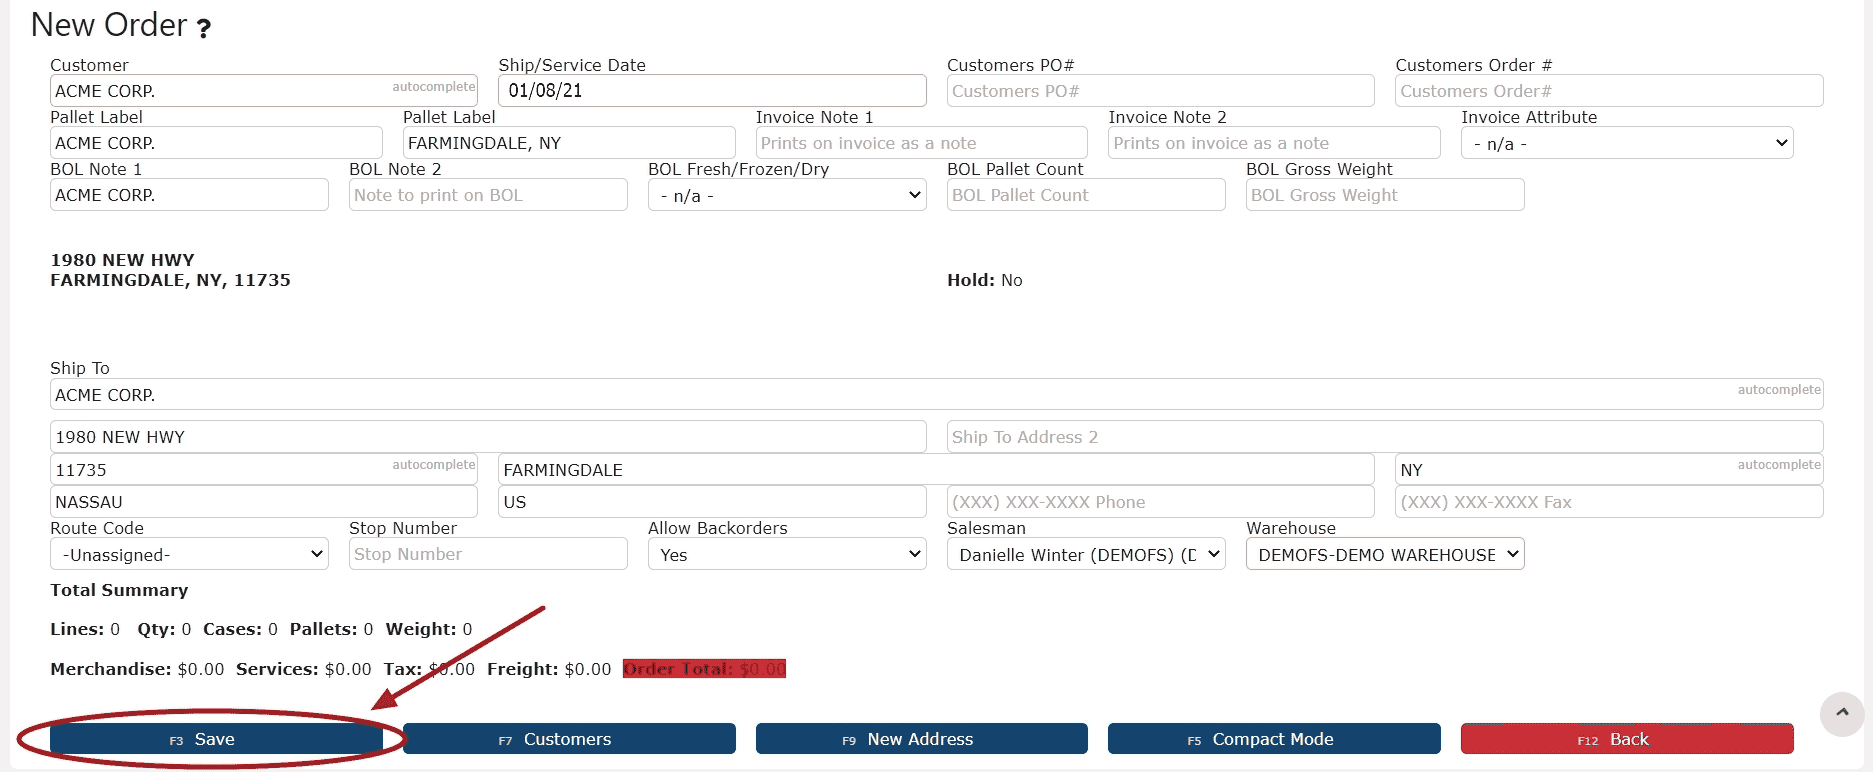
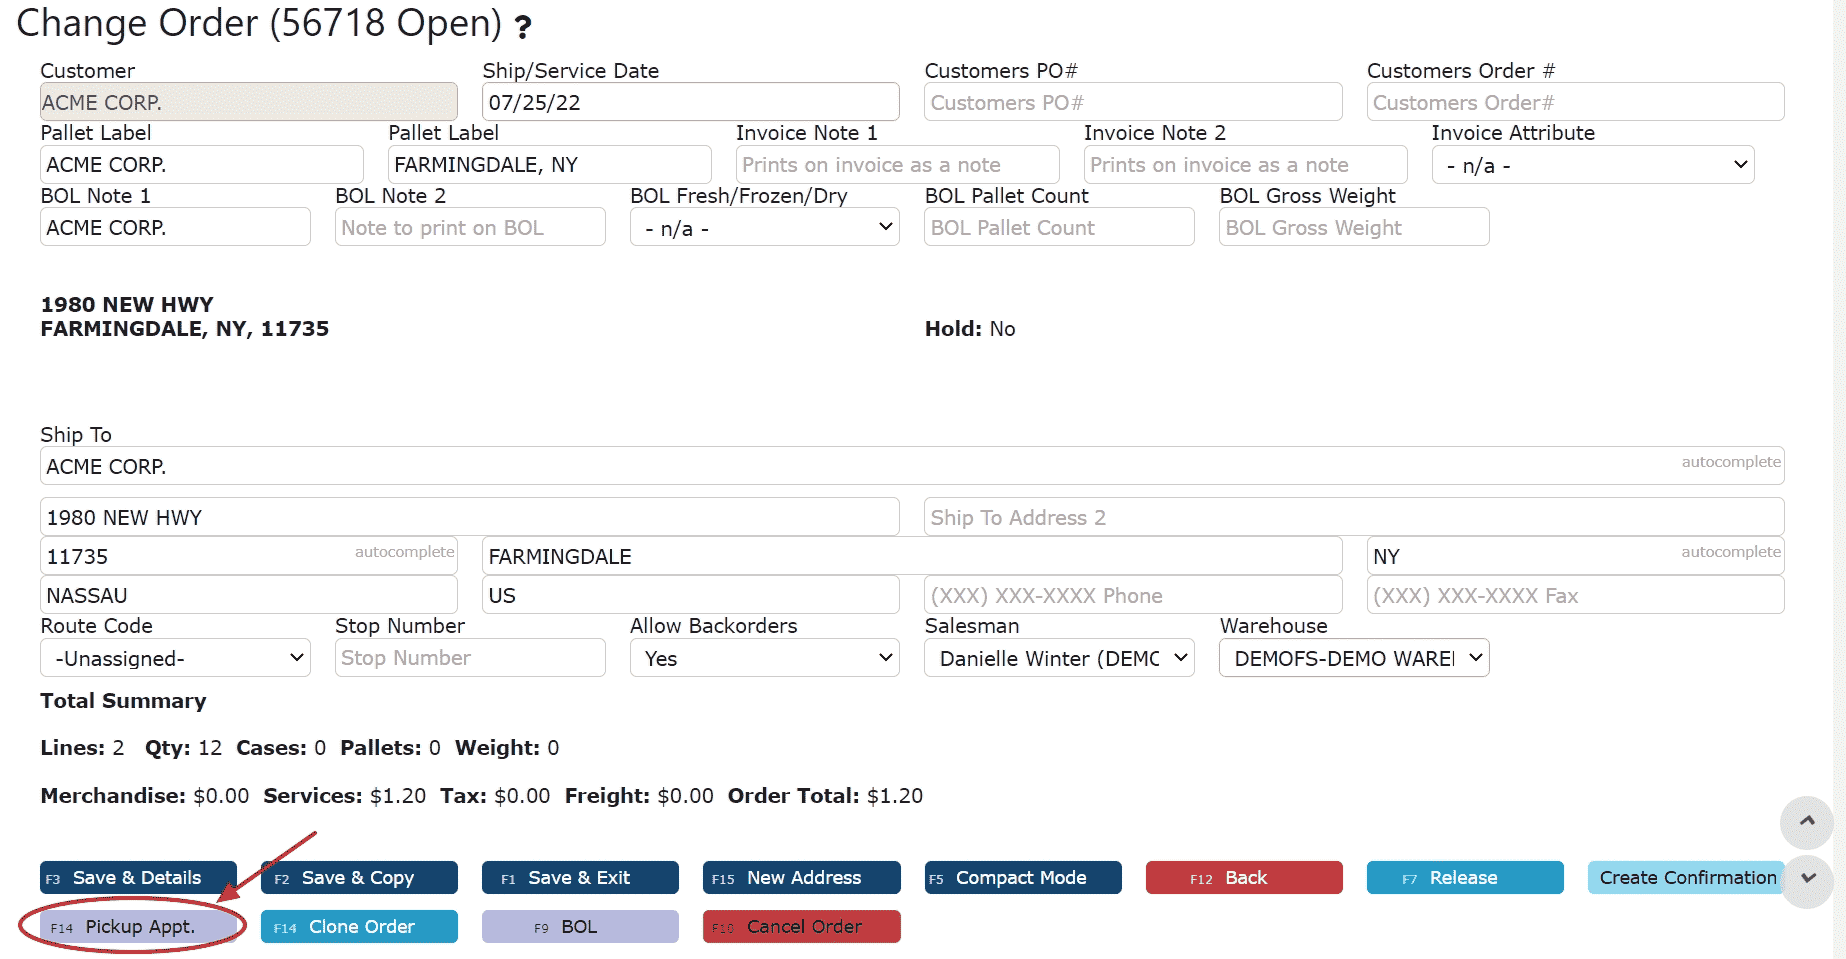
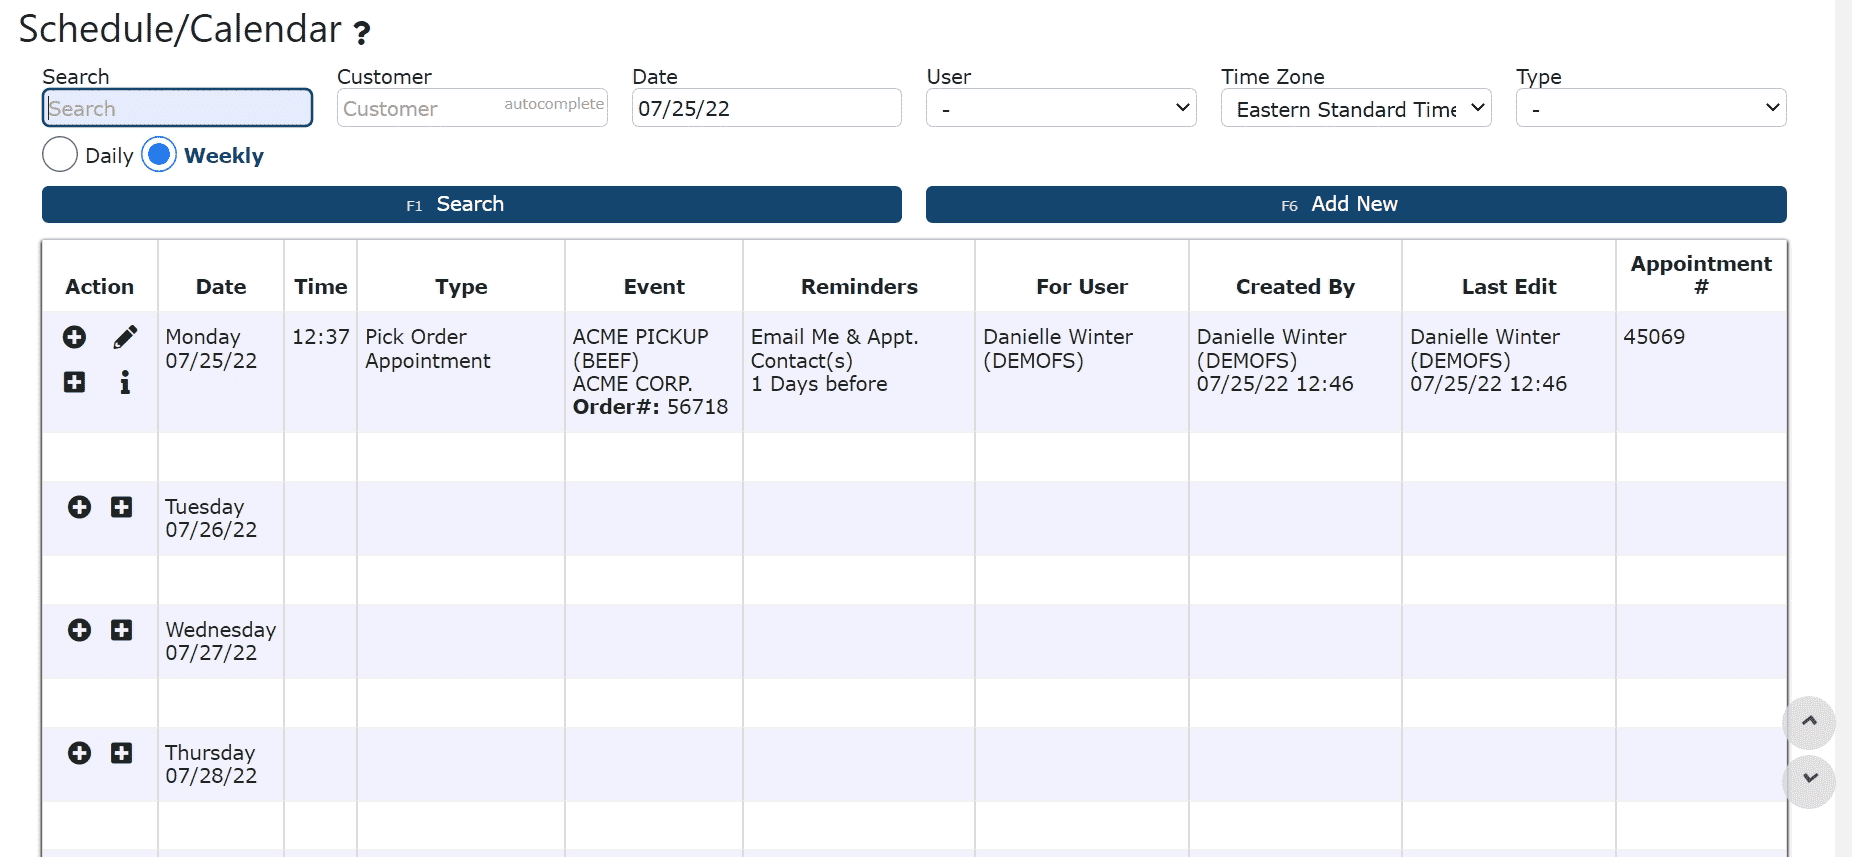
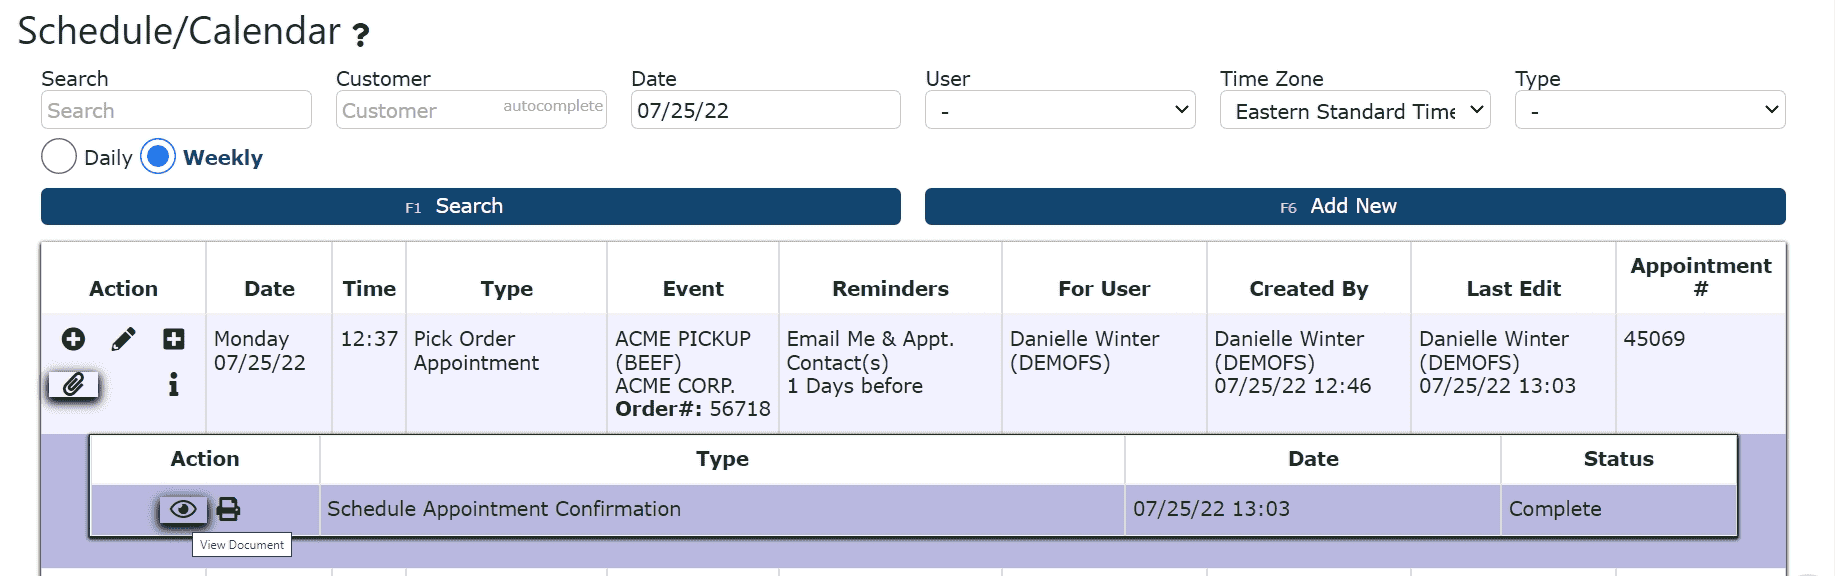
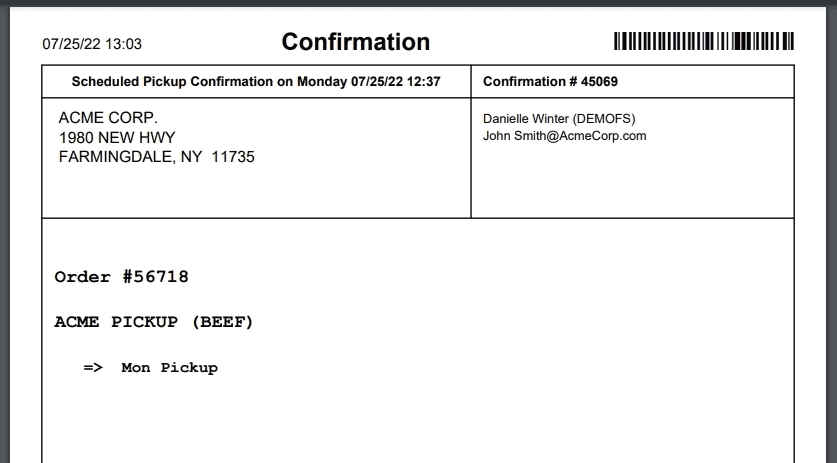
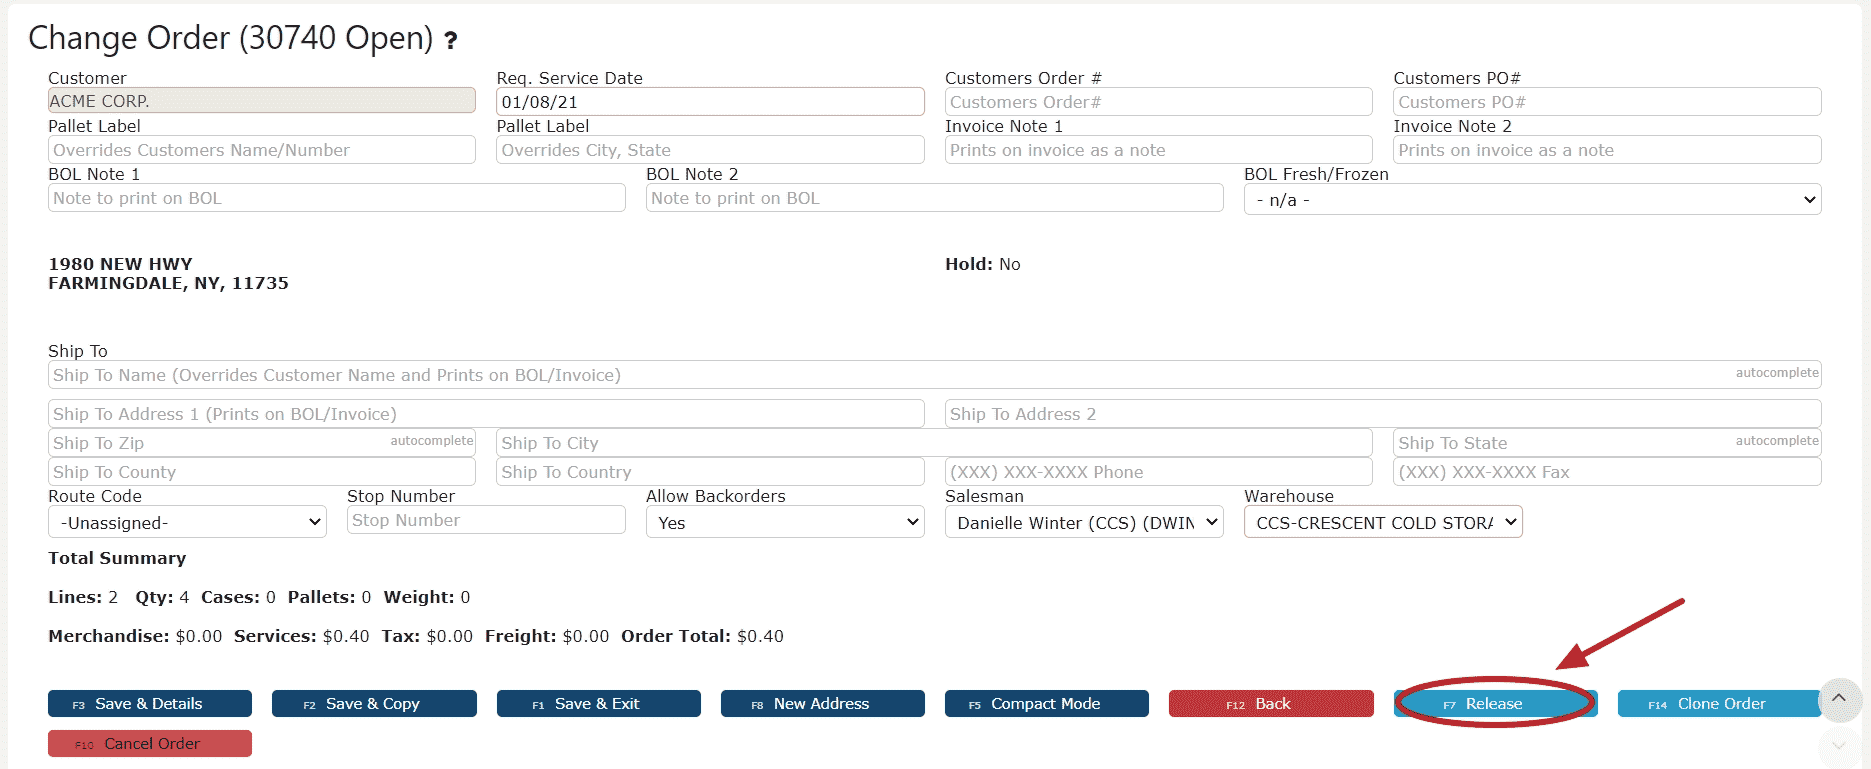
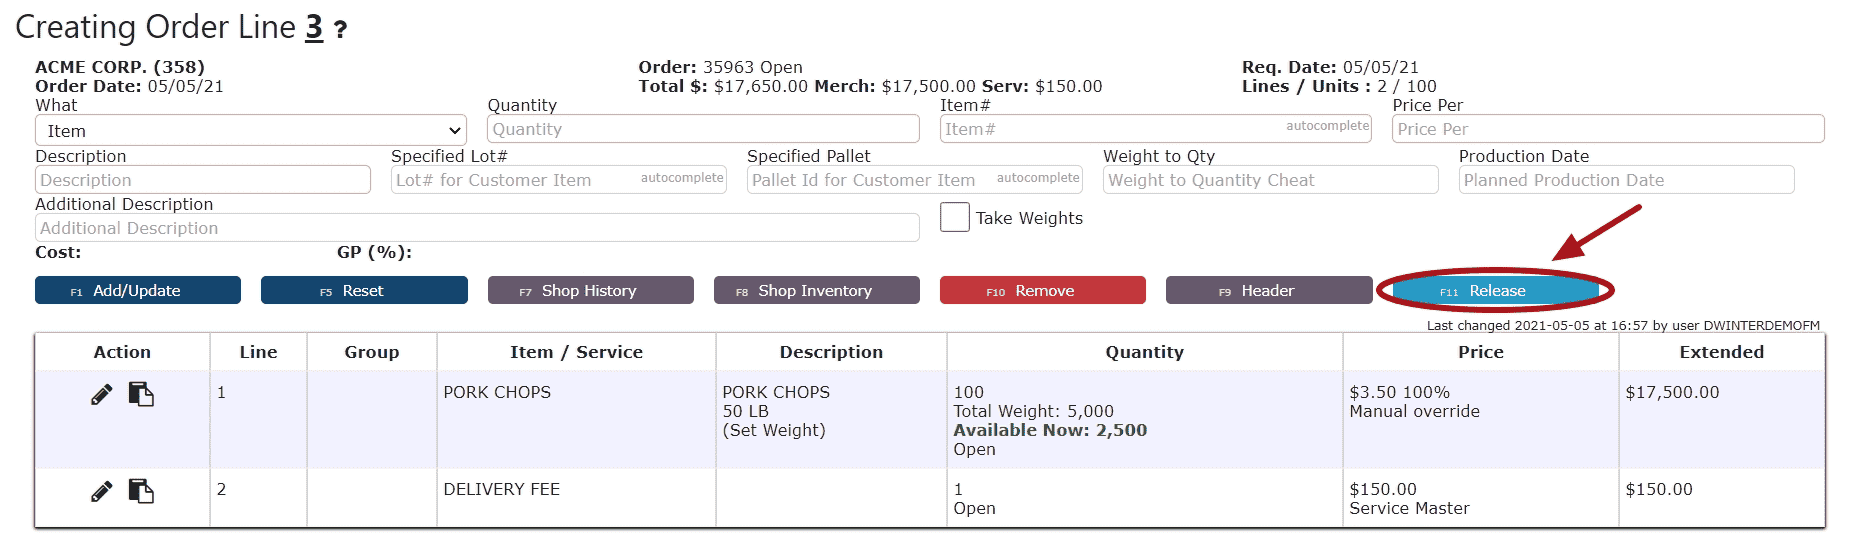
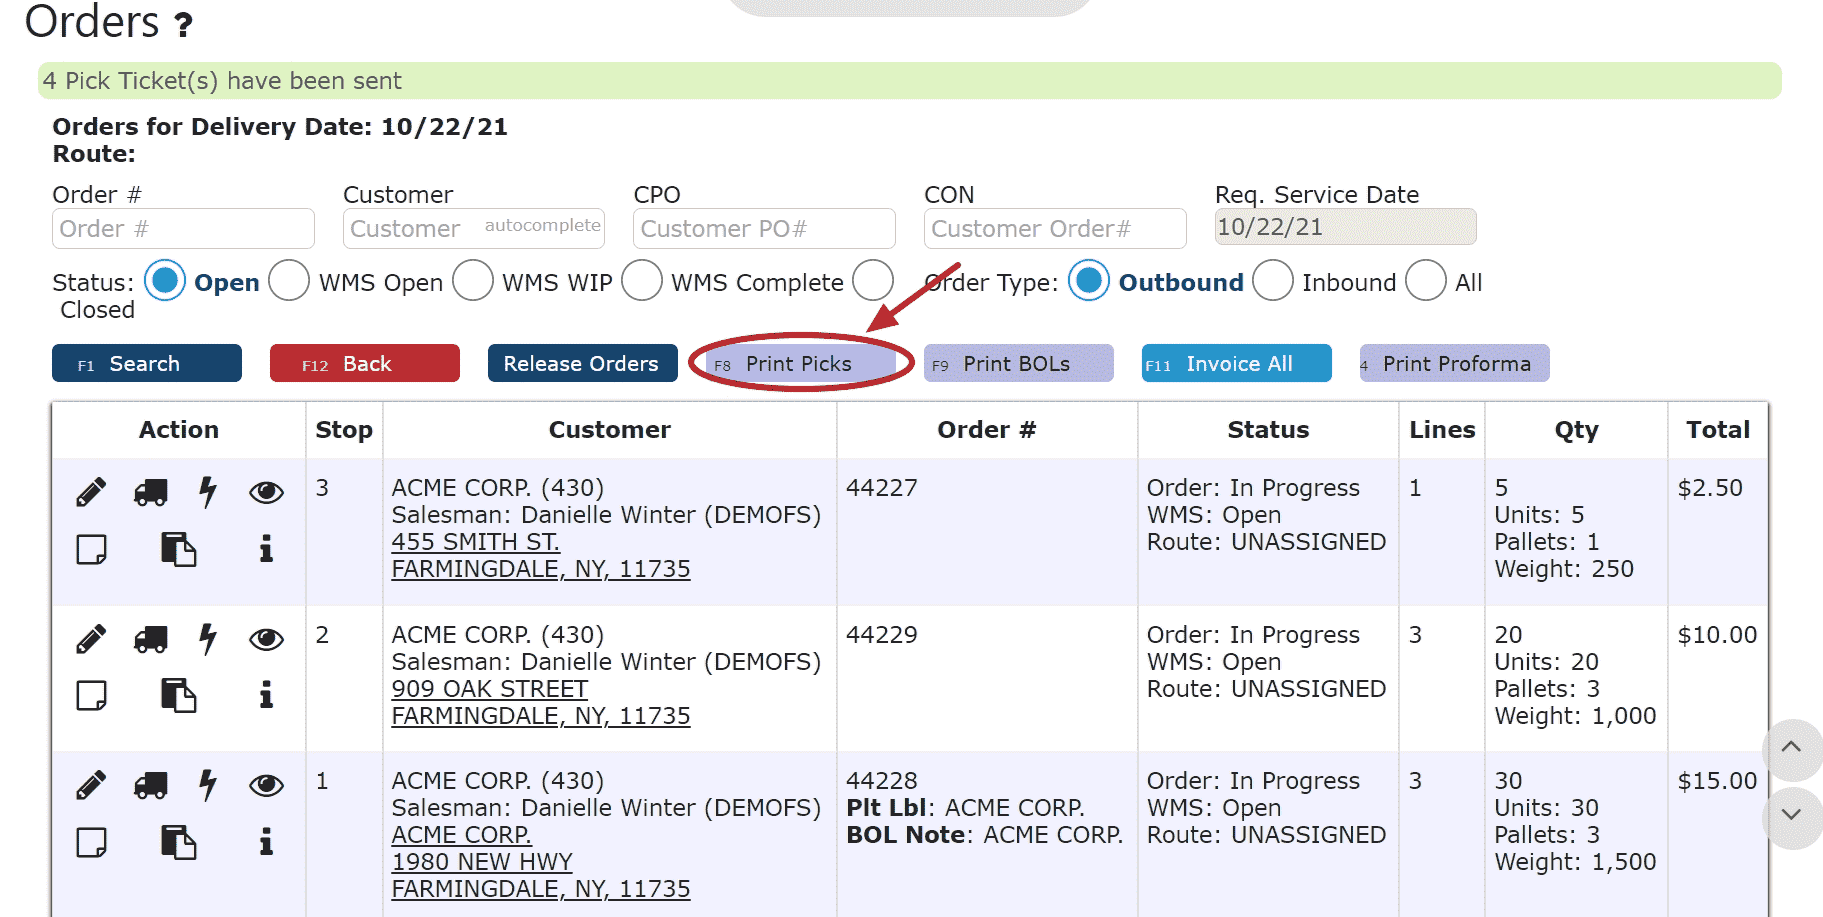
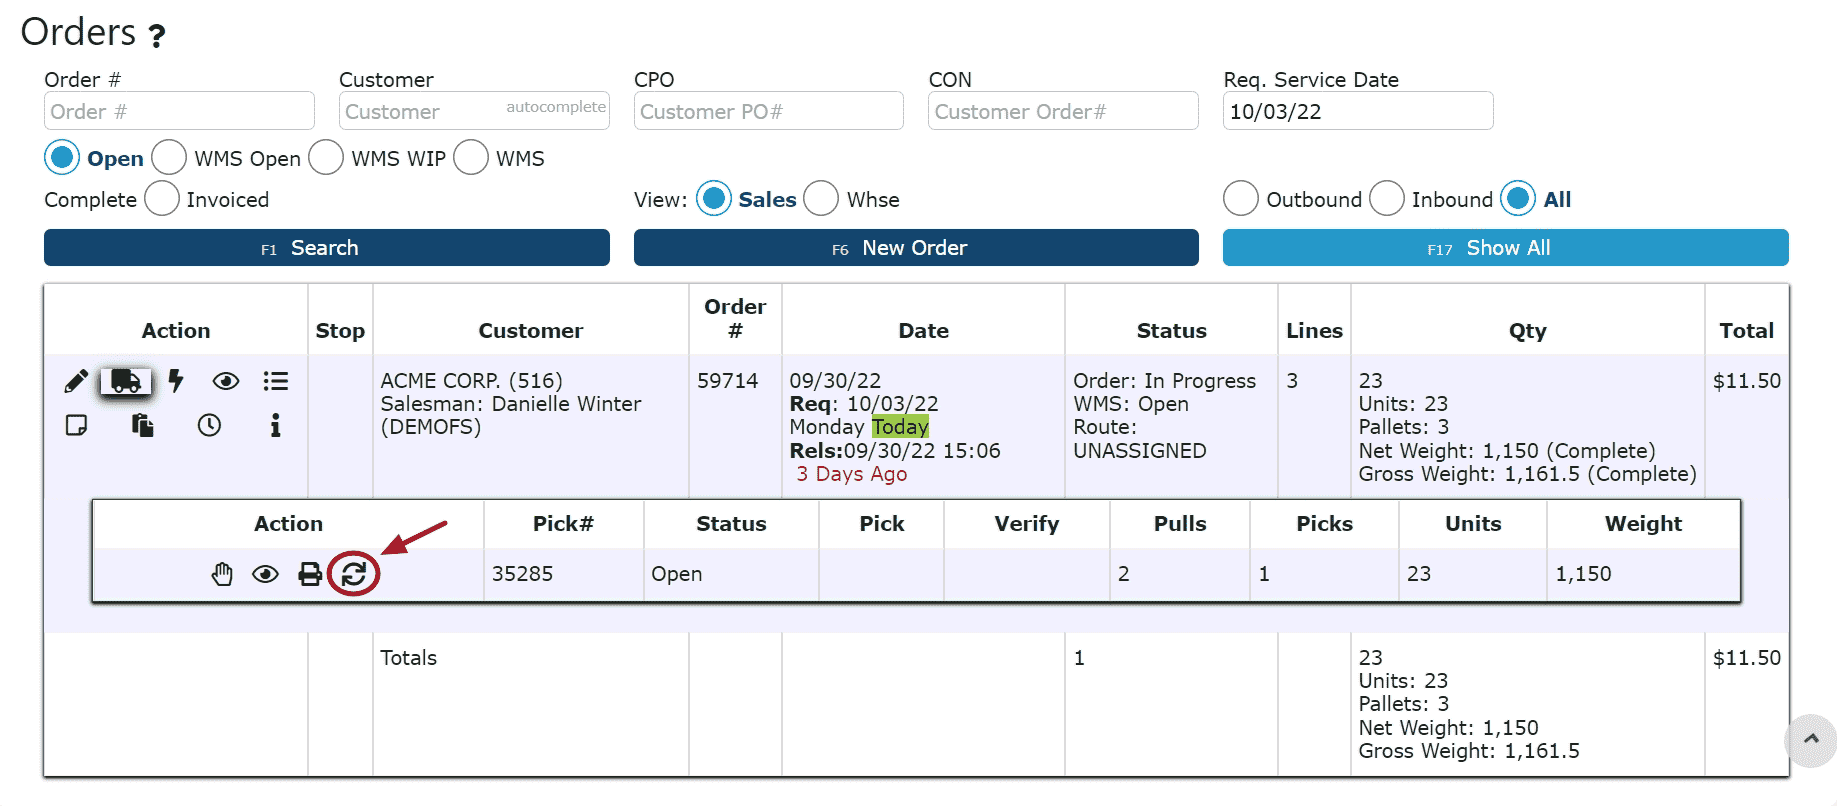
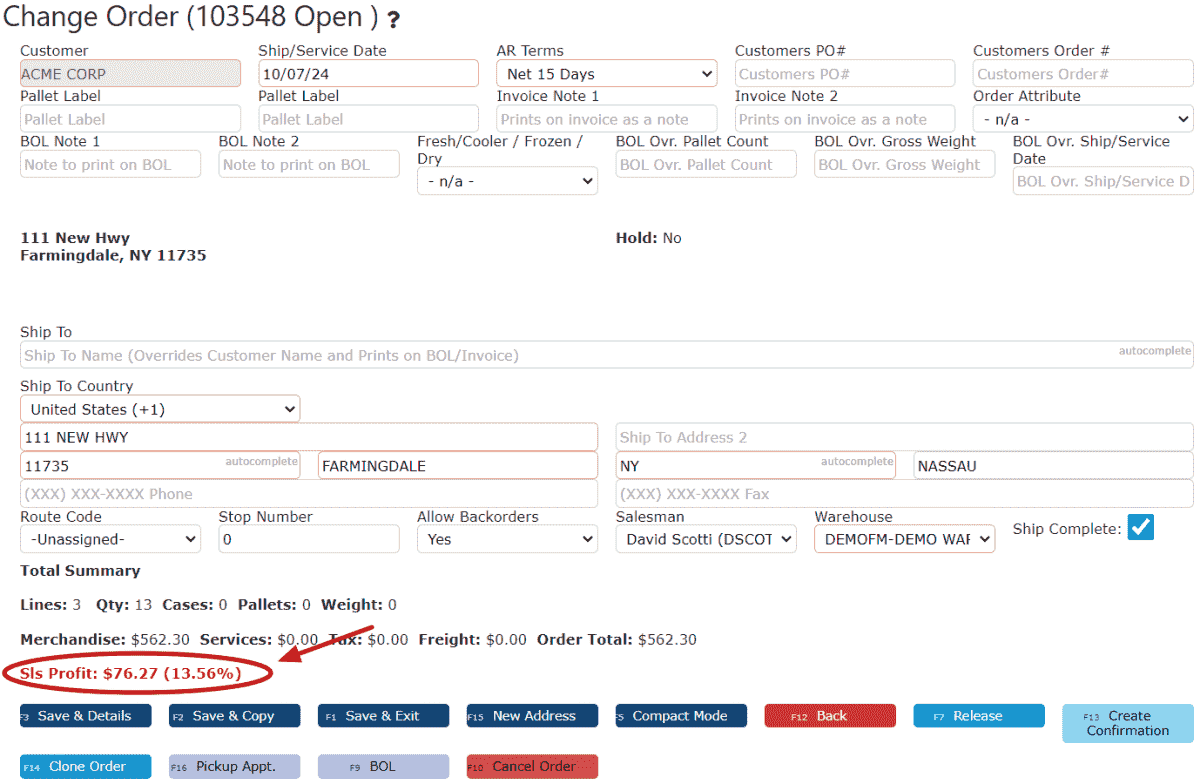
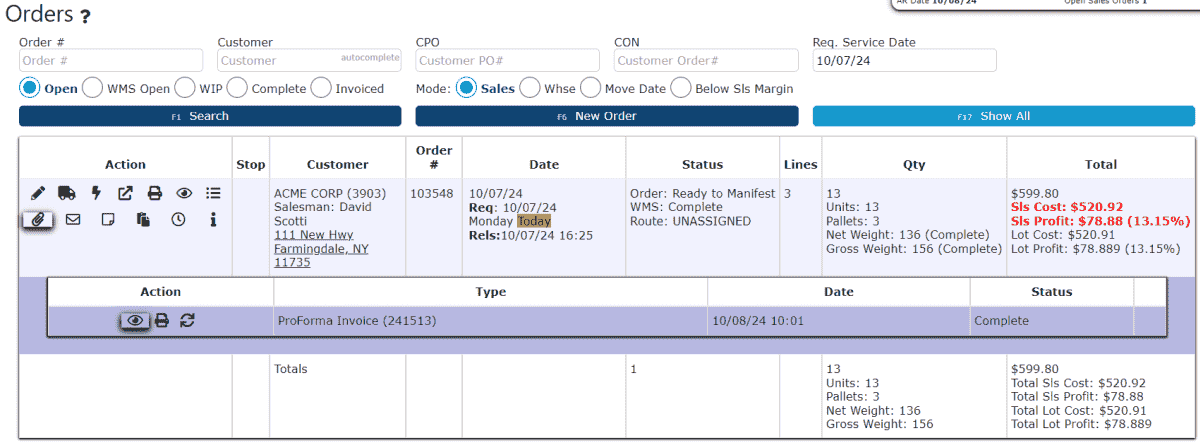
Releasing a Pick Order
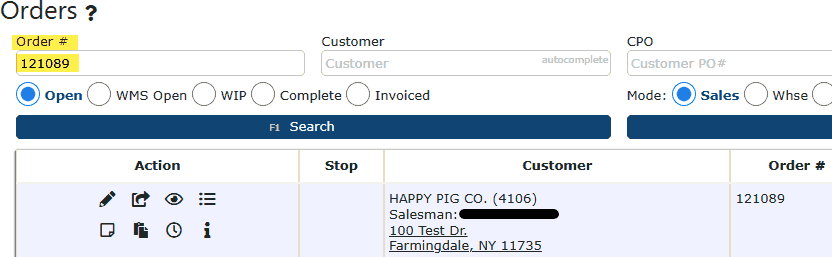
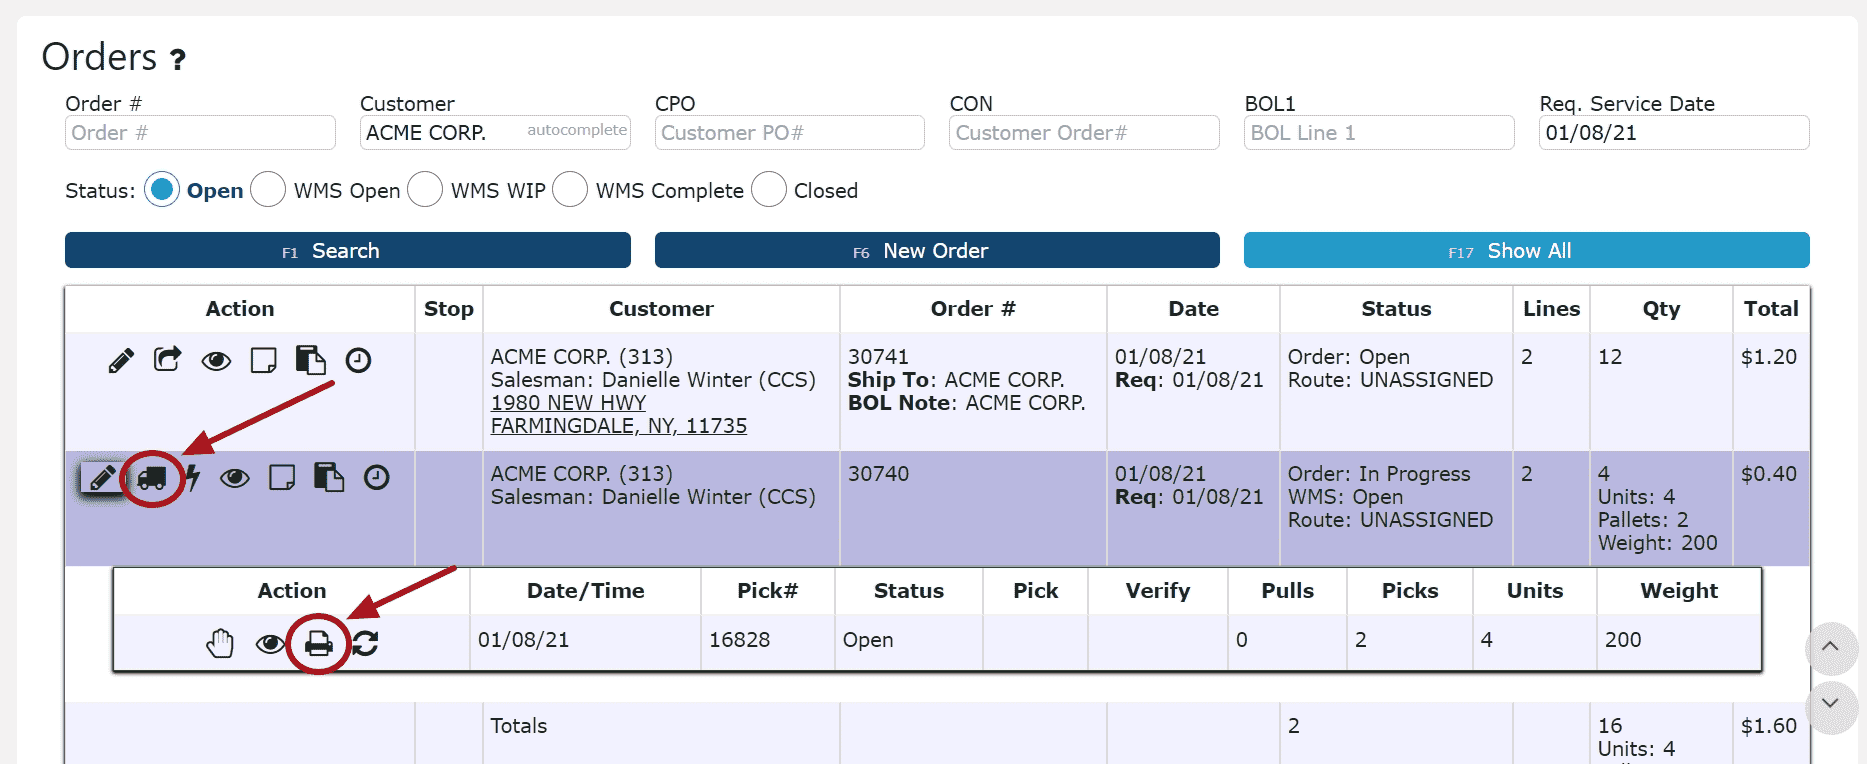
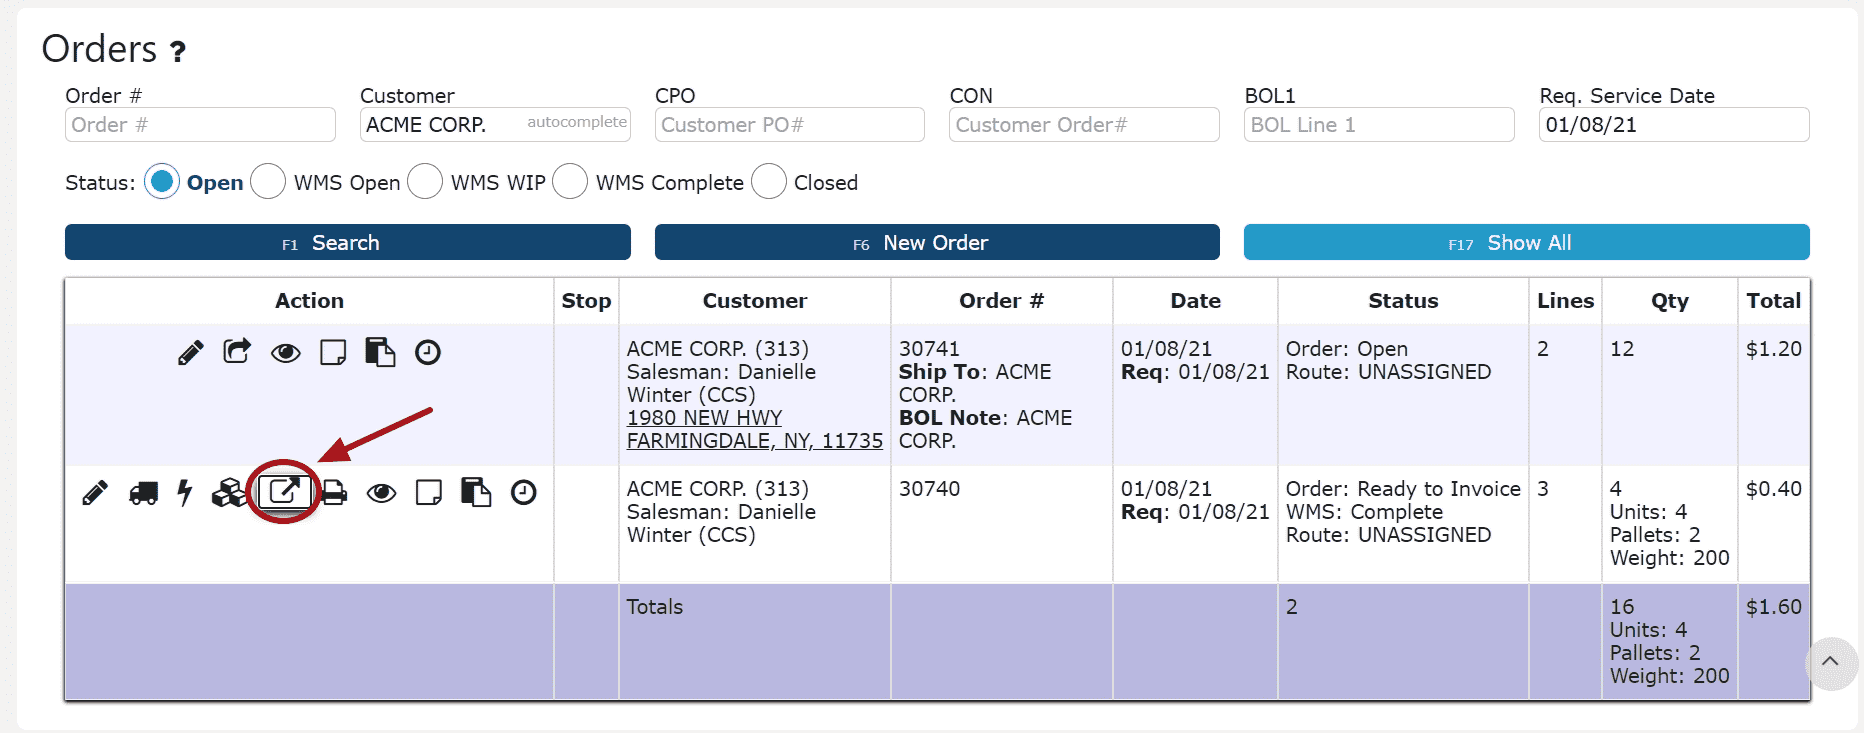
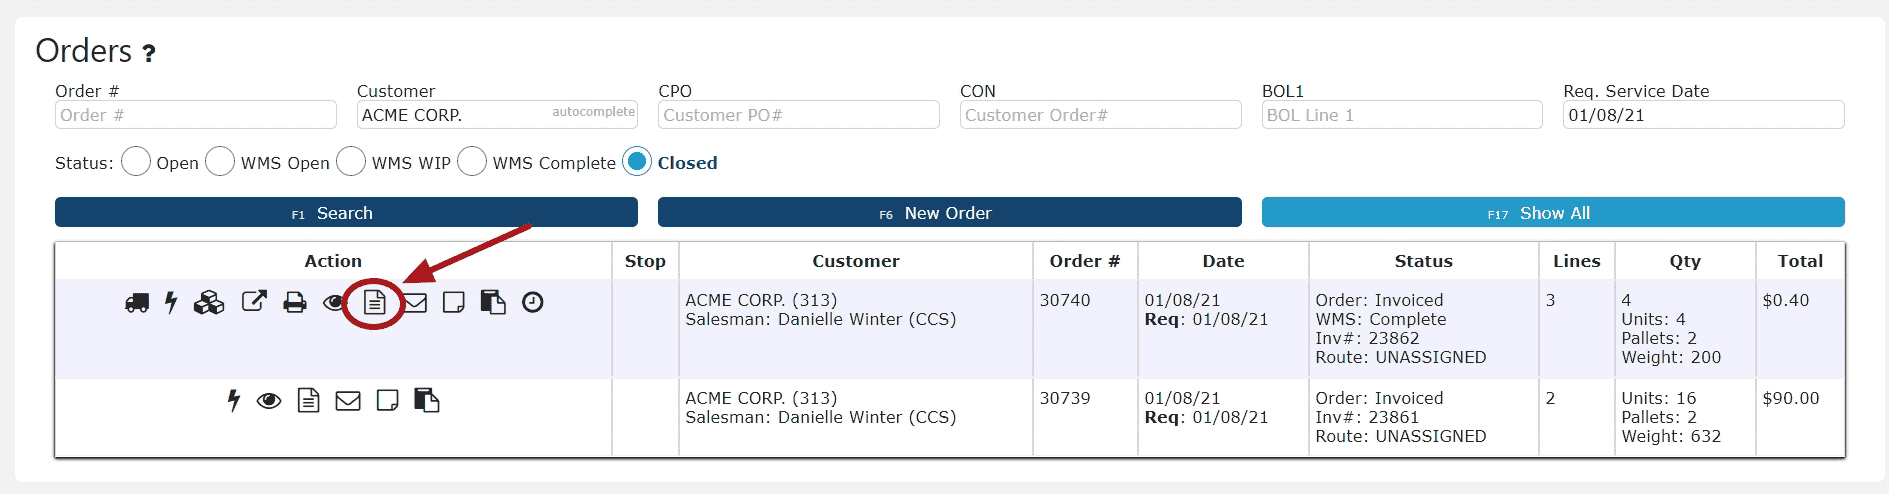
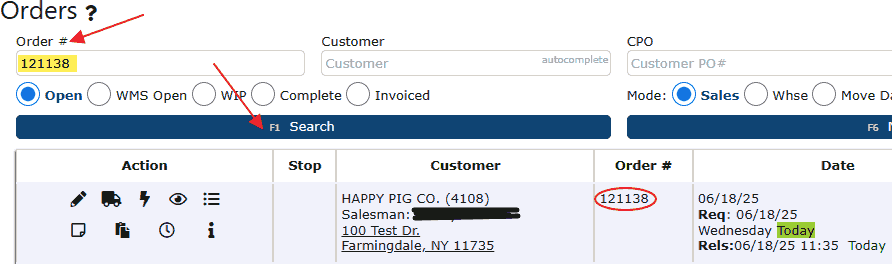
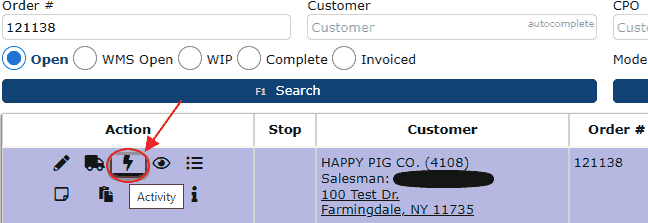
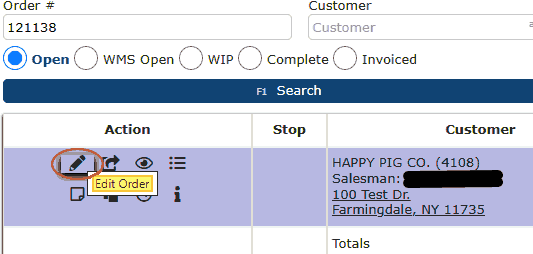
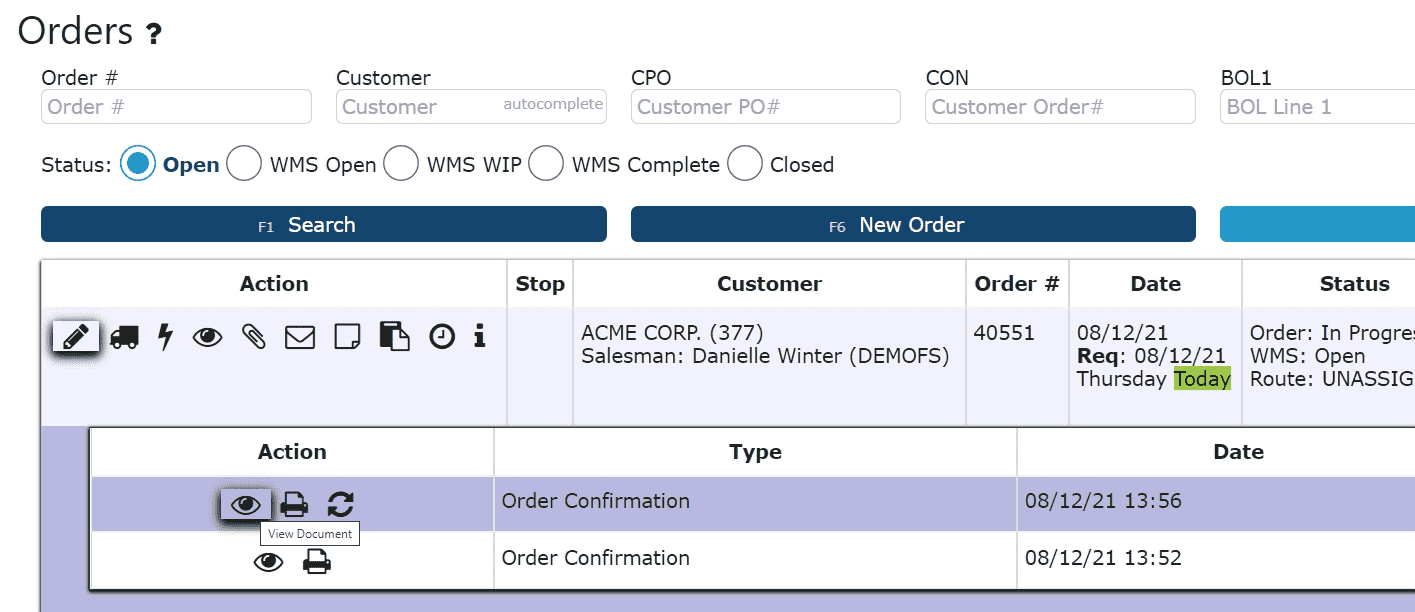
• In the Sales → Orders screen, locate the order to be picked and click the Release (square with arrow) icon under the Action column.
• Releasing sends the order to the next stage in warehouse processing.
• If order waving is enabled, the released order will enter the wave staging area before reaching the pick queue.
• If waving is not enabled but required for your company, contact your IT administrator to have the feature activated.
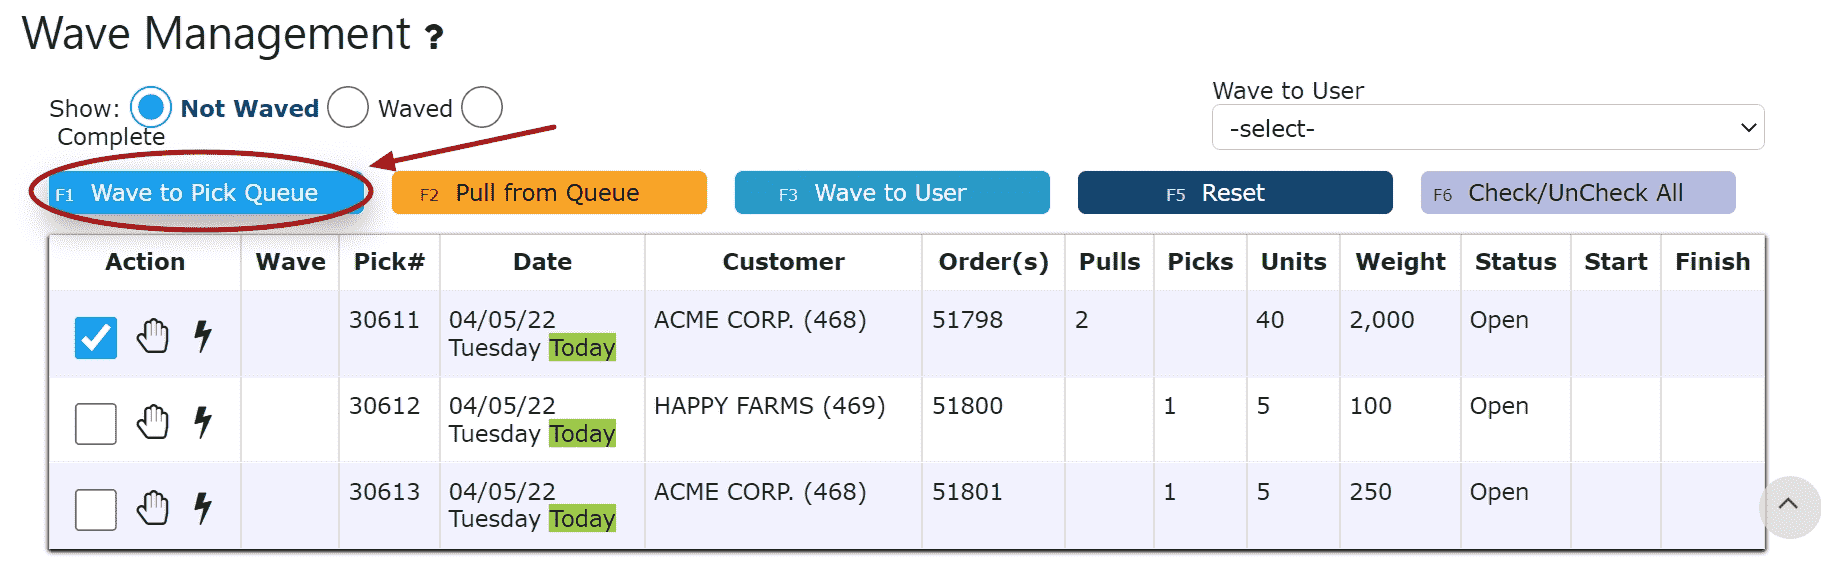
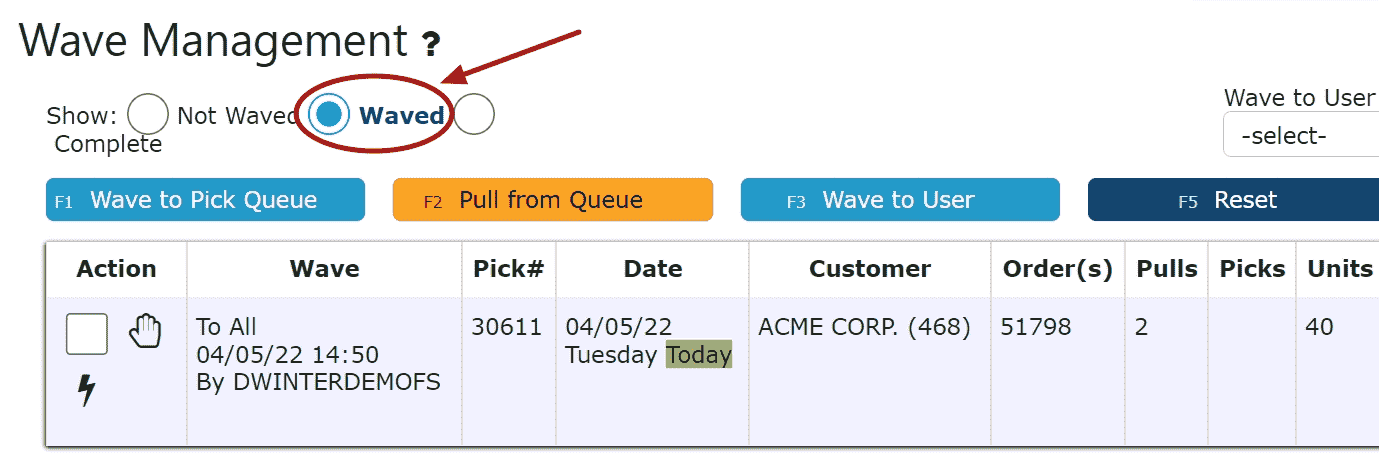
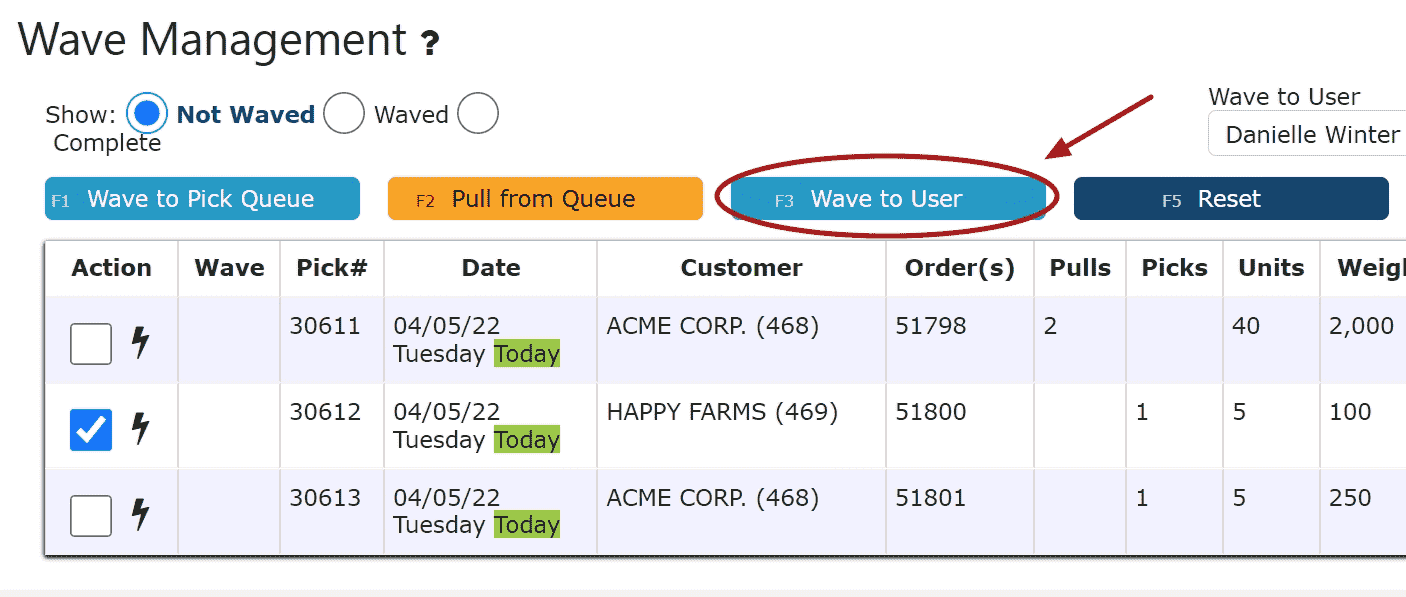
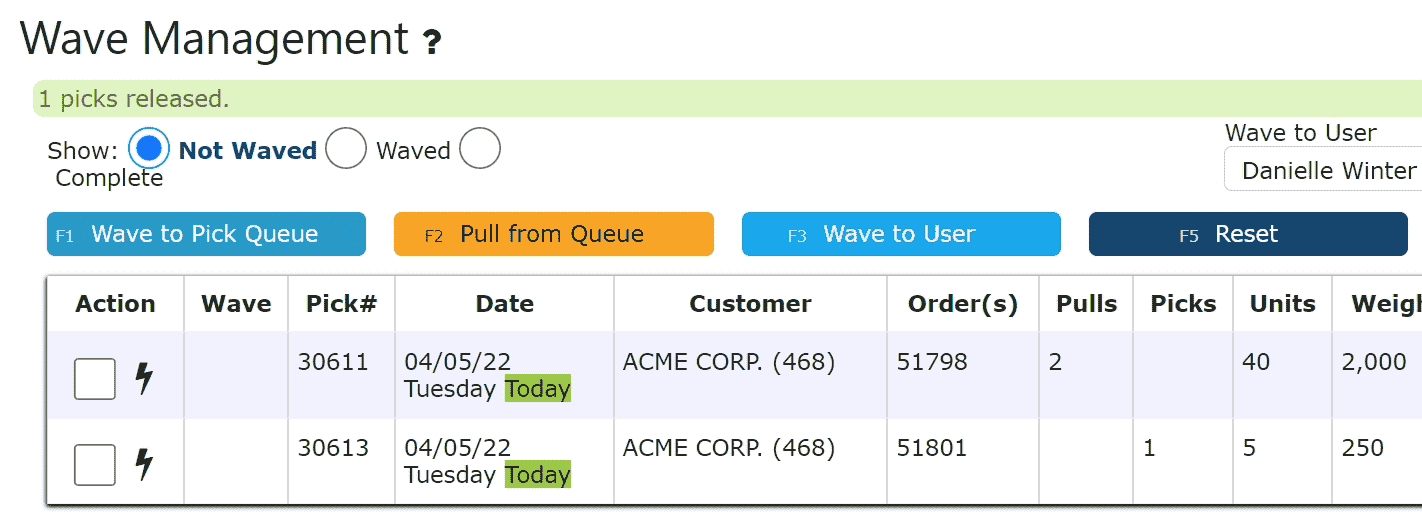
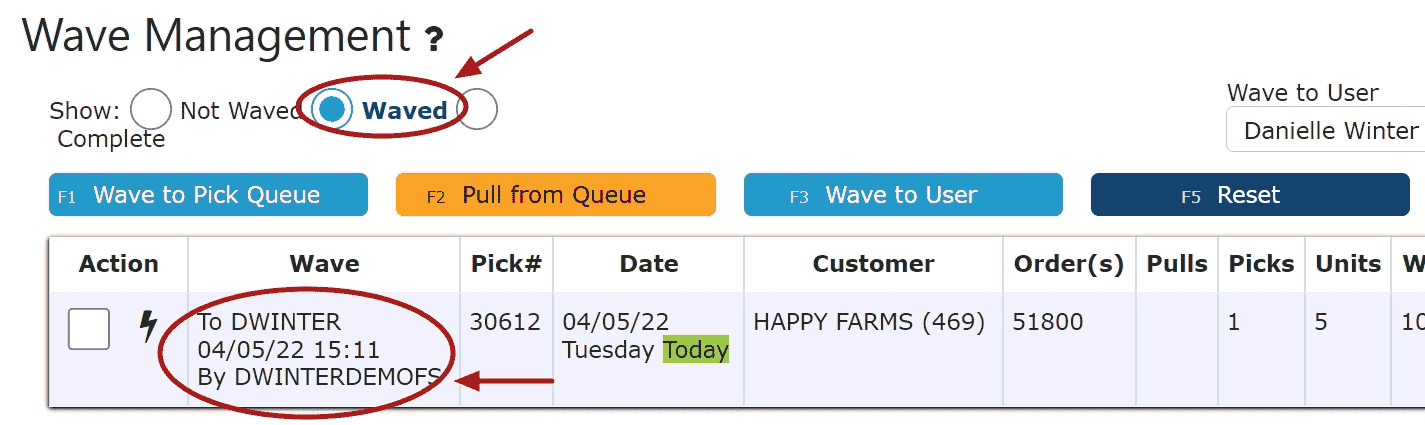
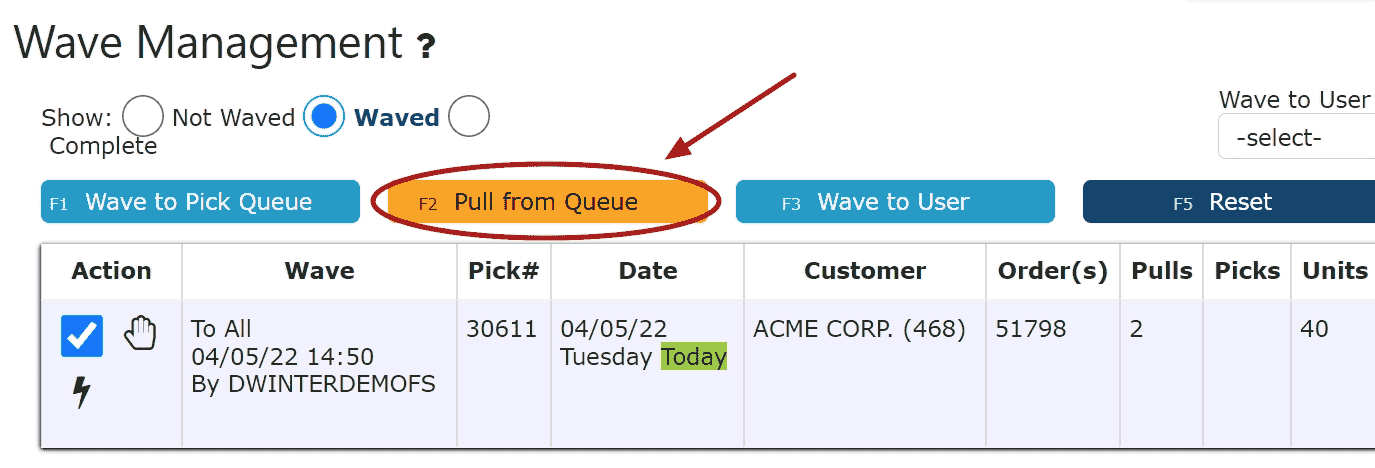
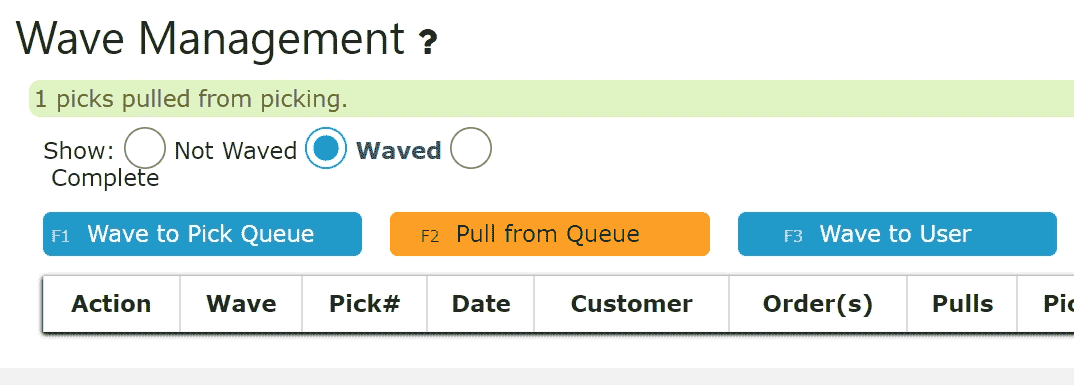
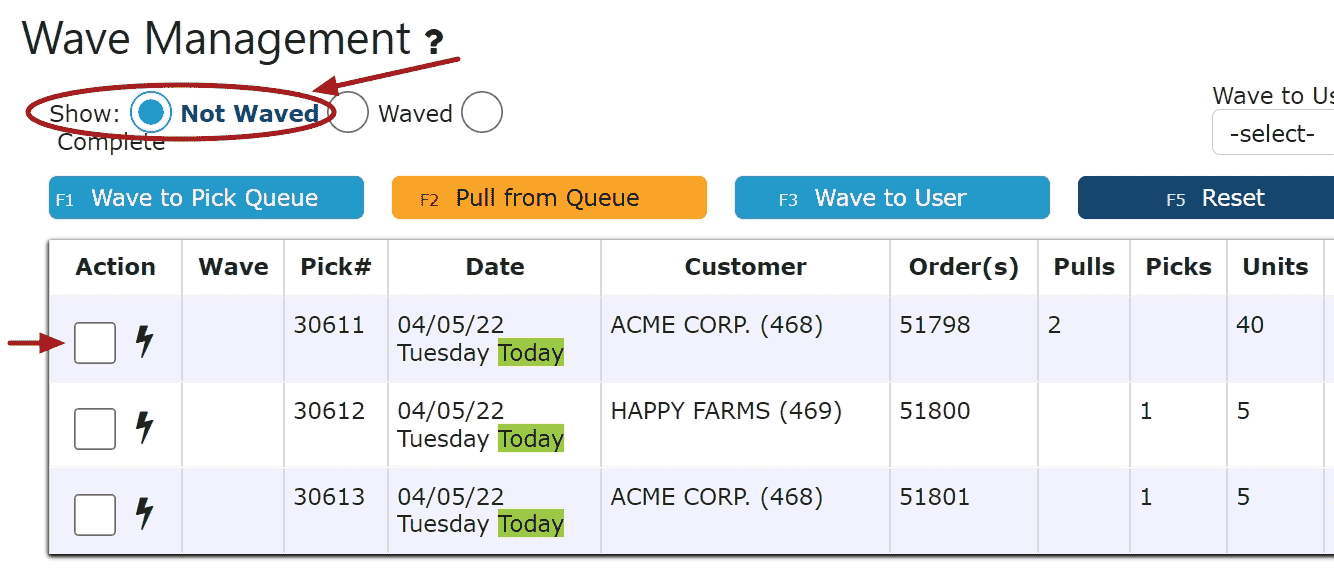
Waving the Order (if enabled)
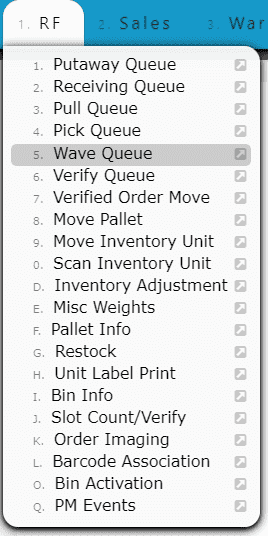
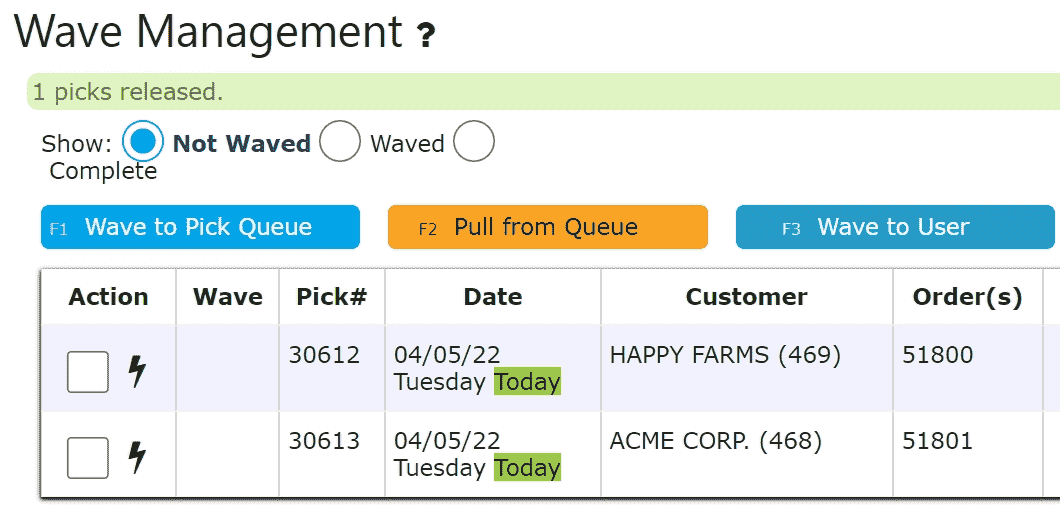
• After release, navigate to the RF → Wave Queue screen to group the order into a picking wave.
• Once waved, the order will move to the Pick Queue for assignment to a warehouse worker.
• You can also choose to either wave the sales order to a certain warehouse worker, or to all users.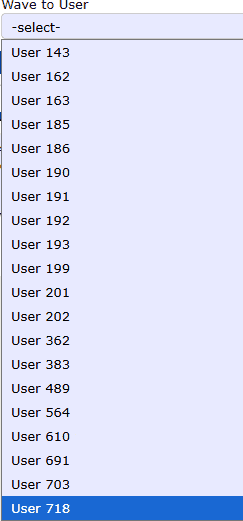
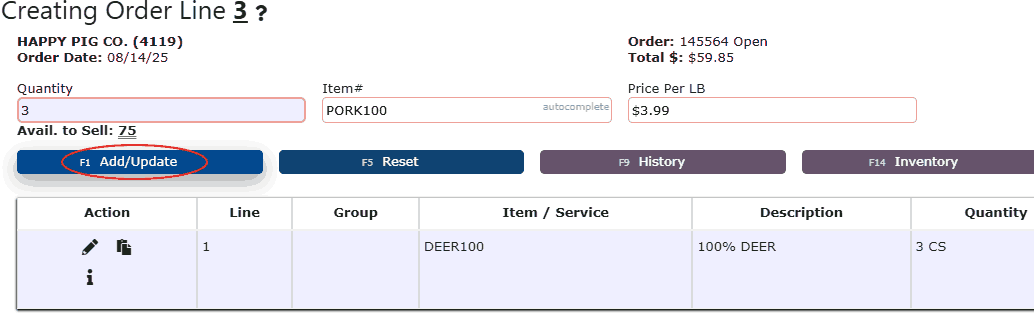
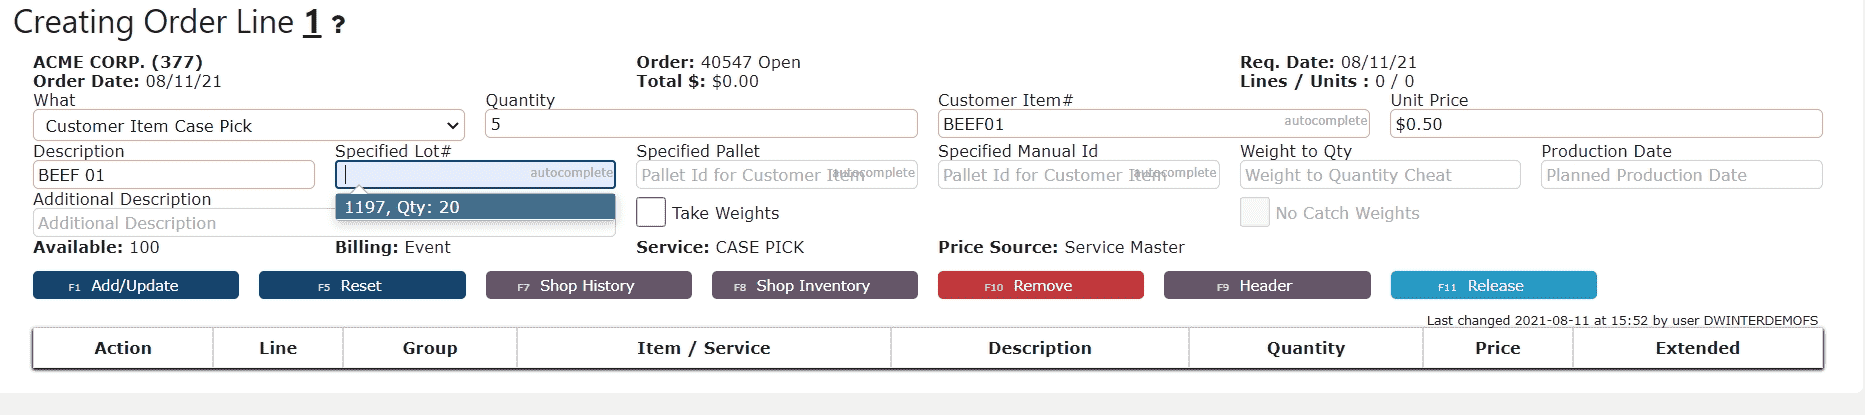
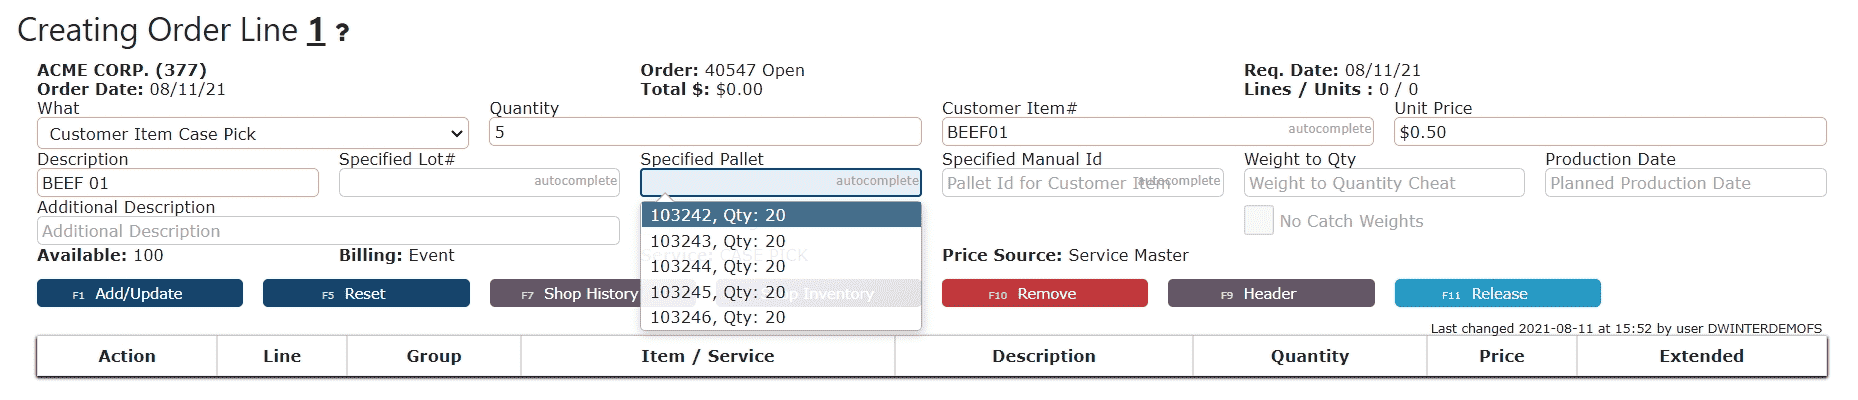
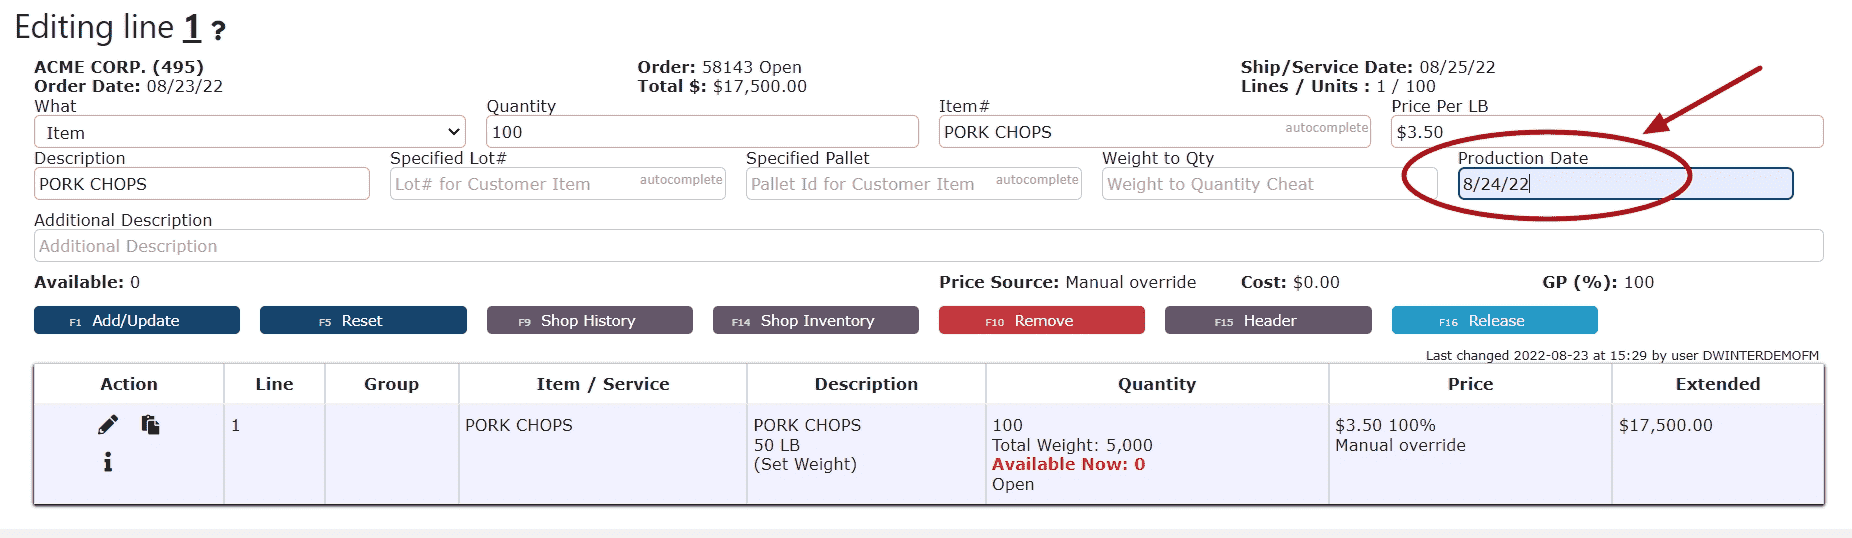
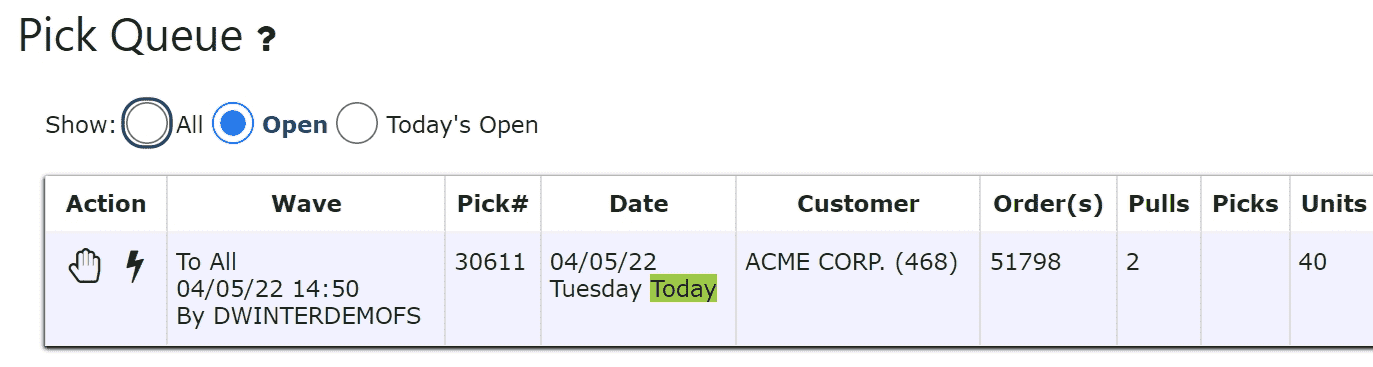
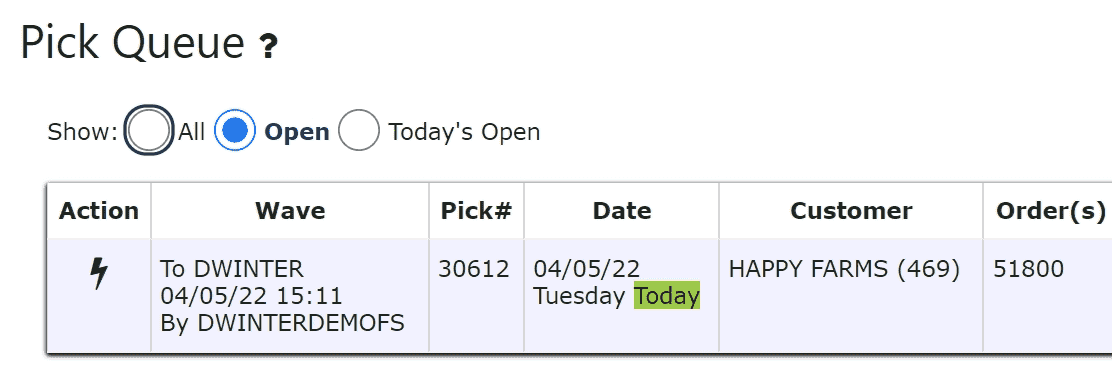
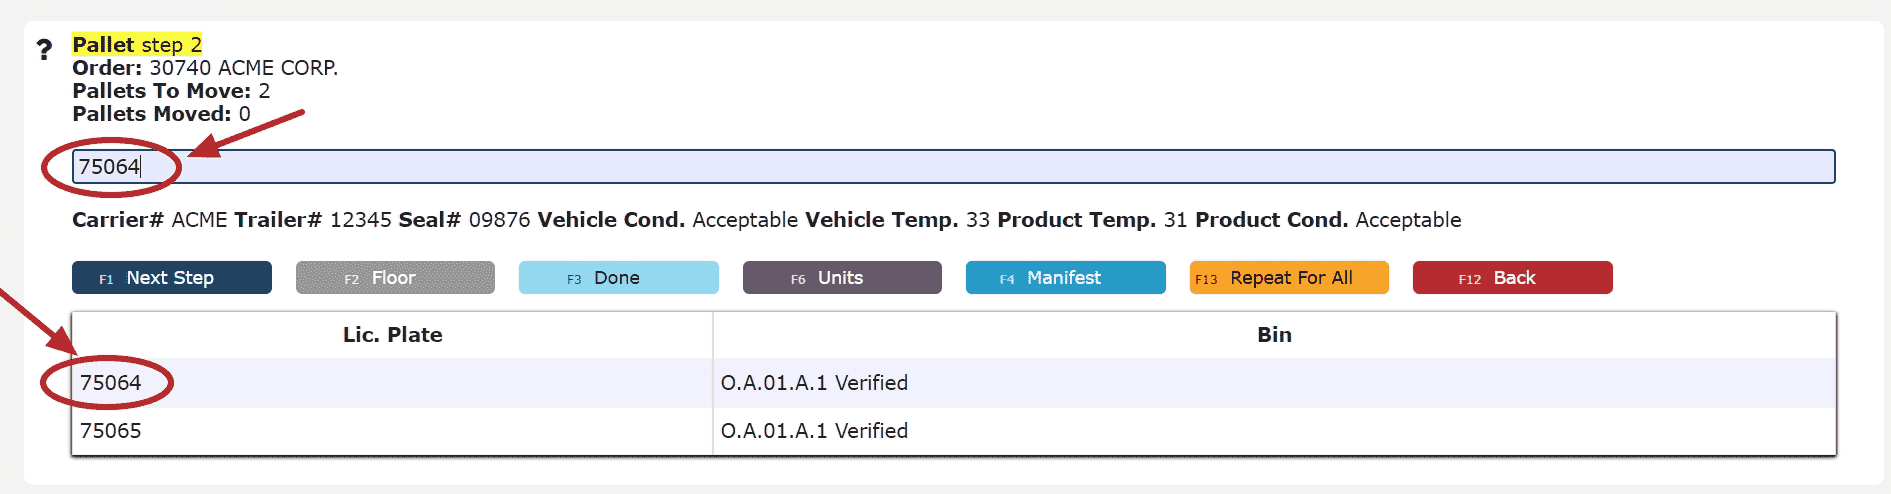
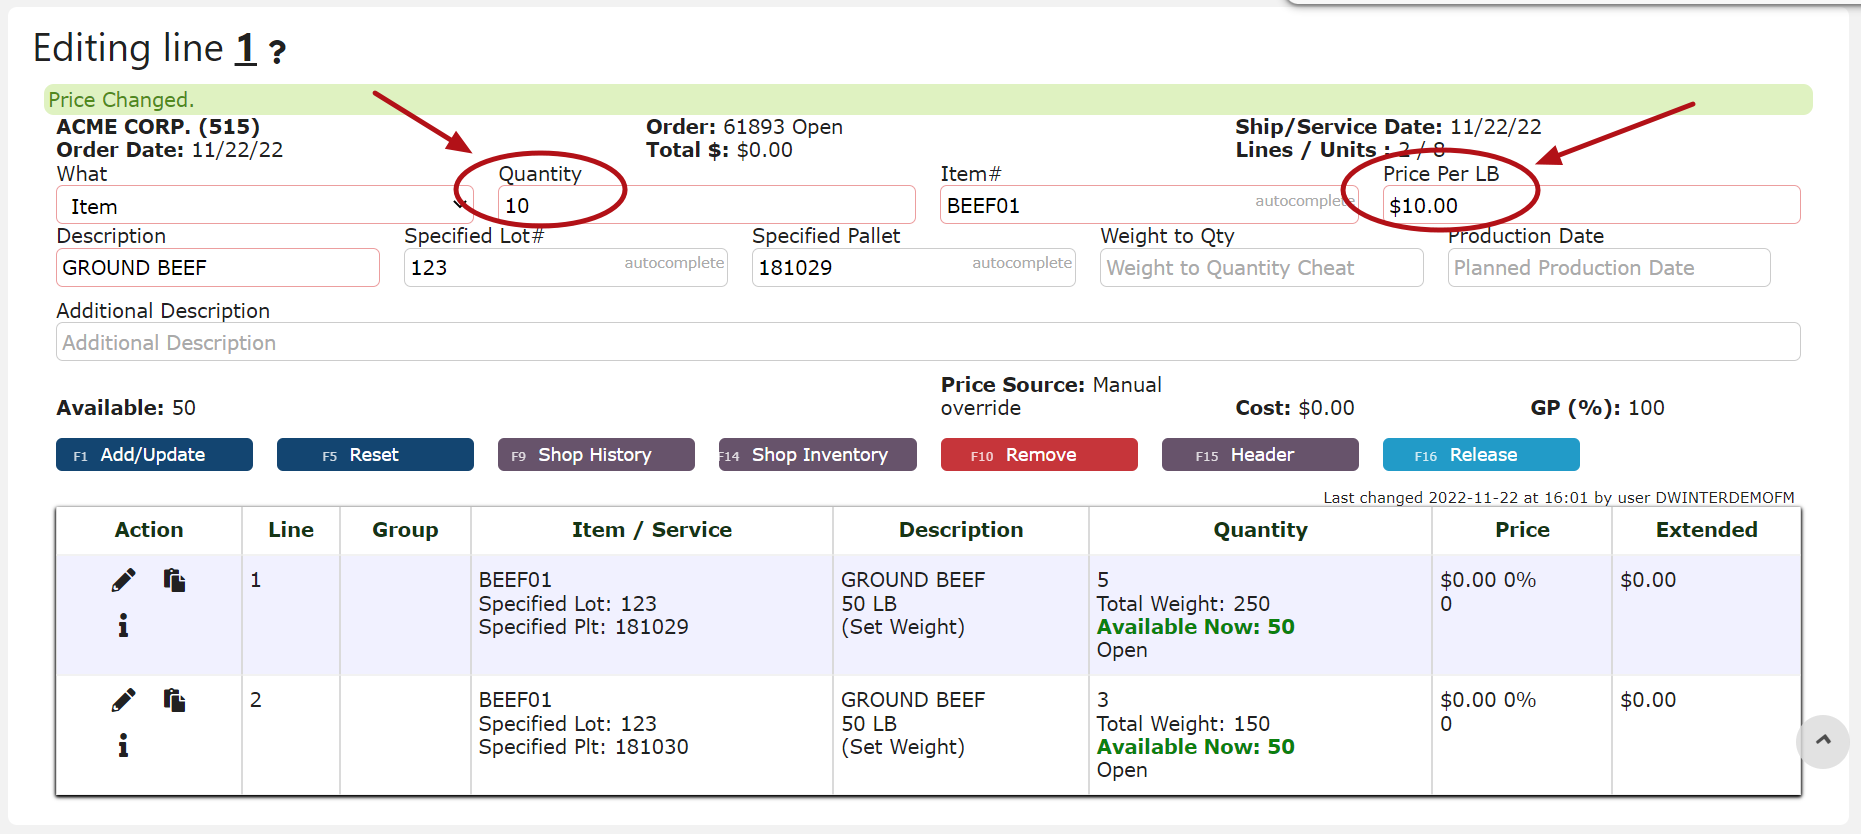
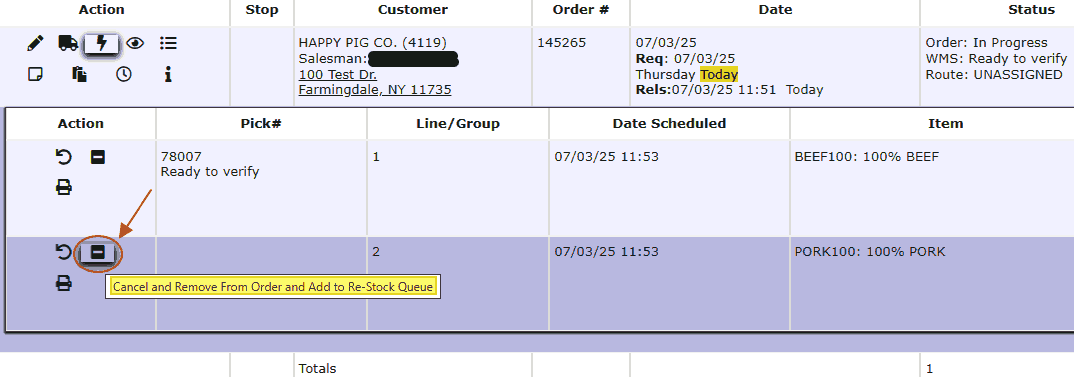
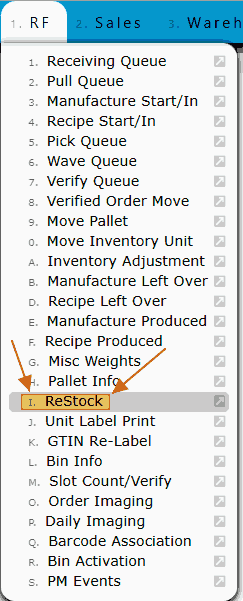
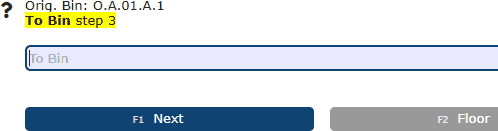
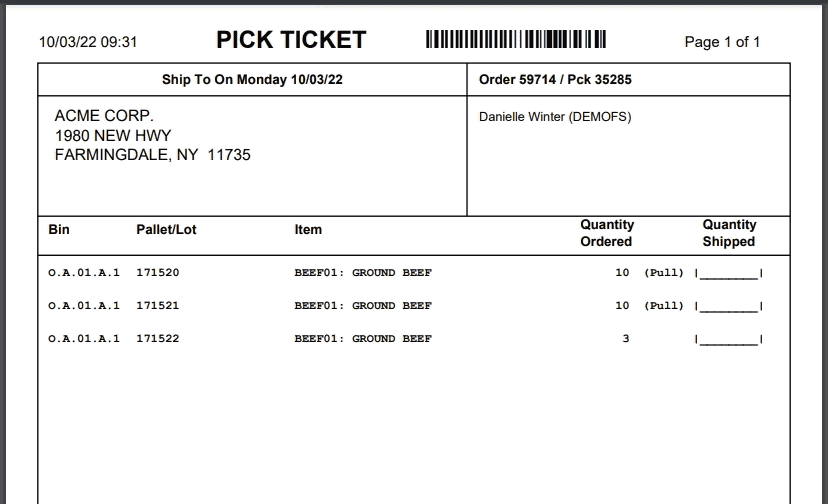
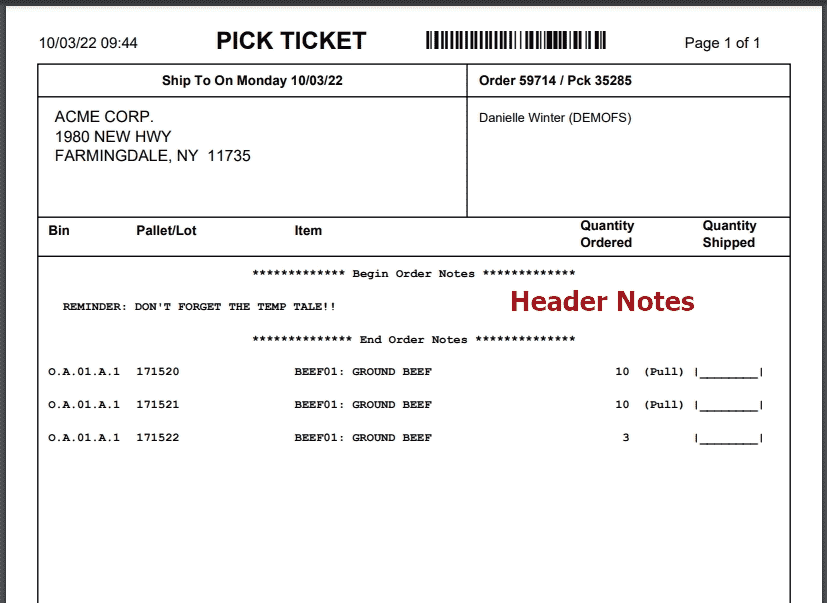
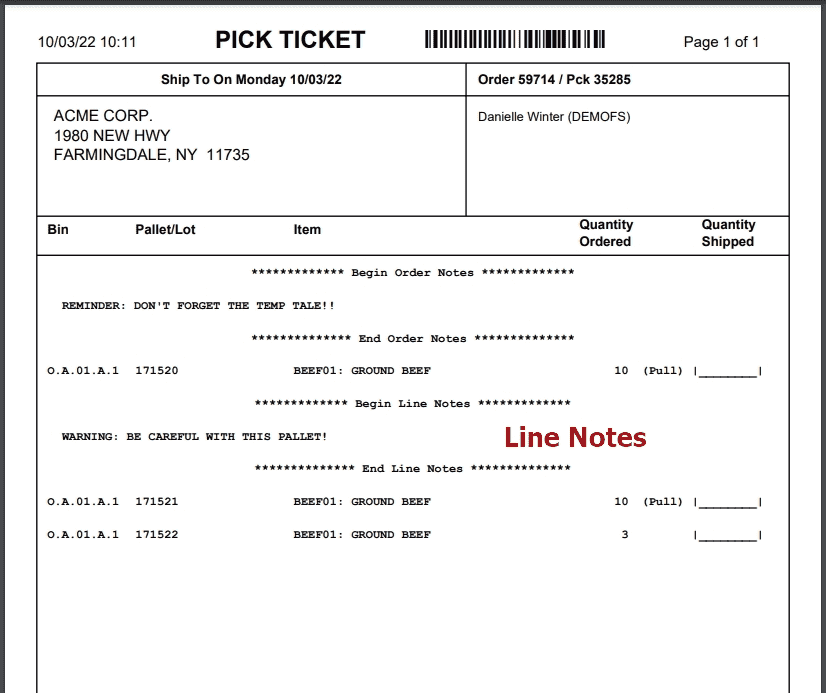
Picking from the Pick Queue
• Access the Pick Queue from the RF menu and locate the waved order.
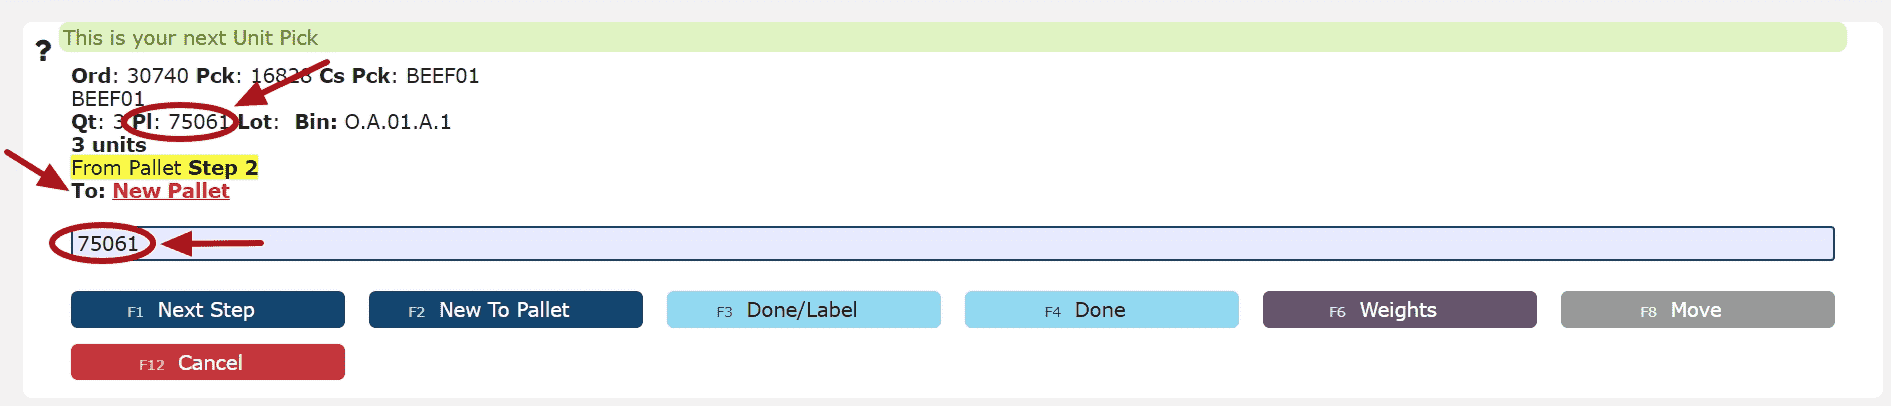
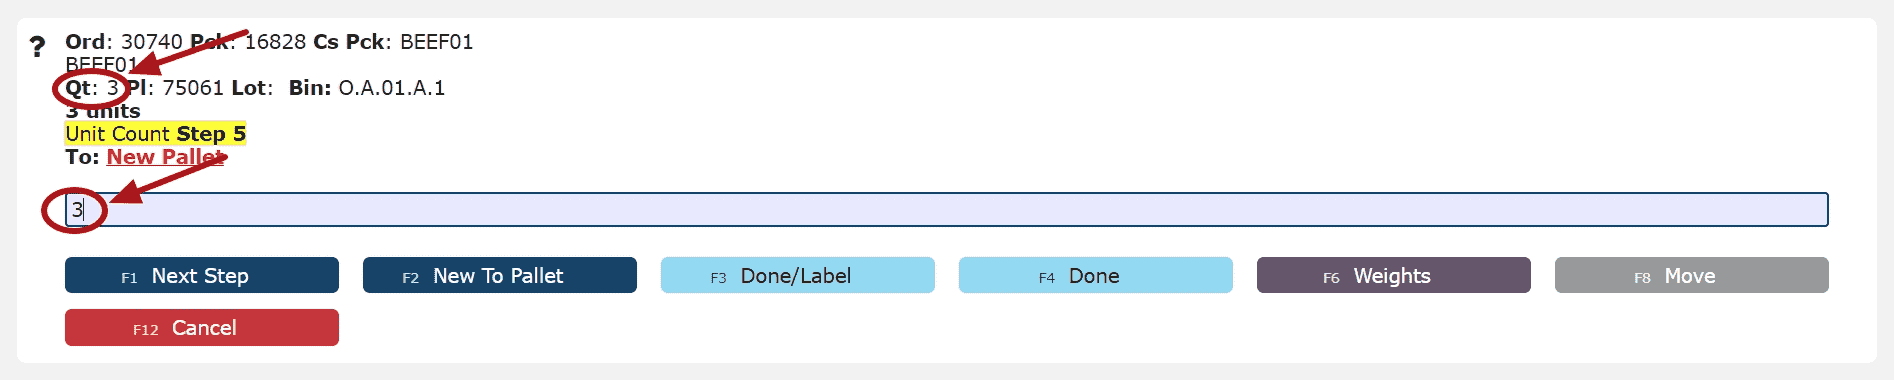
• Click the Pick (hand icon) button to initiate the picking process.
• The system may guide pallet selection based on your warehouse’s picking rules (e.g., FIFO – First In, First Out, which selects the oldest pallet first).
• Follow the prompts to scan or confirm each pallet and quantity being picked.
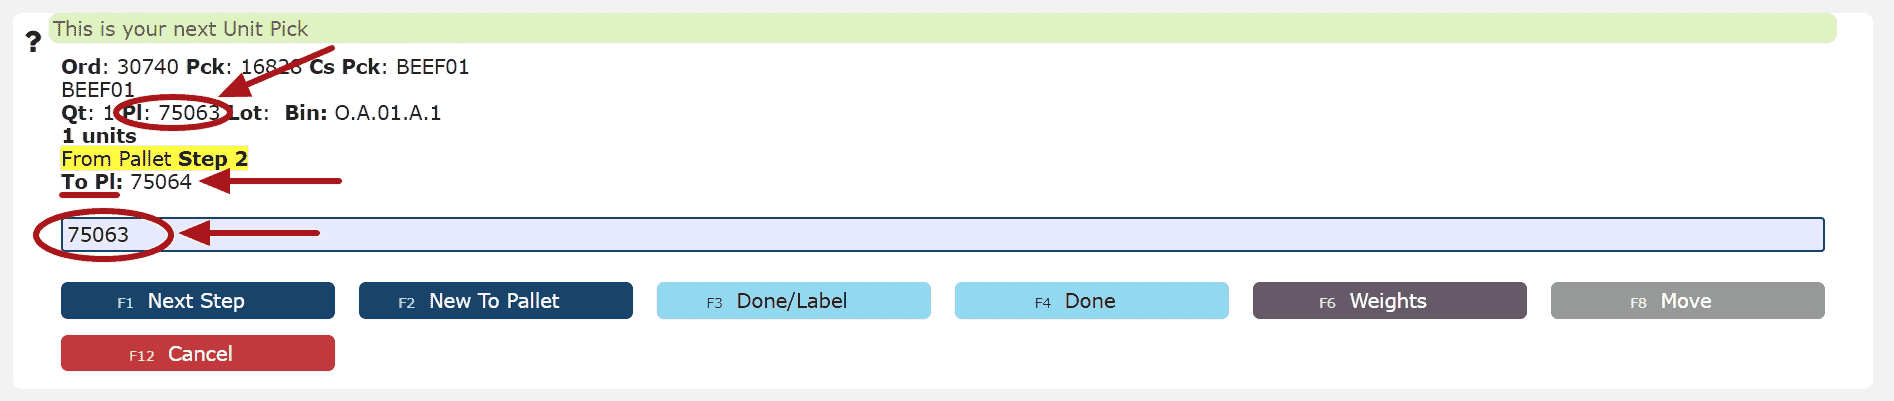
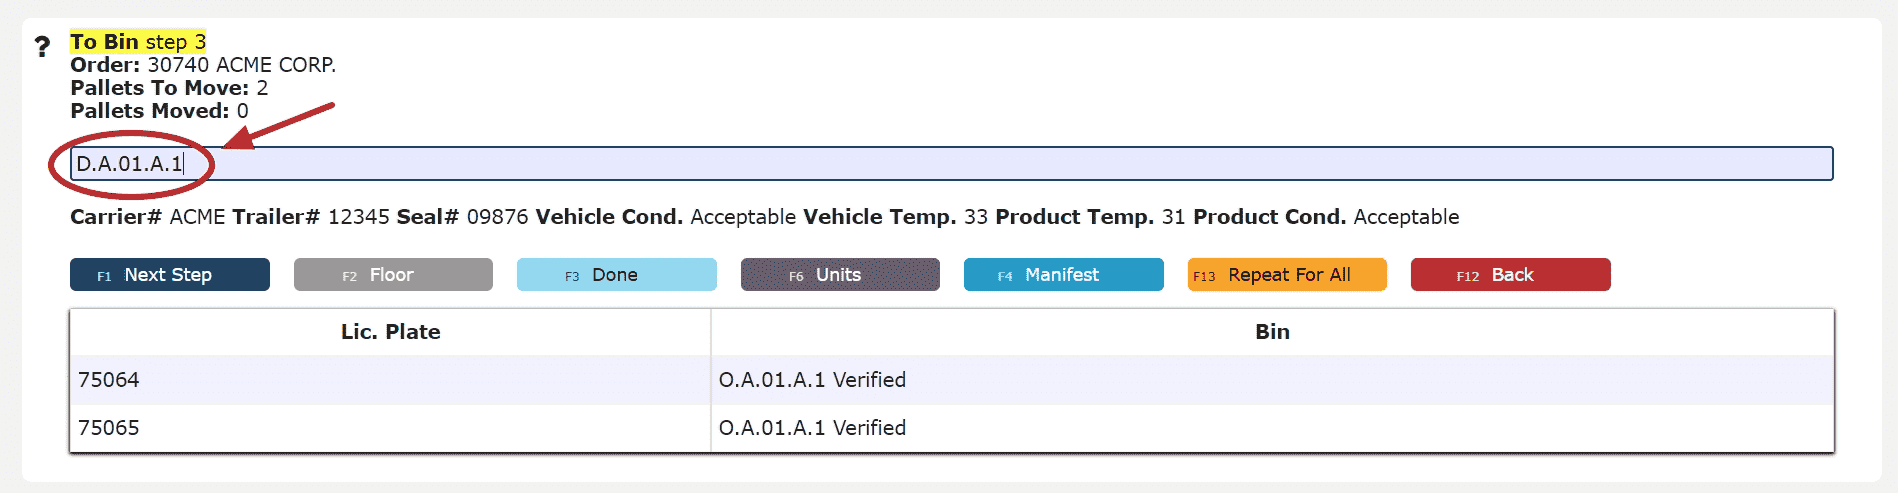
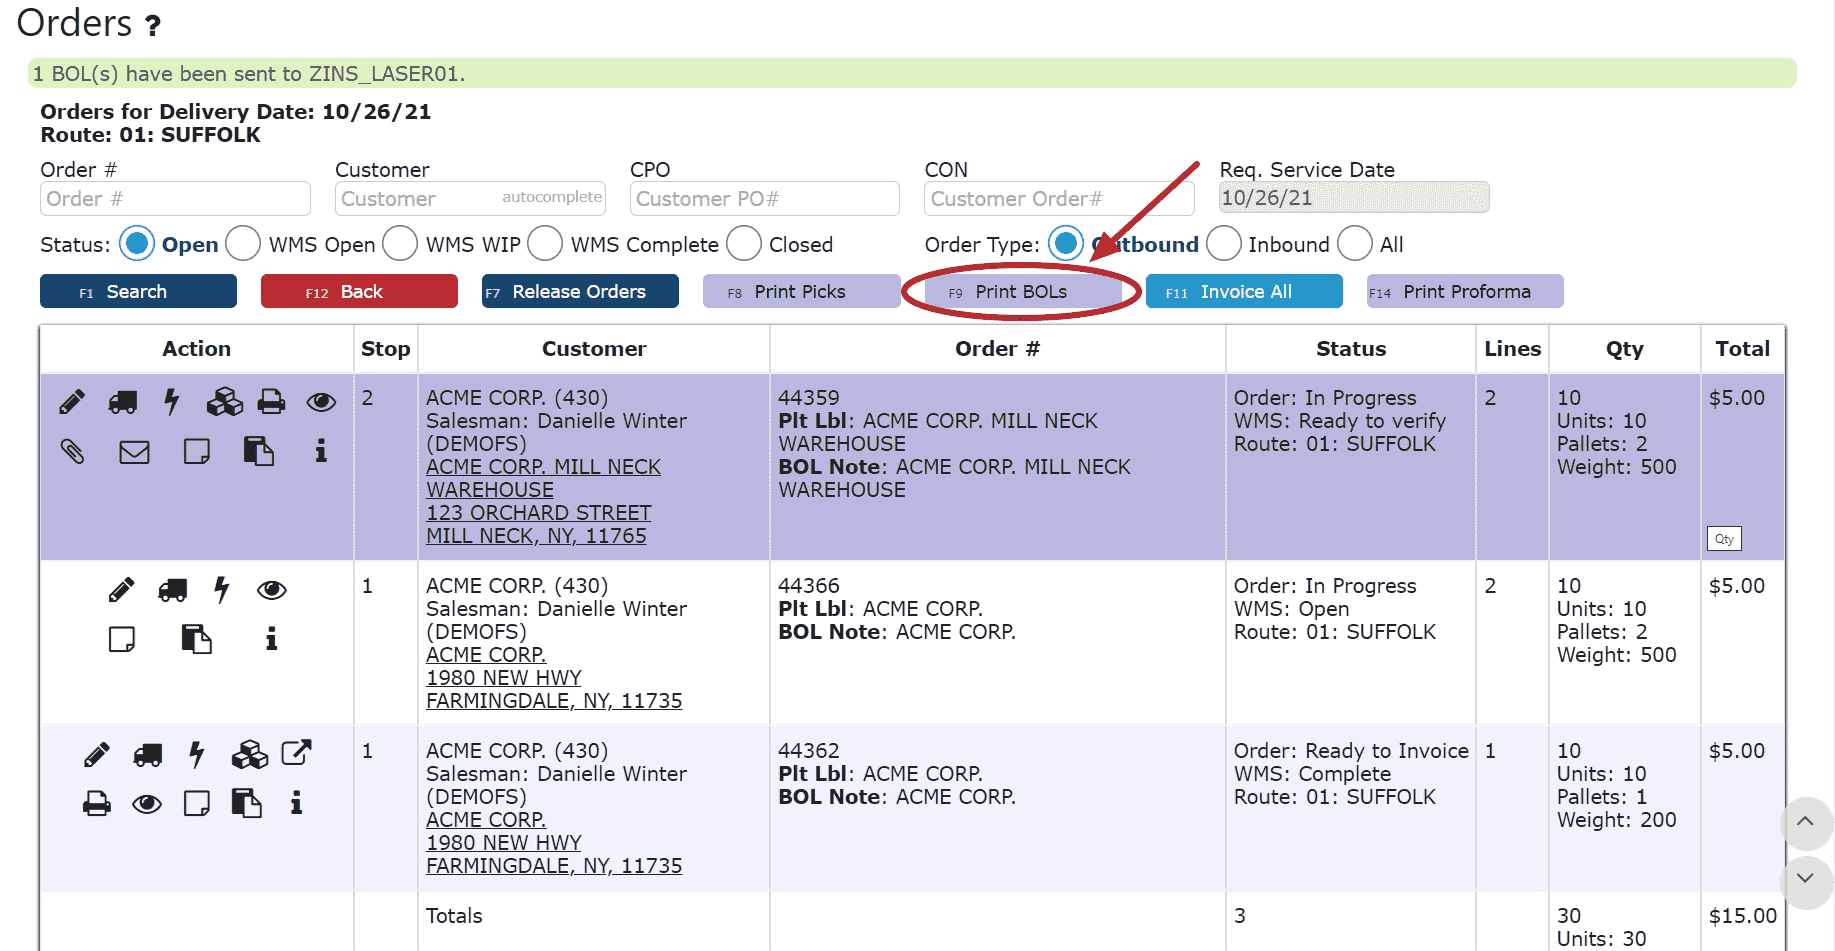
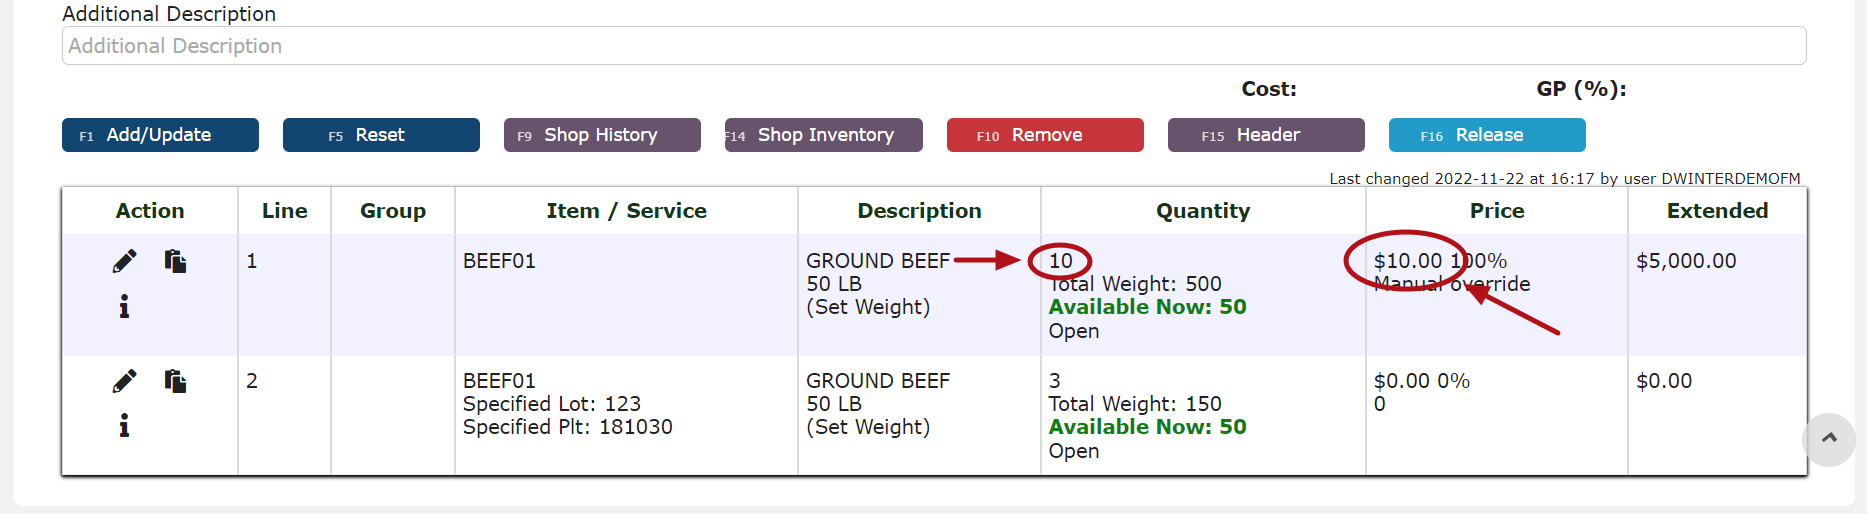
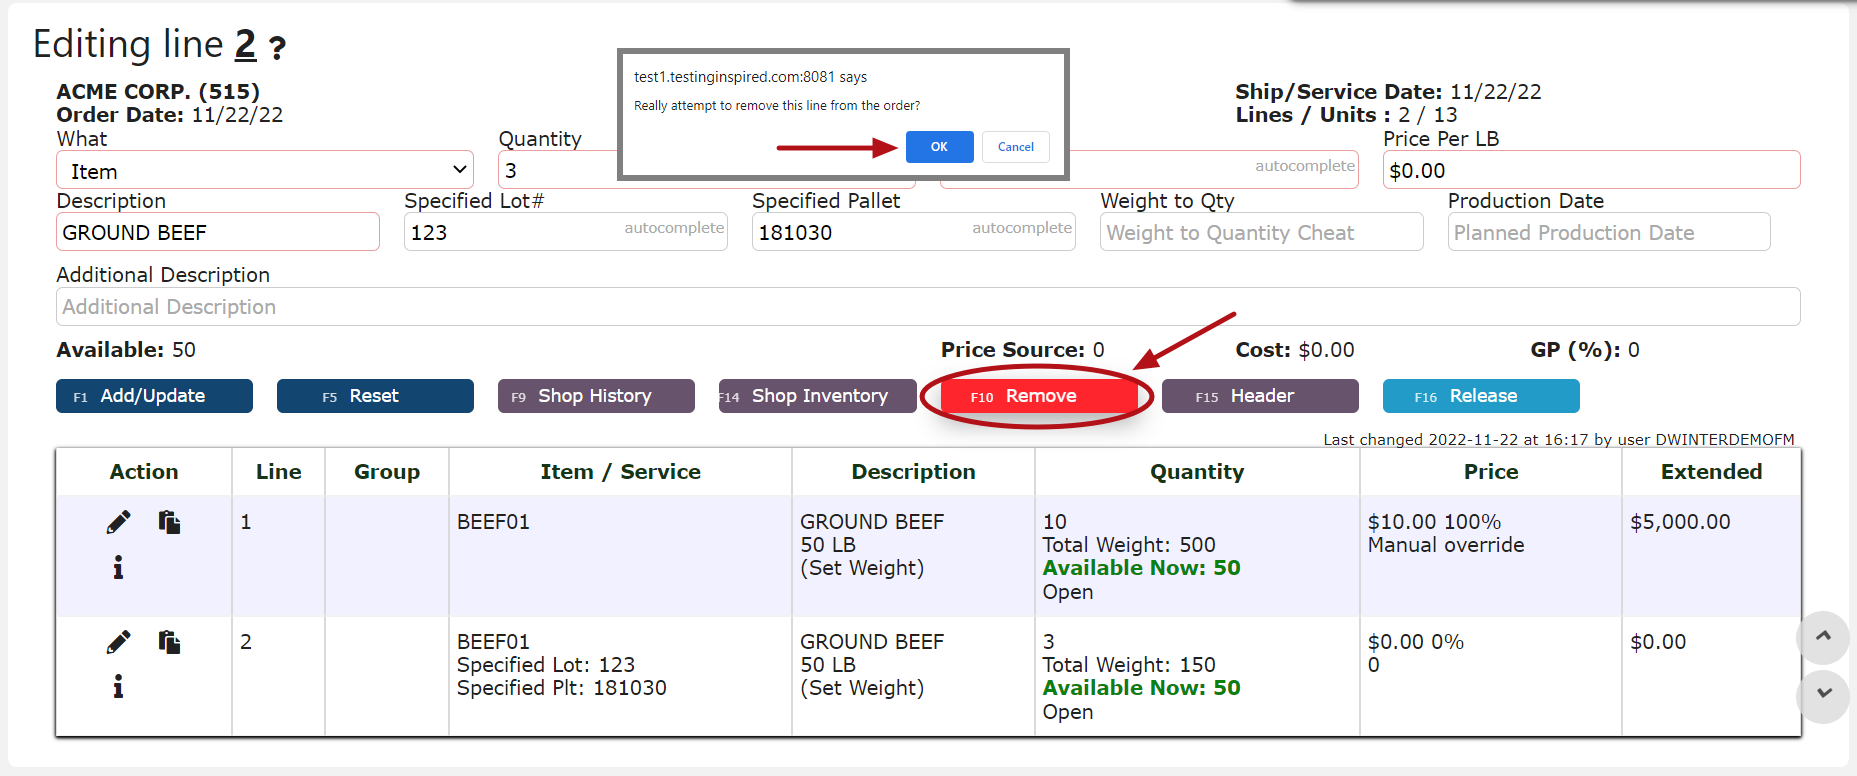
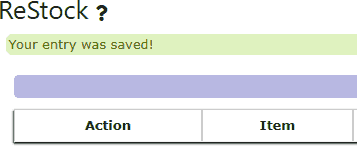
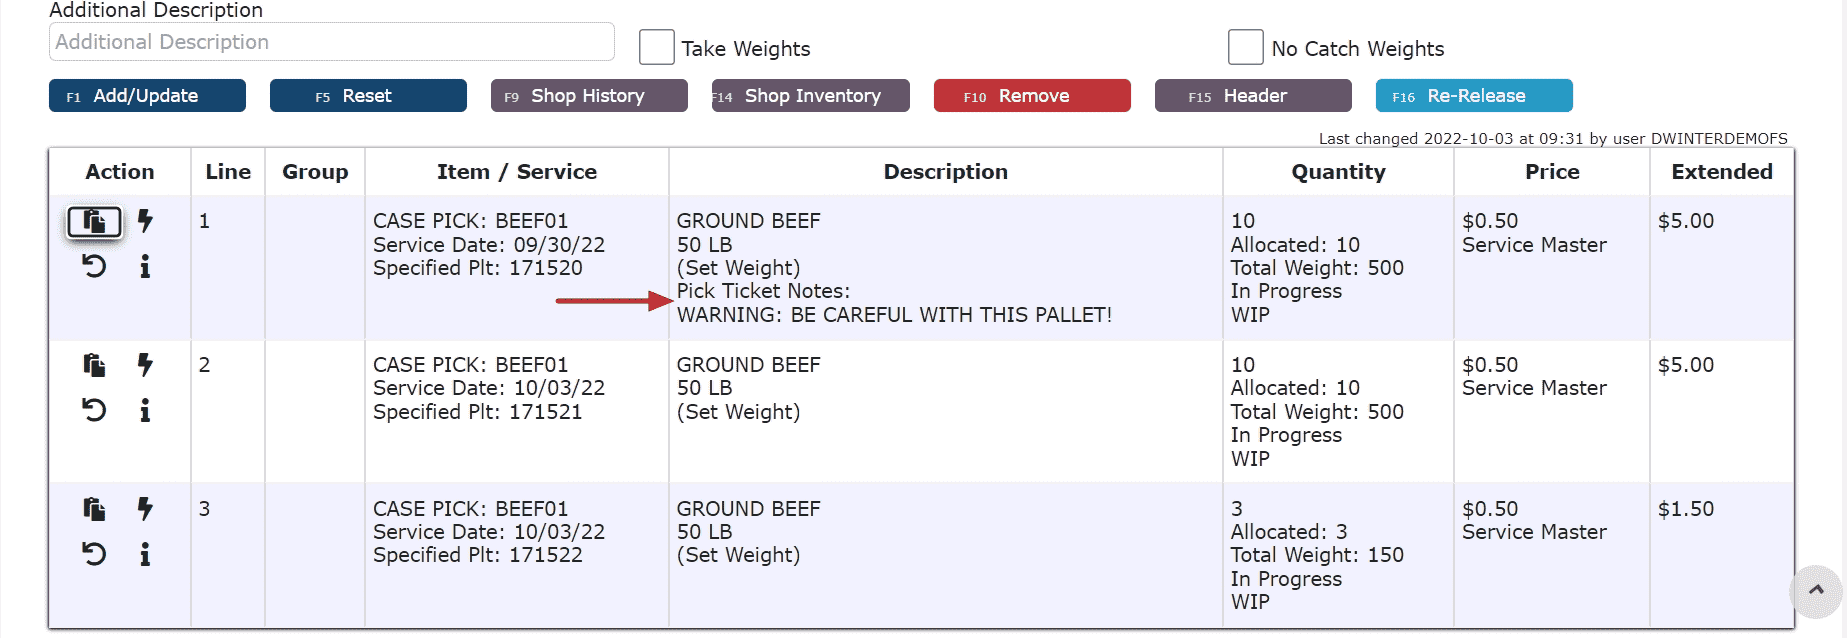
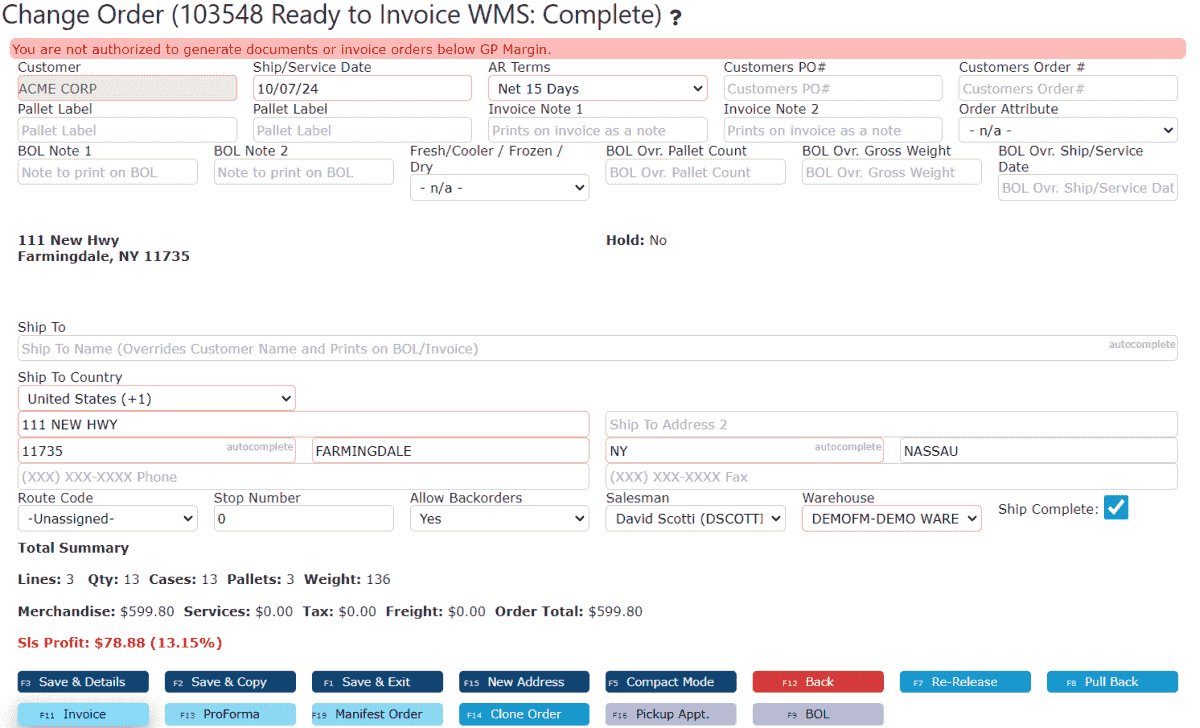
Verifying the Pick
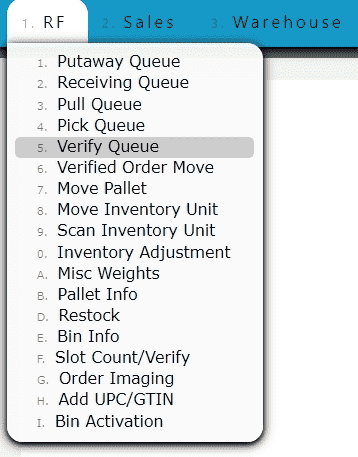
• After picking, proceed to the Verify step to confirm the accuracy of the picked items by going to RF → Verify Queue.
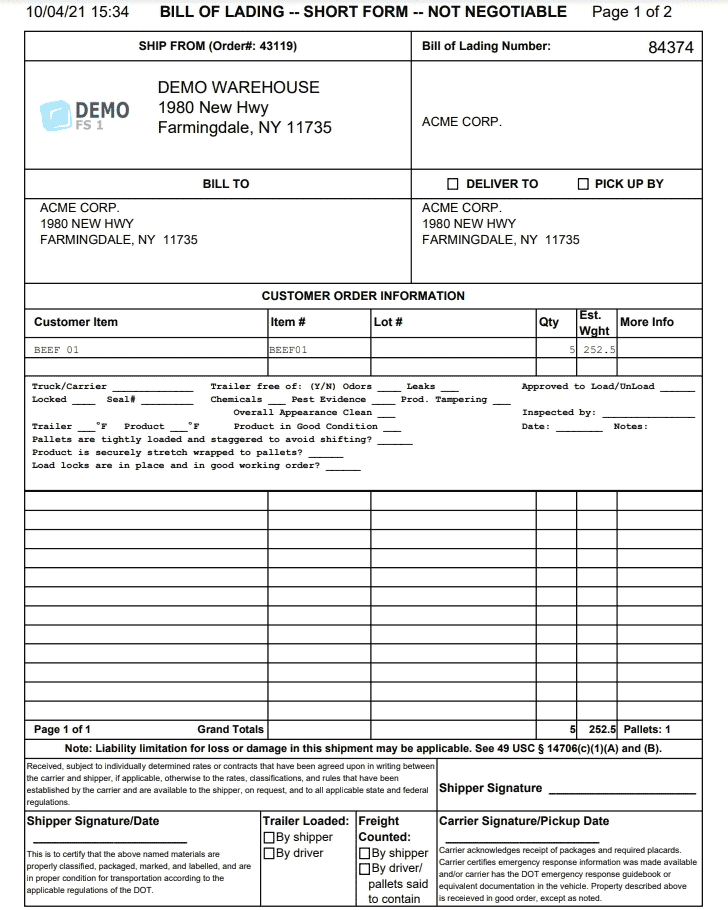
• Verification ensures that quantities, weights (if applicable), and pallet details match the order requirements.
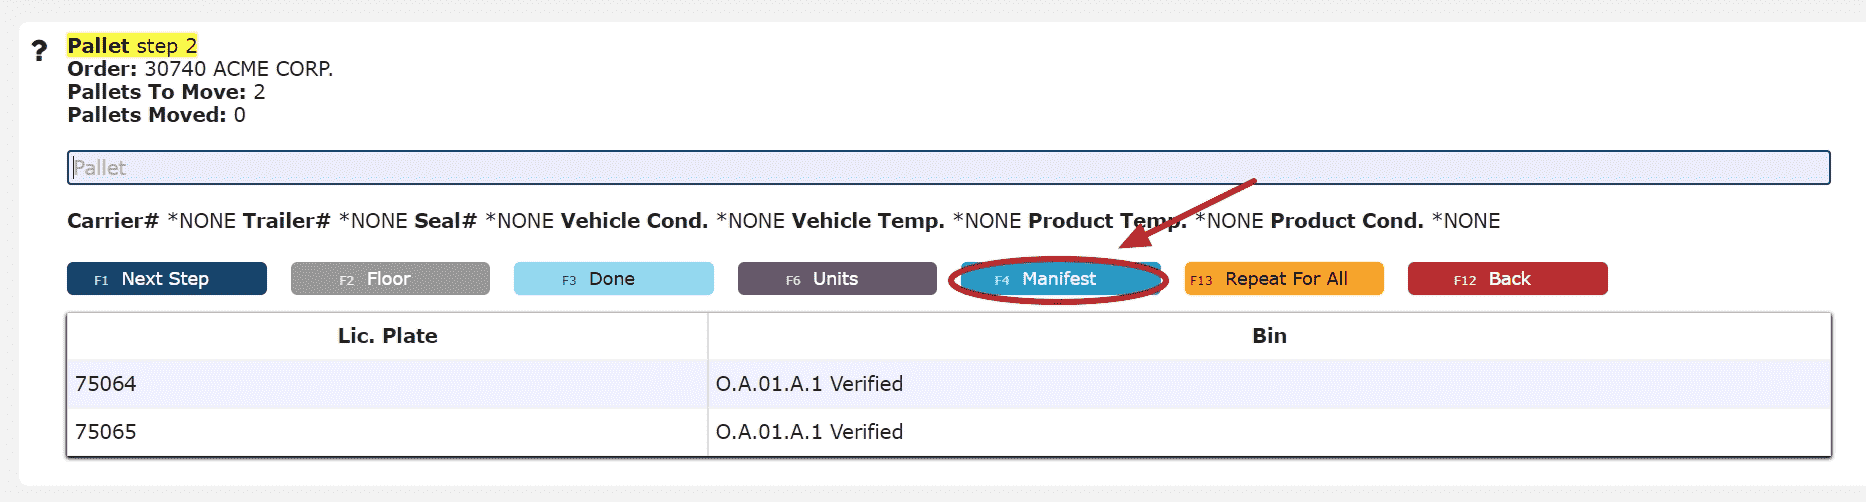
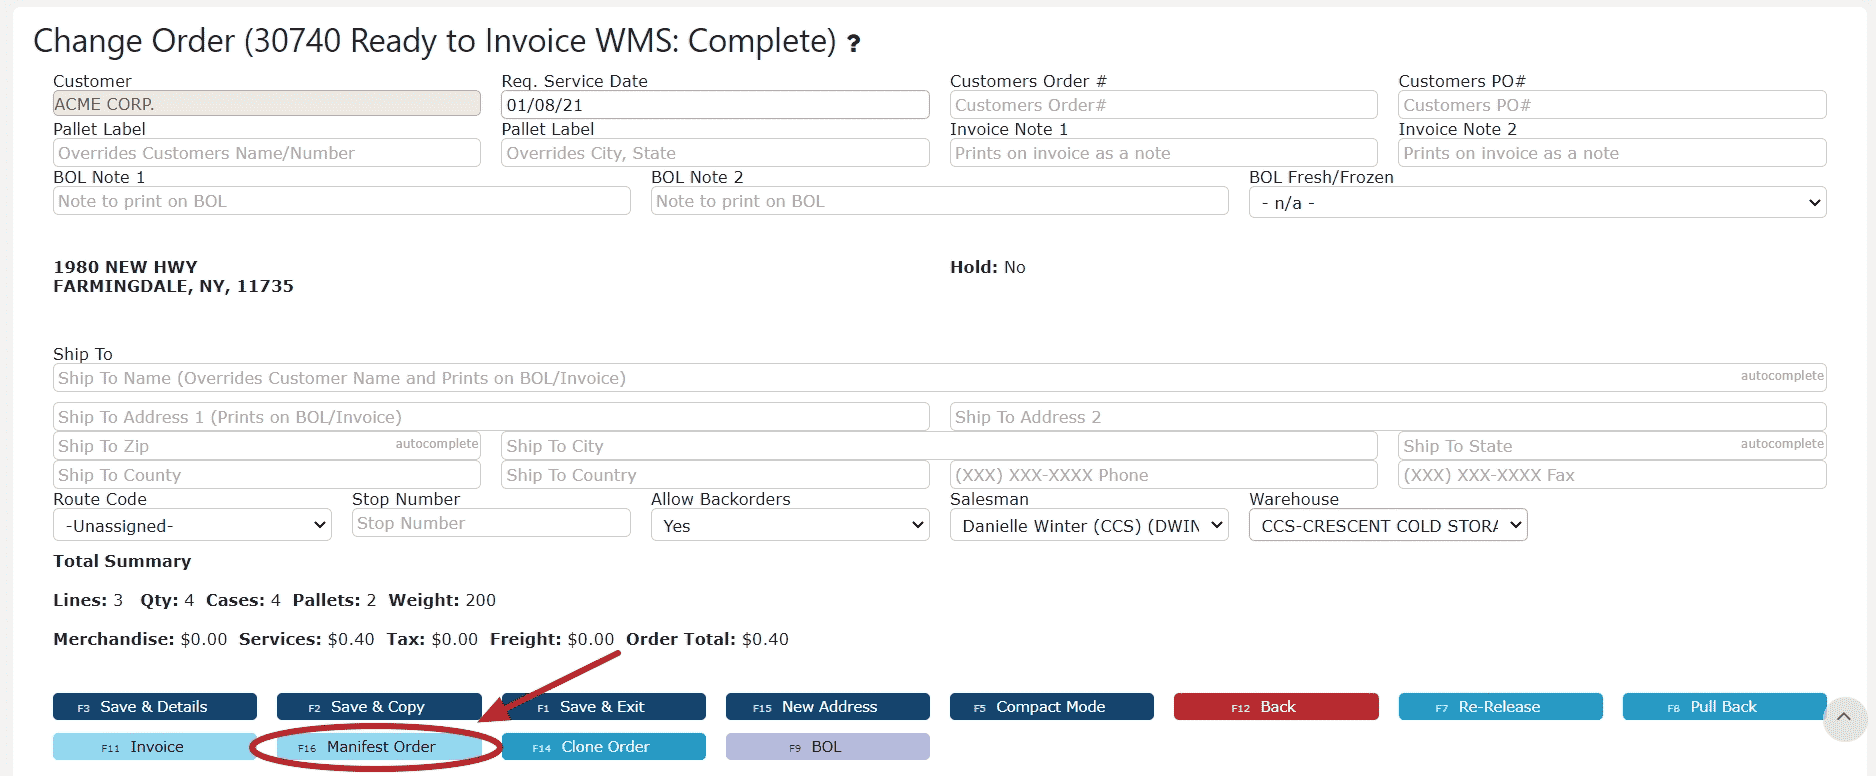
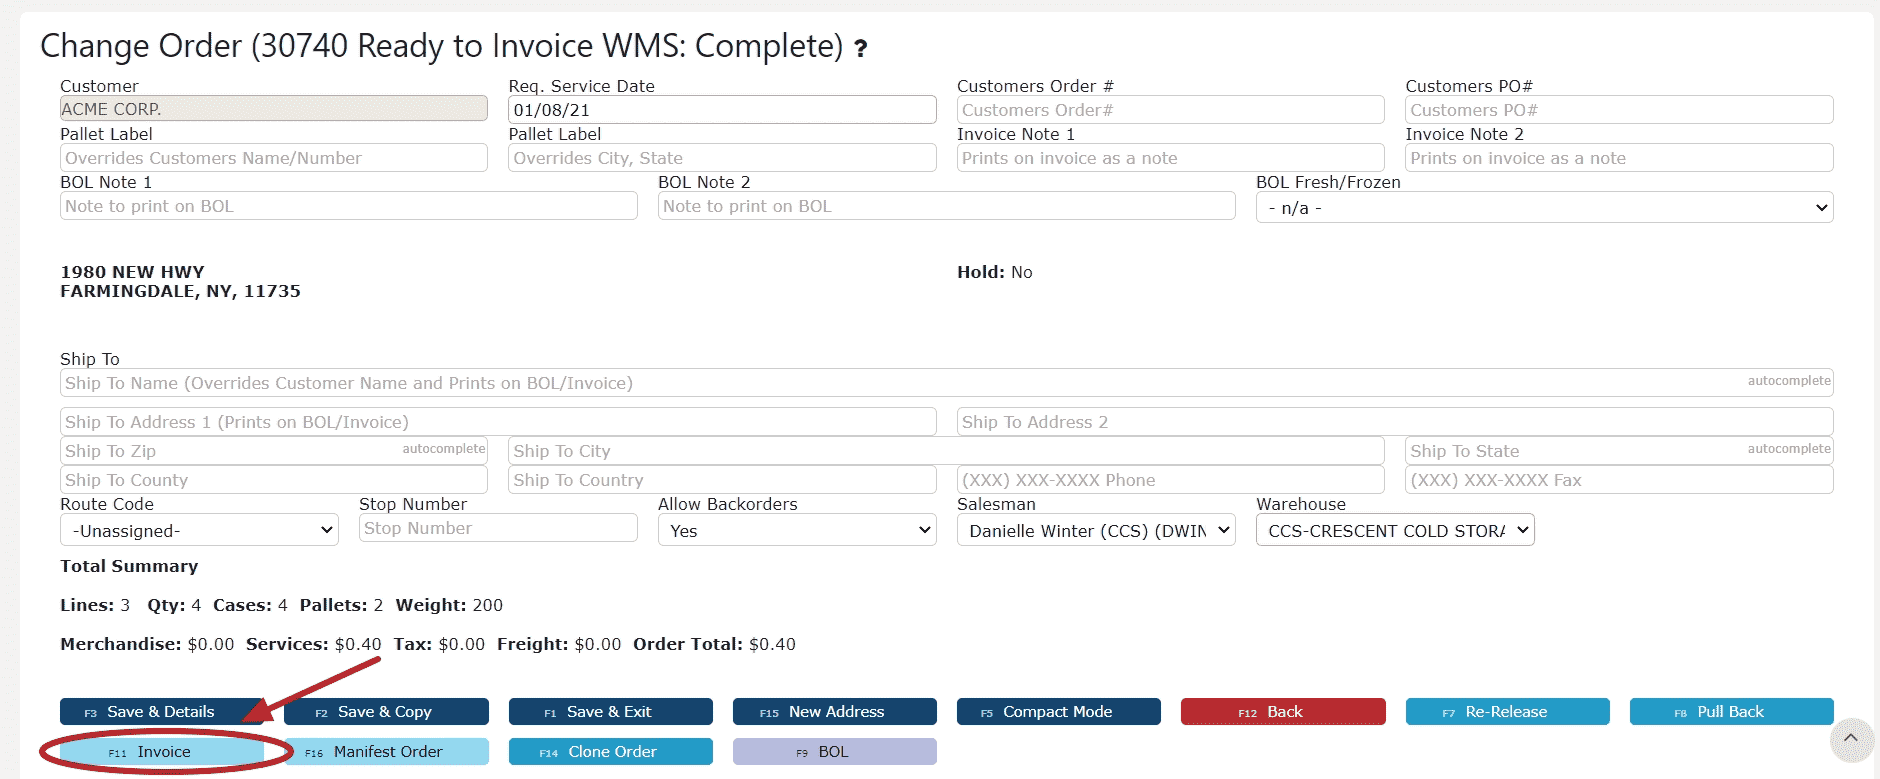
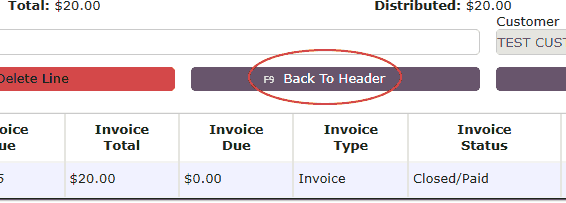
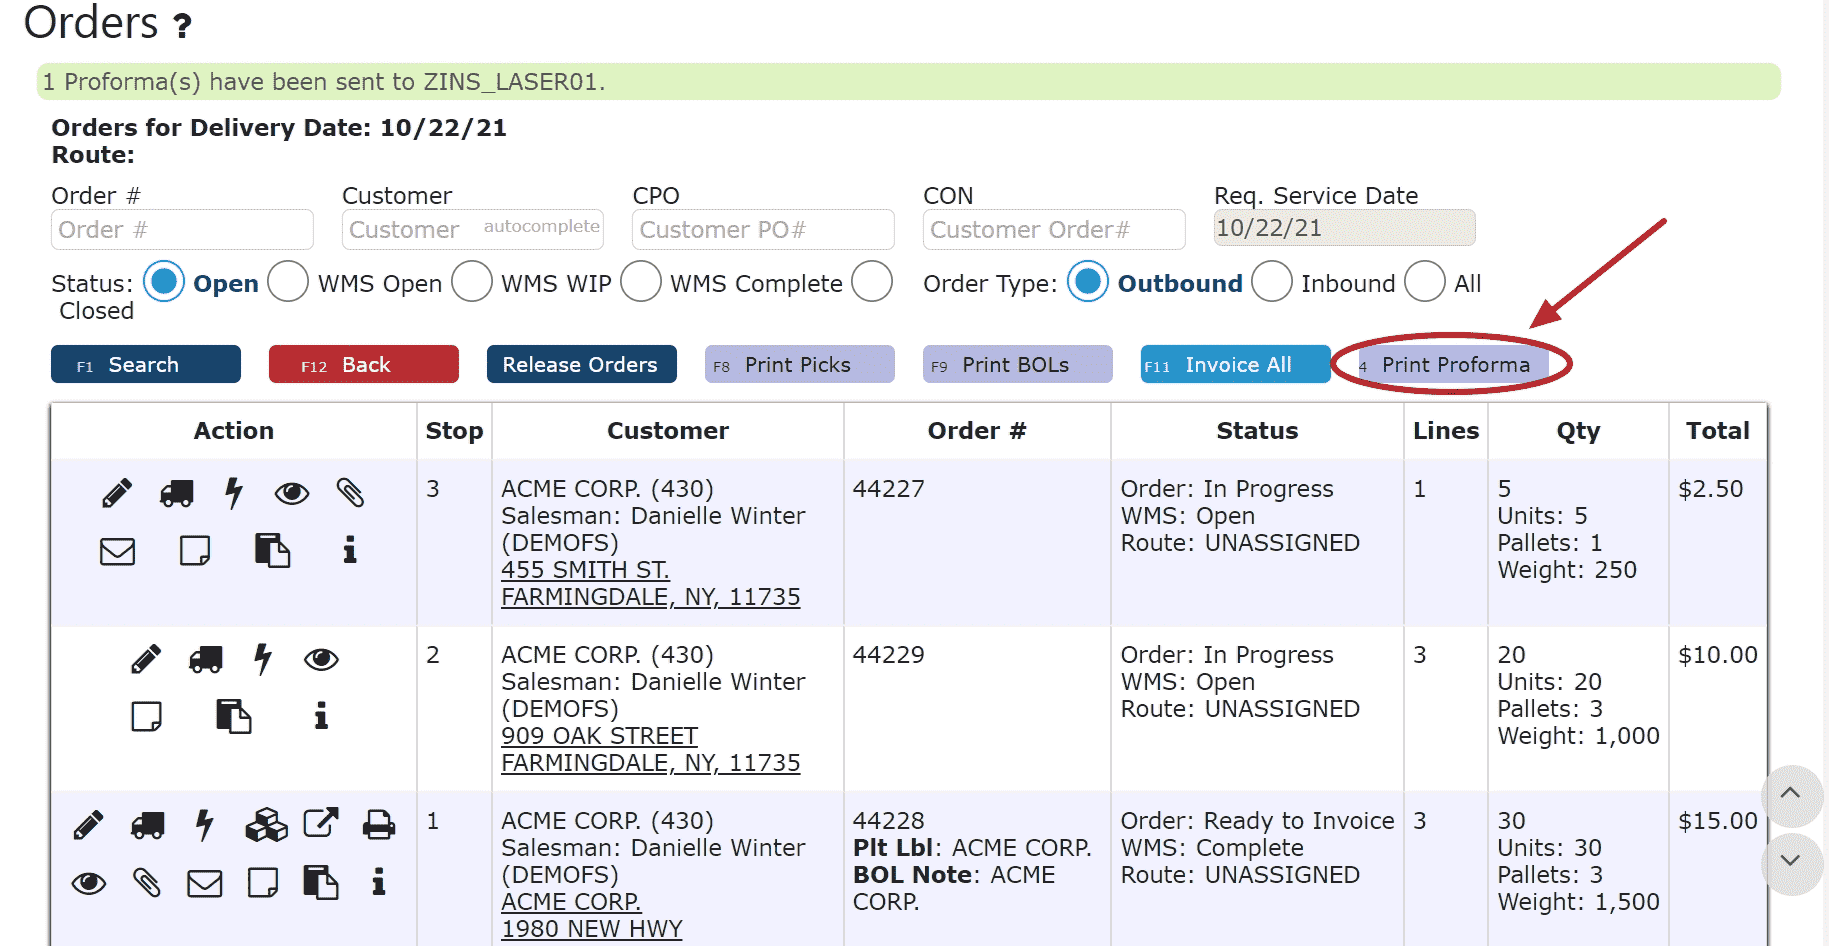
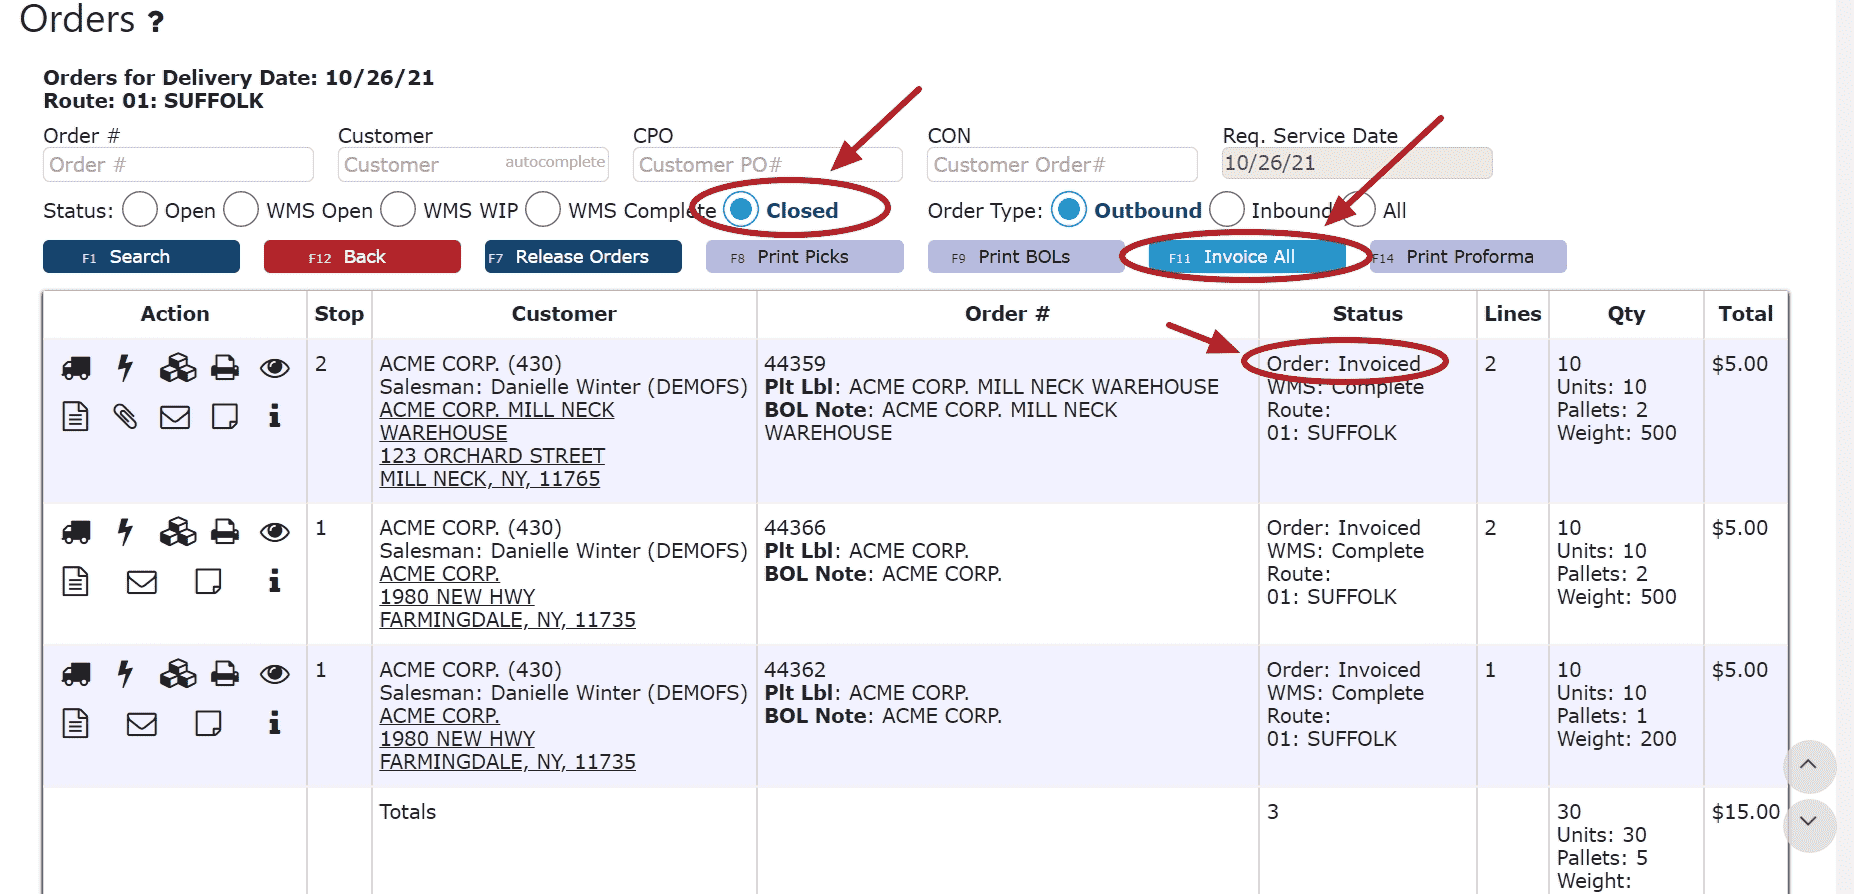
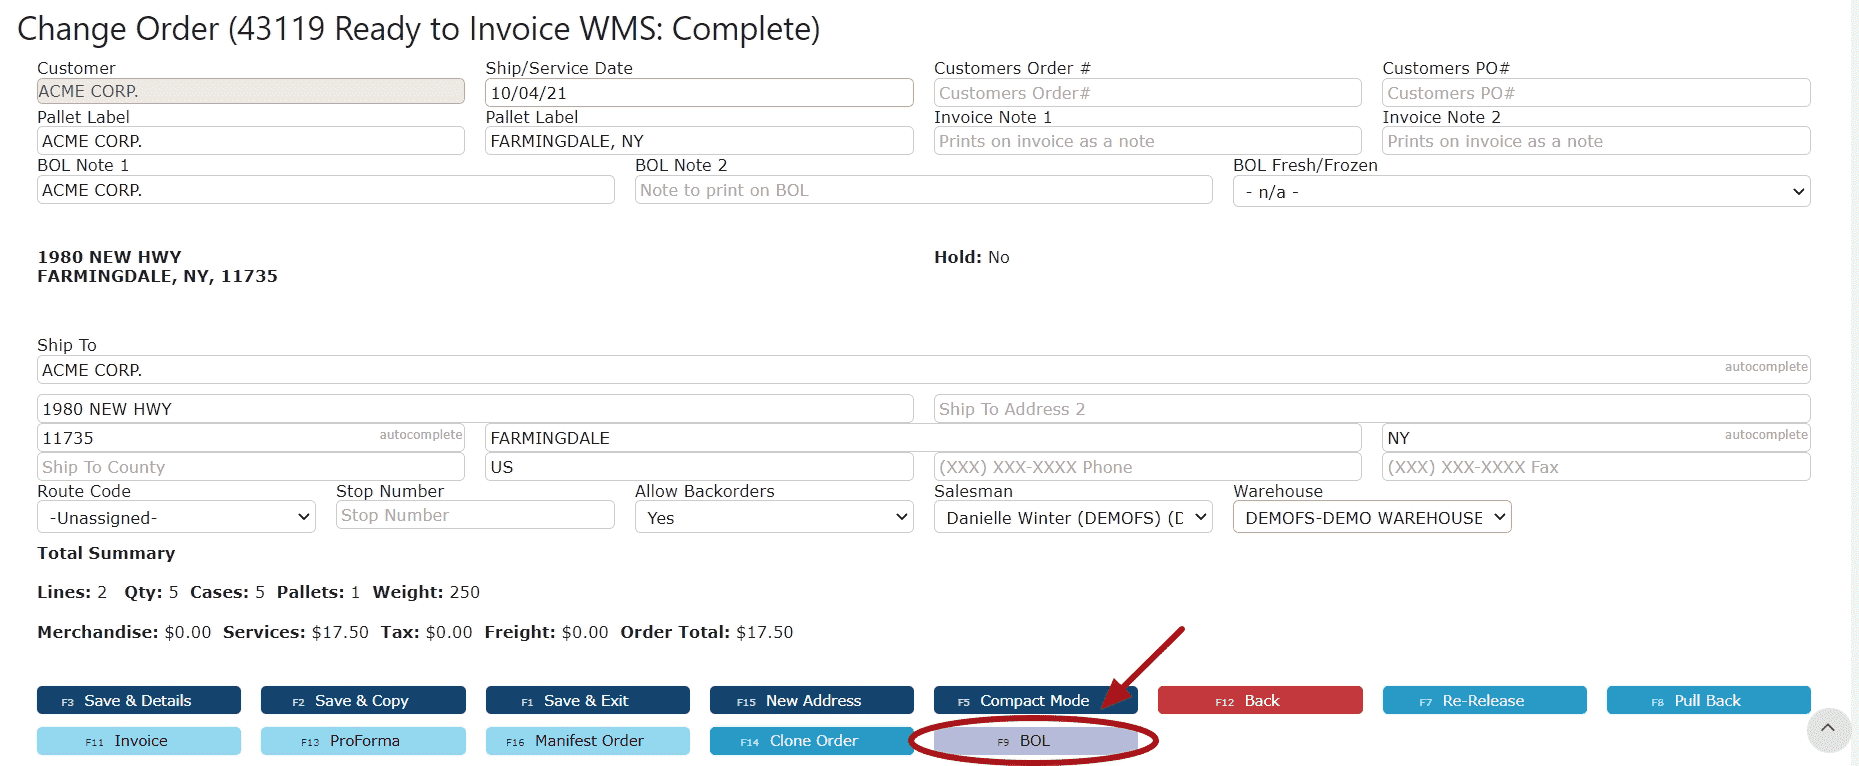
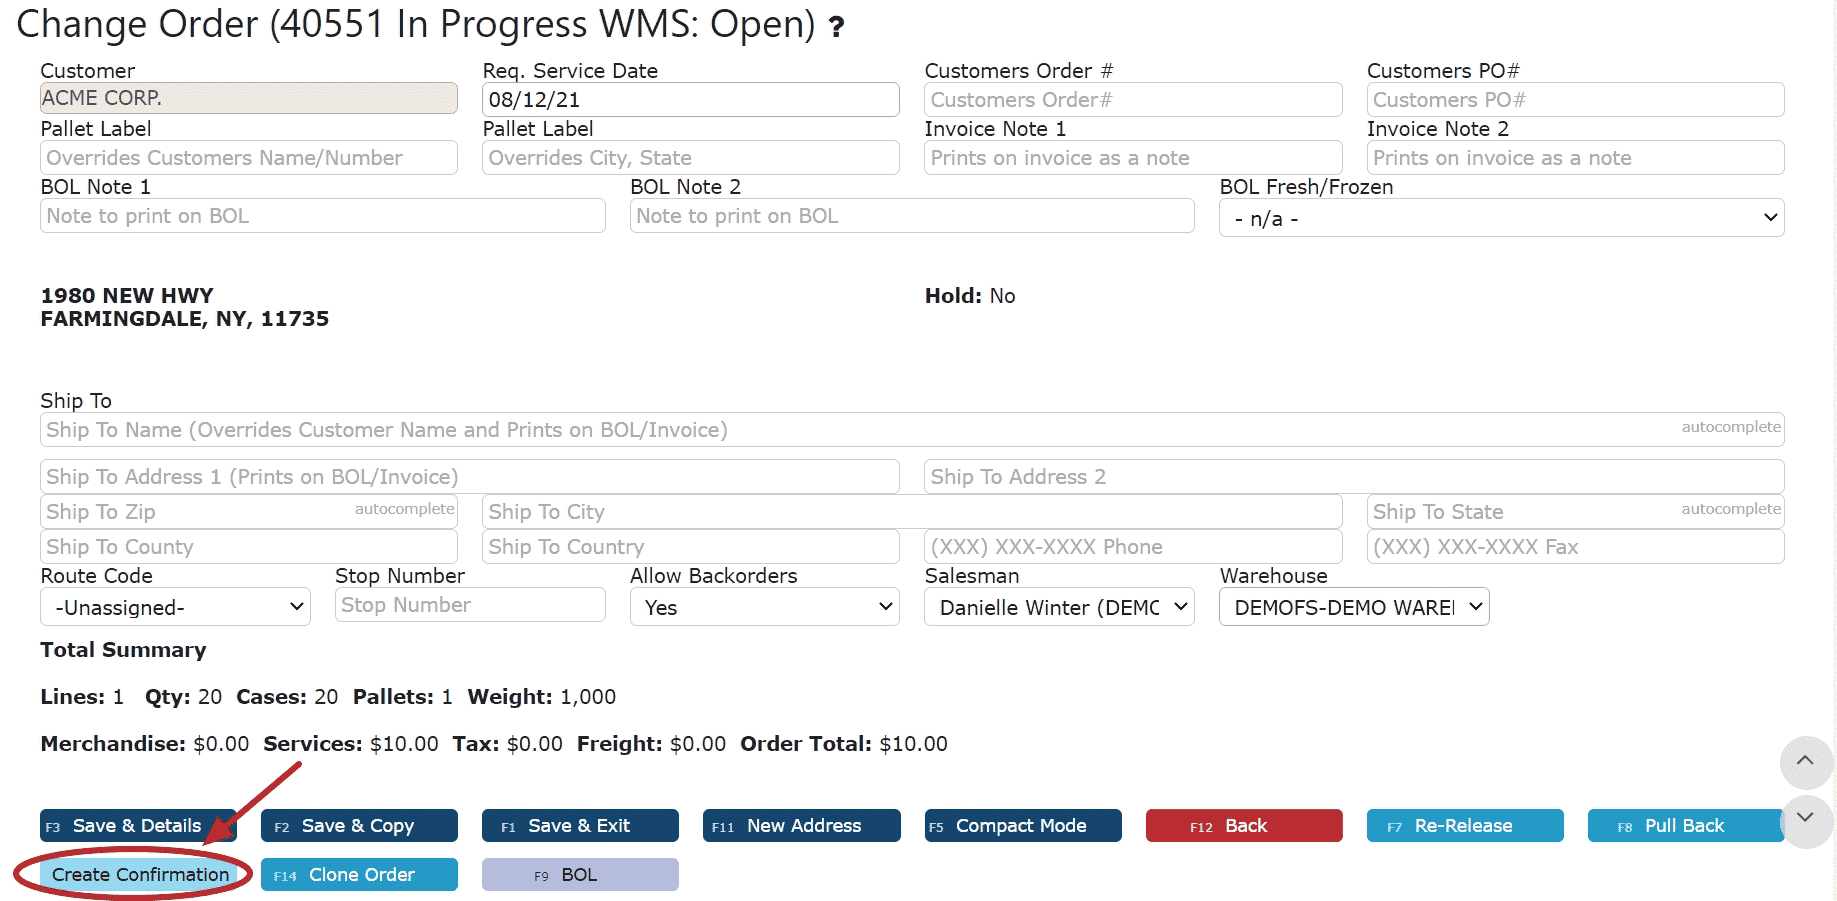
• Once verified, the order is ready to proceed to manifesting, or invoicing, depending on your workflow.
Additional Notes
• Orders must be fully verified before they can be manifested or invoiced.
• Picking rules, bin assignments, and FIFO logic are controlled by your warehouse configuration in Inspired ERP.
• Any discrepancies found during verification should be corrected before moving the order forward.


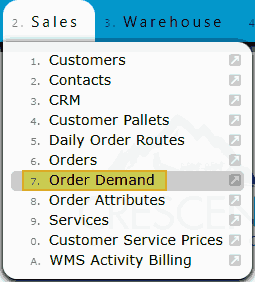
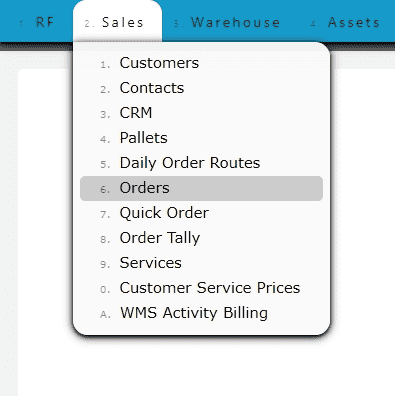
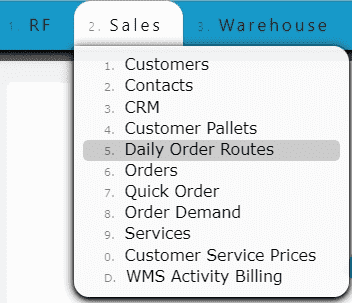
Accessing Order Demand
• Navigate to Sales → Order Demand from the main menu to open the screen.
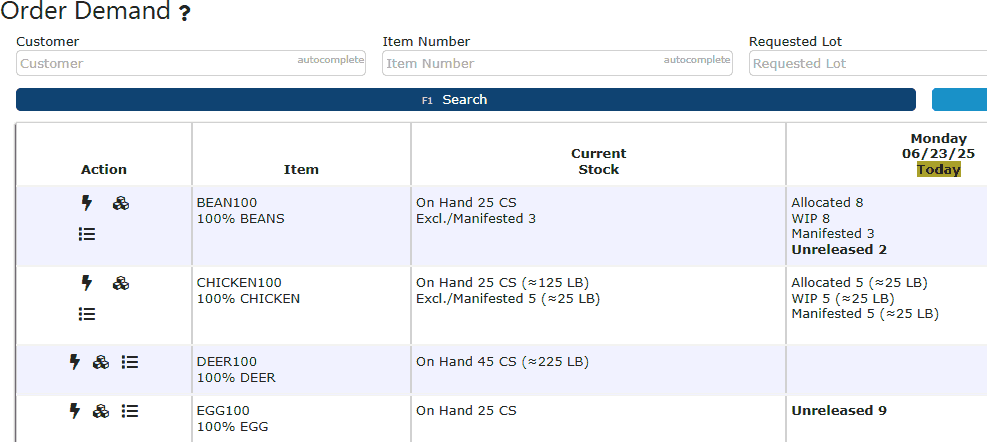
• The page will display in a new view with filter options at the top for refining results.
Filtering Options
• General View – Displays all current sales order demand across all customers and items.
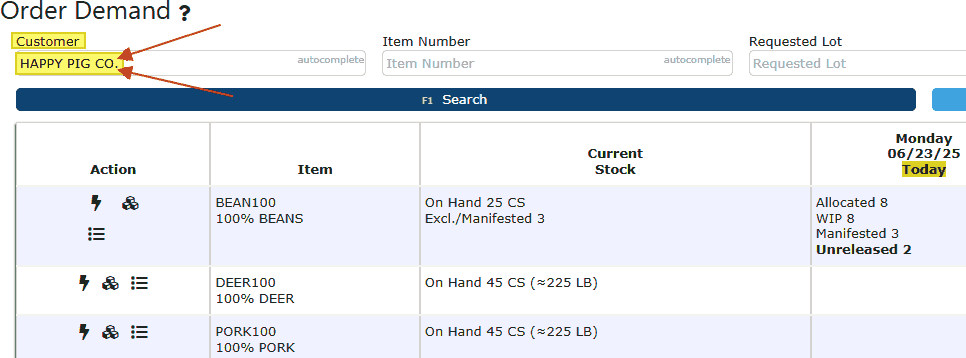
• By Customer – Shows only orders tied to a specific customer.
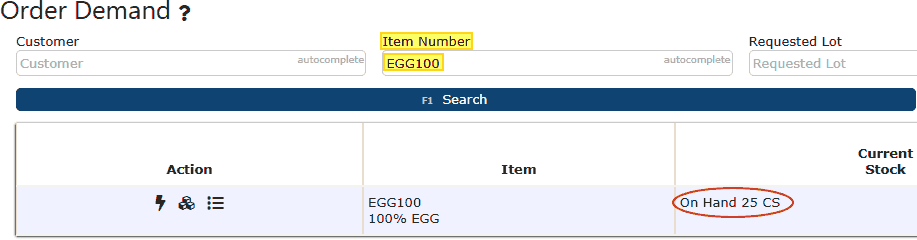
• By Item – Displays demand for a single item code.
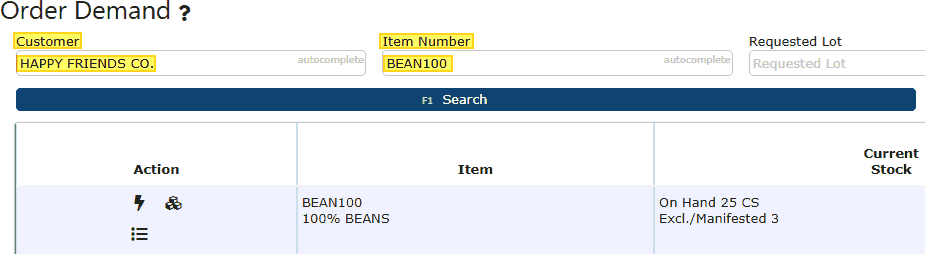
• By Customer & Item – Combines both filters to show demand for a specific product under a specific customer.
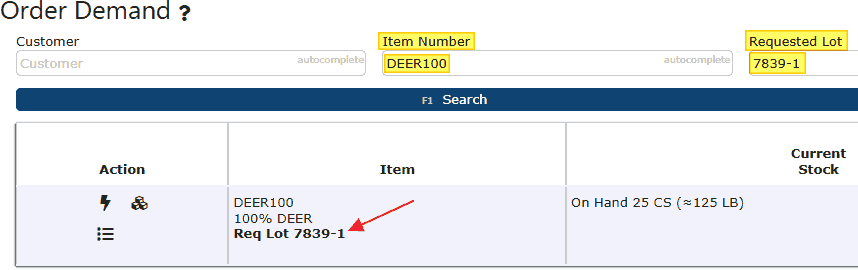
• By Item Number & Lot Number – Provides the most targeted view by specifying both an item and a requested lot number.
Key Uses
• Demand Planning – Spot future dates when stock may be insufficient to meet demand.
• Production Scheduling – Align manufacturing runs with projected inventory needs.
• Purchasing – Initiate replenishment before stock dips below required levels.
• Customer Service – Confirm availability for upcoming customer orders.
• What-If Analysis – Evaluate how large or unexpected orders will affect future stock.
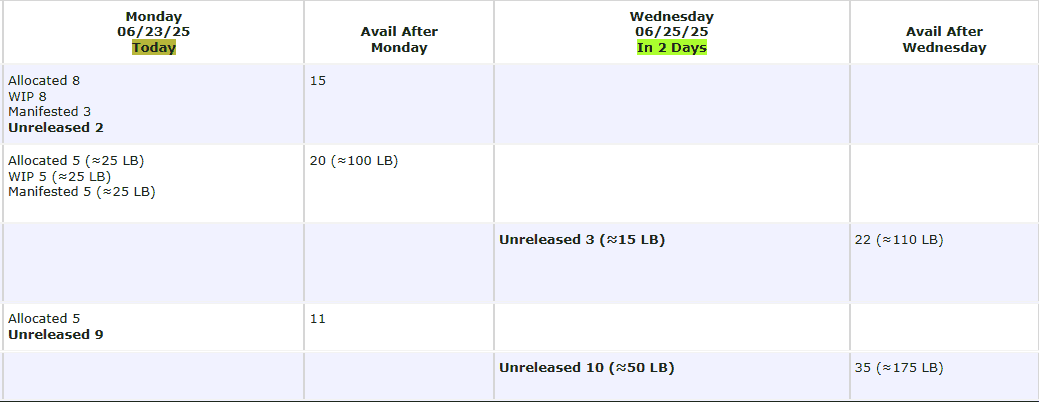
How It Helps
Rather than showing inventory as a static number, the Order Demand screen transforms it into a rolling projection. This allows planners and managers to anticipate shortages, balance supply with demand, and avoid last-minute issues when fulfilling customer orders.