Emails

Overview

  • Emails Overview

    Emails Overview

    Our ERP includes a system-wide email framework that supports customer communication, vendor correspondence, financial document delivery, and operational workflow notifications. Email behavior is driven primarily by contact records, system preferences, and module-specific options that determine how documents are sent, who receives them, and which formats are used. Once configured, users can email documents directly from transaction screens such as Sales Orders, Invoices, Purchase Orders, and WMS-related documents including BOLs and confirmations.

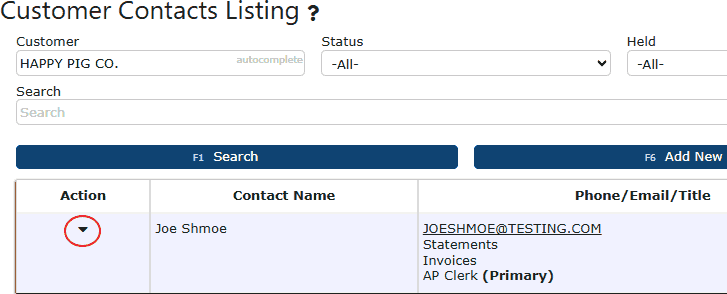
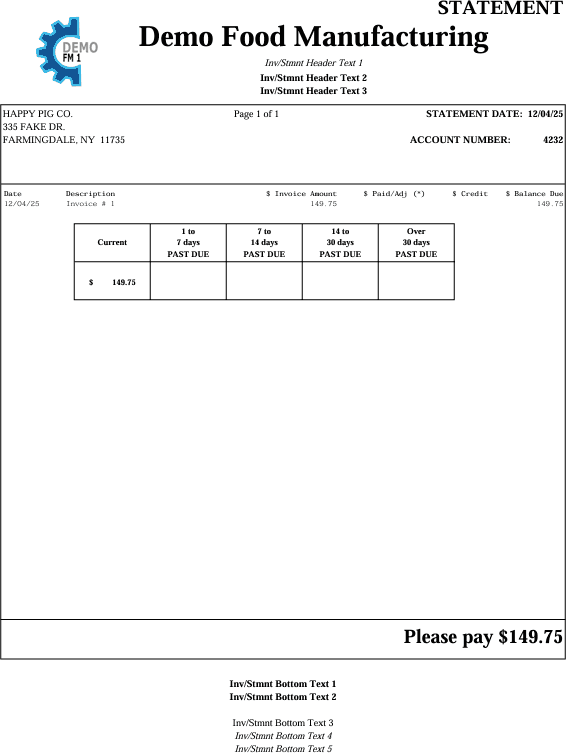
    Customer and vendor contacts store the email addresses and delivery preferences the system uses when sending invoices, statements, POs, reports, and other system-generated communications. These settings ensure that each document reaches the correct recipient without manual intervention. System-level email preferences—such as SMTP configuration, sender defaults, PDF formatting, bulk invoice settings, and auto-fill options—provide consistent delivery rules across all modules.

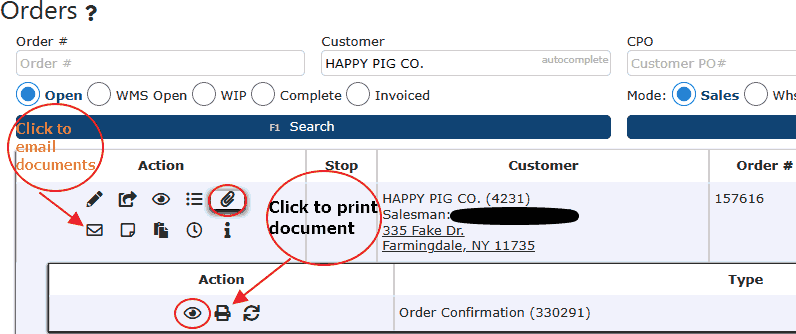
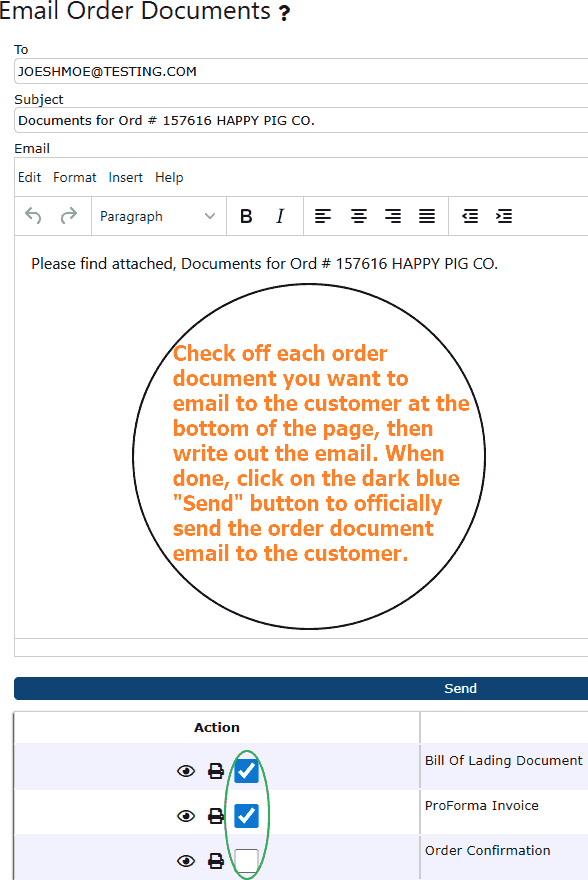
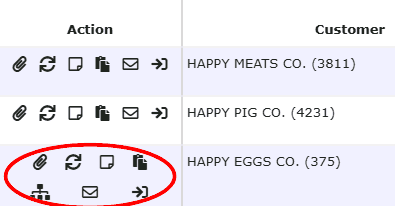
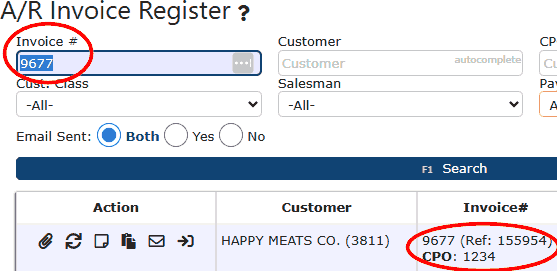
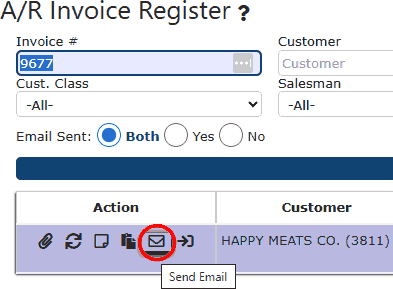
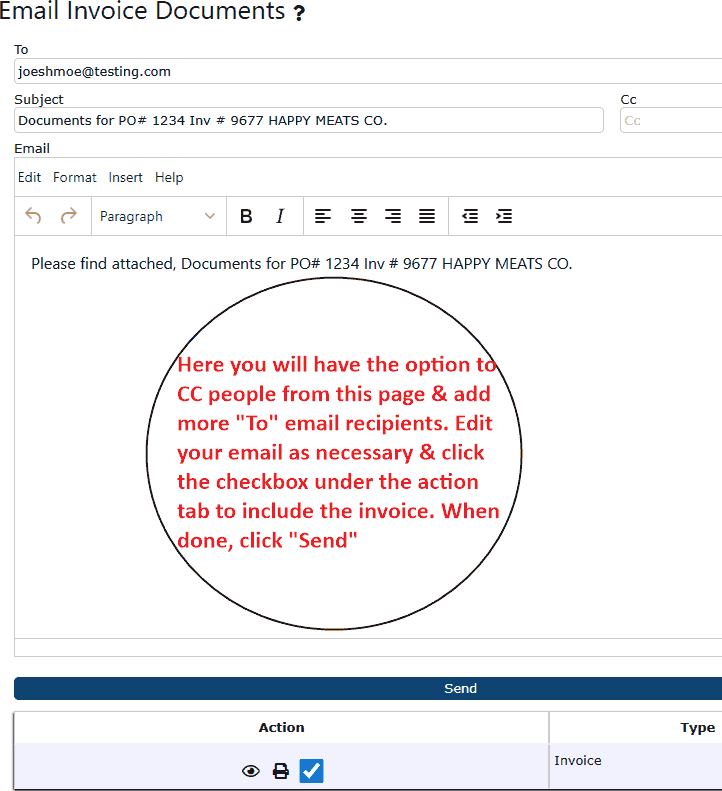
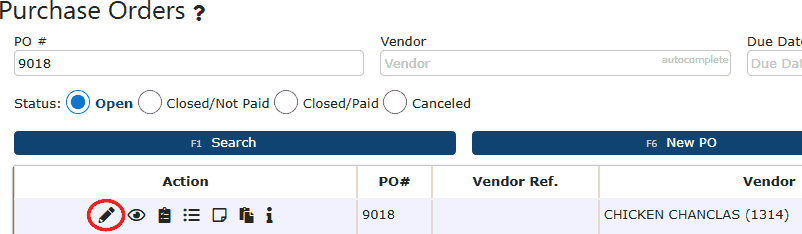
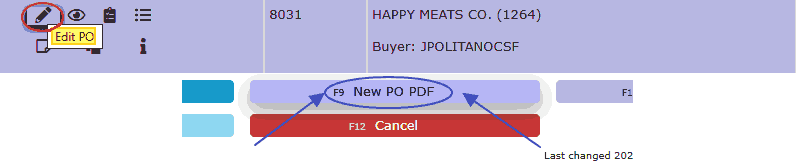
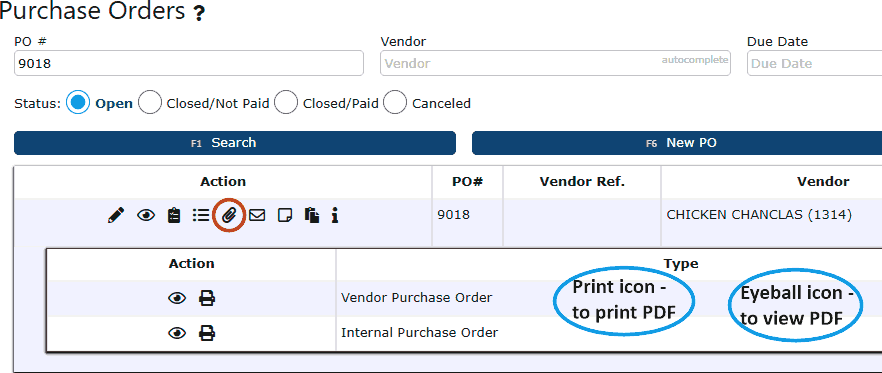
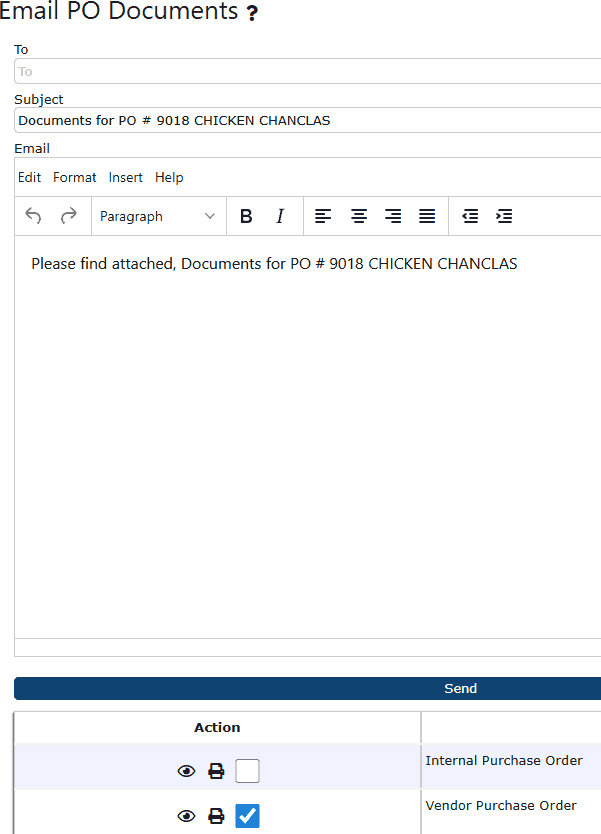
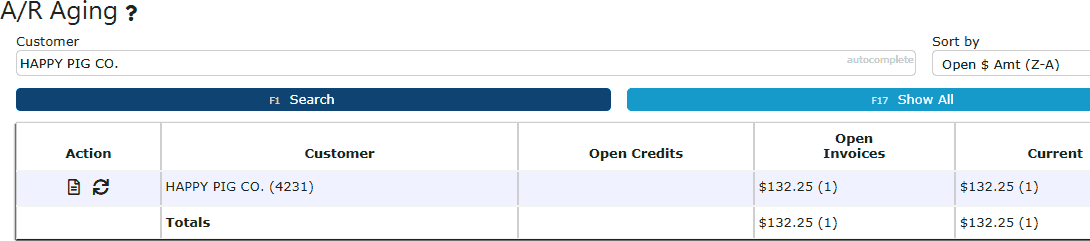
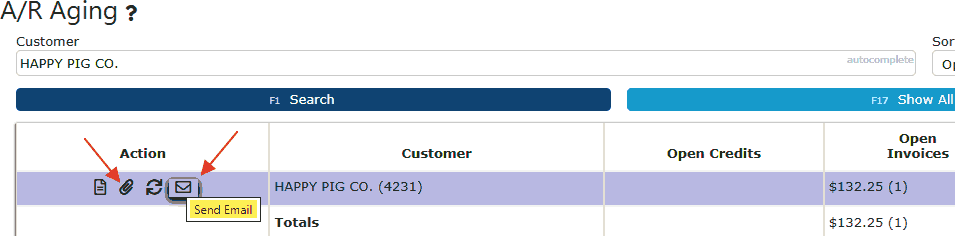
    Emailing is available from various Action menus throughout the platform, allowing users to generate and send documents on demand while automatically attaching the correct PDFs and populating recipients based on contact setup. In addition, many AR and Sales billing workflows support bulk emailing for high-volume operations, ensuring efficient delivery of invoices, statements, and other financial documents.

    Calendar events can also trigger automated email reminders, enabling users to schedule notifications for internal teams or operational activities. Together, these tools create a unified communication process that supports accuracy, compliance, and streamlined workflow management across the entire system.

Enabling Automatic Emailing

  • Enabling Automatic Emailing

    Automatic Emailing Key Information

    Automatic Emailing allows the system to automatically distribute invoices, statements, bulk invoices, purchase orders, NACHA files, and other documents based on the specific options enabled on each customer or vendor contact. These settings determine when the system should email documents, who should receive them, and whether AutoFill rules apply during bulk or automated processes.

    Customer Contact Email Options
    Go to Sales → Contacts to set up automated emailing for a specific customer contact.

    On the Contacts page, simply look up the customer to narrow down your results, then click the triangle icon under the action tab & click manage to begin editing the enabling of automatic emailing.


    You will now be on the Change Contact screen, where the automatic emailing options can be turned on or off.

    Customer Contact-Level Options
    Statements Via Email – Yes/No
    Enables automatic emailing of AR statements to this contact.

    Invoices Via Email – Yes/No
    Sends individual invoices automatically to this contact when they are posted.

    Bulk Invoices Via Email – Yes/No
    Determines if this contact receives invoices during Bulk Invoice Runs (manual or automated).

    Statement in Bulk Email – Yes/No
    Includes this contact in automated/ bulk statement cycles.

    Auto Fill (Statements) – Yes/No
    When sending statements, automatically adds this contact as a CC or recipient based on AutoFill rules.

    Auto Fill (Sales) – Yes/No
    Automatically includes this contact on sales document emails generated from the system (e.g., confirmations, order updates), depending on AutoFill behavior.

    Vendor Level Email Options
    POs Via Email – Yes/No
    Automatically emails purchase orders to this vendor contact when the PO is released or printed.

    NACHA Via Email – Yes/No
    Sends NACHA remittance files (ACH payment details) to this vendor contact during AP payment batches.

    Company Level Email Options
    Automate Bulk Invoices DOTW (0=Mon … 6=Sun)
    Sets the day of the week the system will automatically generate and email bulk invoices. Example: 0 = Monday, 6 = Sunday.

    • Autofill Email Defaults - Determines which email address is automatically added to outgoing emails when contacts have Auto Fill enabled.

    AutoFill (Statements) CC Default
    Default CC email added when Auto Fill (Statements) is enabled on a customer contact.

    AutoFill (Sales) CC Default
    Default CC email added when Auto Fill (Sales) is enabled on a customer contact.

    Summary
    Automatic Emailing centralizes and streamlines how documents are delivered across your organization by combining customer contact settings, vendor contact options, and company-level automation rules. Customer and vendor contacts determine who receives invoices, statements, purchase orders, and NACHA files, while company preferences define when bulk emails are generated, as well as the default CC rules used for AutoFill behavior. Together, these settings ensure that transactional documents are emailed to the correct recipients automatically—reducing manual work, improving communication accuracy, and supporting consistent daily, weekly, or scheduled billing workflows.

Customer Order Emails

  • Customer Order Emails

    Customer Order Emails Overview

    Customer Order Emails allow users to send order documents—such as Order Confirmations, BOLs, ProForma invoices, and AR Statements—directly to customers. Email options become available once the related document is generated on the order, and recipients are controlled through each customer’s contact settings. Users can send emails manually through the Email icon on Sales Orders, while Invoices are typically emailed automatically when posted, depending on contact configuration.

    Where Customer Order Emails Are Accessed
    You can find customer documents that have already been generated by going to Sales → Orders, finding the order, and then clicking on the email icon under the action tab to view and send the documents to the customer. Alternatively, you can click on the paperclip icon to just see which documents have been generated and then click the eyeball to view the newly generated PDF.


    Customer Order Email Screen
    When the email icon is clicked, users can:

    • Add recipients

    • Review attached order documents

    • Edit the subject and message

    • Send the email immediately


    Customer Contact Requirements
    Customer Contacts (Sales → Contacts → Manage Contact) determine who receives what.


    Key fields include:

    • Invoices Via Email

    • Bulk Invoices Via Email

    • Statements Via Email

    • Statement in Bulk Email

    • Auto Fill (Sales)

    • Auto Fill (Statements)

    If no contacts are enabled, users can manually enter emails on the send screen.

AR Invoice Emails

  • AR Invoice Emails

    AR Invoice Emails

    The A/R Invoice Register (Reports → Accounts Receivable → A/R Invoice Register) allows users to review invoice activity, access invoice documents, and—most importantly—send invoice emails directly from the system. This article focuses specifically on how invoice emails work, where to find them, and what to expect when sending them.

    The A/R Invoice Register displays a searchable list of invoices, including invoice numbers, orders, amounts, status, and whether an email has already been sent. On the far left of each invoice row is the Action column, which contains several icons. These icons allow quick access to invoice-related functions:


    Action Icons
    Paper Clip — Invoice Documents
    Opens the invoice documents panel to view related files or generated forms.

    Circular Arrow — New Invoice PDF
    Generates and displays a fresh PDF of the invoice.

    • Single Paper — Add Attachments
    Allows uploading new attachments for this specific invoice.

    • Two Papers — Invoice Notes
    Opens a notes panel for internal invoice-specific notes.

    • Email Icon — Send Email
    Sends the invoice email to the customer.

    • Branching Squares — View Payments
    Displays payments applied to the invoice (only appears if payments exist).

    • Door Arrow — View Sales Order
    Opens the sales order associated with the invoice.

    Sending Invoice Emails

    The Email icon is used to generate and send invoice emails from the A/R Invoice Register. It is located in the Action column on each invoice row.

    1. Locate the invoice you want to email.


    2. Click the Email icon in the Action column.


    3. A new page will load showing:

    • The customer email(s) on file in the "To" email field

    • Email subject and body (pre-filled based on your system template)

    • Order documents to pick & attach to the email


    4. Review the content and click Send.

    Invoice Email Behavior & Rules
    What gets attached to the invoice email?
    The invoice chosen gets attached to the invoice email, & is optional to keep or remove as an attached email file.

    • Who receives the email?
    Any customer contacts with Statements via Email & Invoices via Emails set to Yes will receive the email by default.

    Does the email icon appear on all invoices?
    Yes, unless your permissions restrict email sending.

    Using Filters When Emailing Multiple Invoices
    While emailing is done one invoice at a time, the filter tools help you easily locate:

    • All invoices with Email Sent = No

    • Past-due invoices

    • Open invoices by customer

    • Specific aging buckets

    This makes it easier to identify which invoices still need to be emailed.

    Best Practices
    • Always confirm the customer’s AR email address before sending.

    • Use filters to collect all invoices with Email Sent = No to avoid missing any.

    • Regenerate the PDF if recent changes were made to the invoice.

    • Add necessary attachments before sending if required.

    • Keep internal notes updated if the customer communicates email receipt issues.

Purchase Order Emails

  • Purchase Order Emails

    Purchase Order Emails Overview

    Purchase Order (PO) Emails in Inspired ERP allow users to easily generate, attach, and send purchase order documentation directly to vendor contacts. Unlike Accounts Receivable emails, Purchase Order emails are driven by vendor contact settings and document generation actions within the Purchase Order itself. This streamlined workflow ensures vendors receive accurate, up-to-date purchase order PDFs without manual file handling.

    Purchase Order emails are commonly used to:

    • Send newly created Purchase Orders to vendors

    • Re-send updated PO documents after changes

    • Share Vendor PDFs or PO PDFs with the primary vendor contact

    • Maintain a documented email trail tied directly to each Purchase Order

    Vendor Contacts & Email Setup

    Purchase Order emails rely on Vendor Contact records, not customer AR contacts.

    Generating Purchase Order Documents
    1. Open an existing Purchase Order by clicking the Edit (Pencil) icon.


    2. After reviewing or adding PO line items, use one of the following buttons at the bottom of the screen:

    • New PO PDF – Generates a Purchase Order PDF


    • New Vendor PDF – Generates a Vendor-facing PDF version


    3. Once generated:

    • A paperclip icon appears in the Action column for the Purchase Order, allowing you to view the created document.

    • The document is stored directly on the Purchase Order record.


    Emailing Purchase Order Documents
    1. After generating a PO or Vendor PDF, an Email icon appears in the Action column for the Purchase Order.

    2. Click the Email icon (Email PO Documents).


    3. The Purchase Order email screen opens.


    Purchase Order Email Screen
    • The email layout closely mirrors the Accounts Receivable email screen, providing a familiar experience.

    • Generated PO and Vendor PDFs automatically appear as selectable attachments at the bottom of the screen.

    • Users can:

    - Write a custom email message

    - Check or uncheck attachments

    - Confirm receipts before sending

    4. Click Send to email the Purchase Order documents to the vendor.

    Key Differences from AR Emailing
    • Purchase Order emails are sent to Vendor Contacts, not customers.

    • Email recipients are controlled through Vendor Contact settings.

    • PDFs are generated directly from the Purchase Order using New PO PDF or New Vendor PDF.

    • Emails are tied to document creation rather than invoice actions.

    Best Practices for Purchase Order Emails
    • Always confirm the Primary vendor contact has a valid email address.

    • Regenerate a new PO PDF after making changes to ensure vendors receive the most current version.

    • Use the Email PO Documents screen to add context or instructions in the message body.

    • Rely on the paperclip icon to confirm document history before resending.

AR Statement Emails

  • AR Statement Emails

    AR Statements

    AR Statements can be emailed in two different ways, depending on which type of statement the user wants to send. Both options rely on the customer having valid email settings on their Contact record. Navigate to Accounting → Accounts Receivable → AR Statements.


    Option 1 - Emailing Open Individual Invoices
    Accounting → Accounts Receivable → AR Statements → Paper Icon

    For each customer line, clicking the Paper icon expands a list of the first 100 open invoices. Each invoice row includes:

    • Eyeball - View the Invoice

    • Printer Icon - Print the Document

    • Email Icon - Email the Invoice

    Clicking the Email icon opens the same Customer Email page used for Sales Orders, which was referenced near the beginning of this article.

    Option 2 - Emailing a Full Customer Statement
    Accounting → Accounts Receivable → AR Statements → Arrow-in-a-Circle (New Statement PDF)

    Clicking the Arrow-in-a-circle icon generates a full customer statement PDF showing:

    • All open customer balances

    • Aging details

    • Total amount owed

    Once the system generates this statement, a new Email icon appears directly on the main AR Statements page under the Action column (no need to expand anything).


    Clicking the Email icon allows the user to send the complete customer statement to the contact(s) configured with:

    • Statements Via Email = Yes

    • or Auto Fill (Statements) = Yes

    Users can also manually enter additional email addresses if needed.

    This option is ideal for sending the customer a comprehensive summary of everything they owe.